Another NodeMCU Case
thingiverse
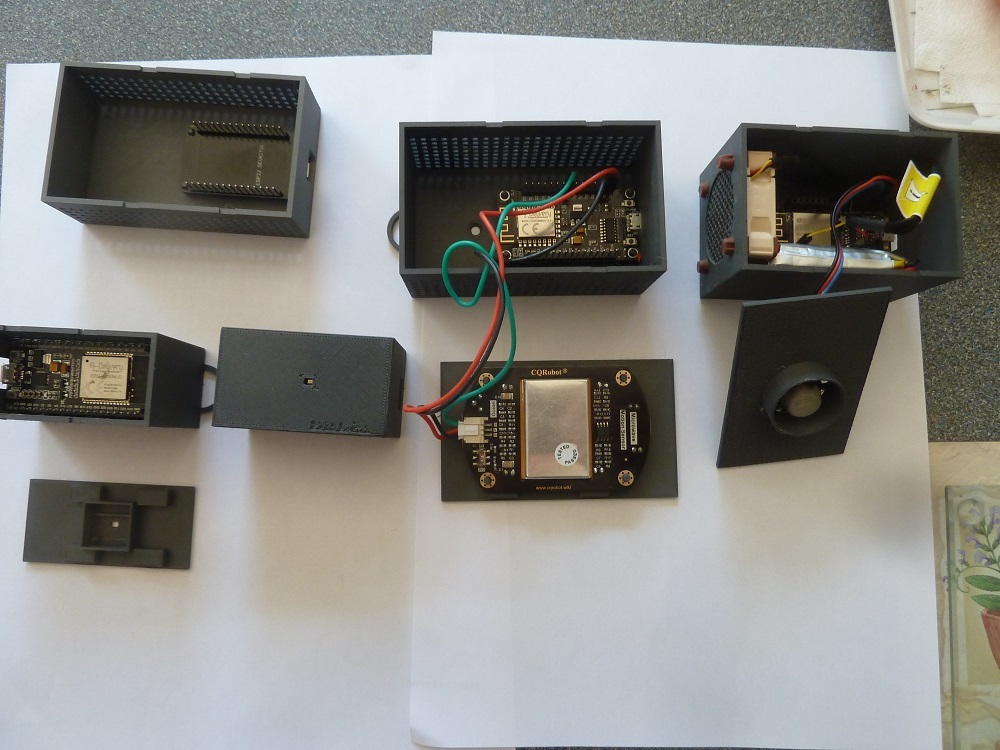
A Modified NodeMCU Case and Lid I present a remixed version of xxxxx’s (unfortunately I have lost the user’s name :-( ) original design which I have remodelled to suit my specific needs for multiple types of ESP boards and peripheral devices. I give full credit for the originating design. I freely admit there isn’t a lot of the original left in my remix but I thank the author. Note that this remixed design is a work in progress and will continue to be added to and refined to suit my needs as they arise. The README Quote from original author for reference:- “## NodeMCU v3 Roomy Case with Ventilated Sensor Bay A spacious case for the NodeMCU v3 made in openSCAD. Has enough room to hold the board, plug in dupont connectors, and route the connectors to a ventilated sensor bay (eg for temperature sensor). #### Note: Not a snug fit! The NodeMCU will likely fall off the supports without tape or the tension of the dupont connectors to hold it in place. I made this case so that I could use NodeMCU v3 boards that I had as part of a wifi MQTT temperature reporting system without desoldering the DuPont connectors. Using DuPont connectors requires a few centimetres of clearance from the PCB, and the temperature sensors need to be a good distance away from the board to avoid being heated, so the case is quite bulky. ## Print instructions - Print the main case without support - Print the lid with supports (not strictly required but the snap fit triangles will droop a bit otherwise) - I printed on an Ender 3 with PLA at 0.28mm 60mm/s 20% infill and found the results acceptable” Outline of design: The aim has been to provide cases for IoT sensors around my home that provide data for my Home Automation system. I started with a PIR sensor using an Adafruit Huzzah ESP8266 board but found I could redesign the case for other sensors. In particular a microwave motion detector (for the cat flap). Many other sensors are to be designed (e.g. light level detection in a poorly illuminated area area) hence the WIP flag. I use OpenSCAD and Prusa slicer for this design. The design has three files; a parameter file (nodeMCU_modified_params.scad); a NodeMCU body file (nodeMCU_modified_body.scad); a NodeMCU lid file (nodeMCU_modified_lid.scad). Use of a parameter file: As is my practice, I have separated commonly used parameters into a parameter file and as far as possible eliminated ‘magic numbers’ in the body and lid files. There is extensive use of ternary logic (since ‘if’-’else’ are not available in the parameter context) to size various parameters and there may be a need to add new sets of values in future as desired. Many options are selected by un-commenting and commenting values. I have not tried the Openscad customiser and I’m not sure if that would simplify parameter selection. Care must be taken to select (or create) a logical set of parameters and I suggest a careful look at the parameter file is essential. The Body file: Although I have used the term NodeMCU thoughout this design, I have become aware of many different types of boards used for IoT devices. I have obtained several different types of board all with different dimensions. As far as possible, I have made this design suitable for the boards I have; I am aware of other boards (such as WemosD1) that I do not have and cannot measure its dimensions. I use a caliper to physically measure board parameters as published dimensions are uncommon and those that are, are often inaccurate. I have provided locator spigots or screw points for securing the boards. I use spigots with superglue but self-tap screws may be better if available. The USB access hole may need adjustment for height depending whether the NodeMCU board is compnent side up or down. I have provided an option for providing a double length case for separating the MCU from a peripheral device - in particular heat sensitive PIR sensors. The Lid File: I have used the lid to secure peripheral or second boards in the case. So far I have generated designs for HC-SR501 PIR sensor and CQRobot Microwave motion sensor. Other designs are pending and are WIP. The original ‘snap-fit’ lid securing method has been retained albeit slightly modified as it works well. Printing Method: I have used and I recommend using Openscad (Version 2021.01) which is freely available at https://openscad.org/. My printer is now an Original Prusa MK3S+ and I use a 0.4mm nozzle. I use Prusa’s slicer to generate G-code. I have used PETG for this design as I believe that to be more stable than PLA in exposed areas. I have found it is quite difficult to get a good clean print and optimal results have been generated by lots of trial and error. The detail is quite fine so getting a clean, accurate print will need adjustments depending on your printer. Edit/Update: 10/07/2022 Previous Openscad files replaced by updated files and a new Openscad Options file created to overcome priority/forward references issues with parameters file. Previous files removed - recommend scrapping any downloads in favour of the latest versions. Some corrections to existing designs inserted. Additions include a box for Adafruit's TSL2561 luminosity sensor and DRRobot's Gas Sensor V2. New photos added to show a sample of the boxes created including one of a radar detector monitoring cat flap entry/exit for home automation system!
With this file you will be able to print Another NodeMCU Case with your 3D printer. Click on the button and save the file on your computer to work, edit or customize your design. You can also find more 3D designs for printers on Another NodeMCU Case.