Anti-Backlash nut mounter/adapter - TR8
thingiverse
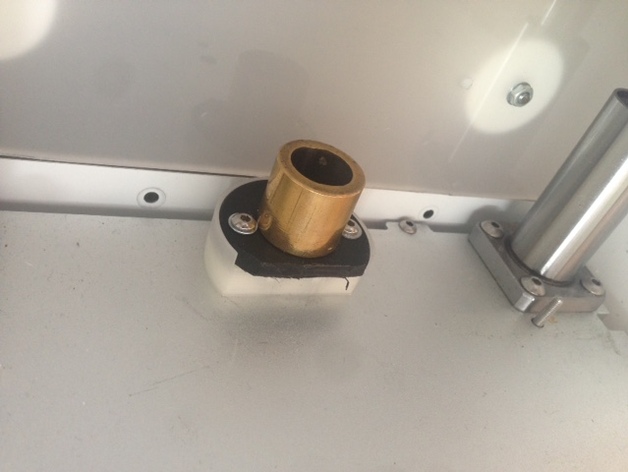
This is an adatper/mountblock to mount an Anti-backlash nut onto an Ultimaker 2 printbed instead of the infamous chinese brass nuts I have made a youtube video showing the difference between the standard brass nut and this adapter + backlash nut. The adapter can be used where-ever brass nuts have been used, and where the space constraints permits. The border is meant to help keep the Anti-Backlash Nut centered Go here to see an Autodesk 3D model, which you can download in different file formats. I used Autodesk Fusion 360 to create this model. There is standard STL download here on Thingiverse as normal :) Print Settings Printer: JennyPrinter Rafts: No Supports: No Resolution: 0,25 Infill: 70 Notes: I've used 3 perimeters using a 0,4mm nozzle. You want to use a resolution/layerheight which you can divide up into 4 and 5mm without decimals. Use high infill for strength. You don't want this part wobbly. Post-Printing Insert m3 nuts into cut-outs Just insert 2x m3 nuts into the bottom of the piece. Use glue if you can't make them stay where you want them to. Attach the adapter to the printbed, or other surface. Screw on the Anti-BackLash nut onto the adapter using 2x m3 nuts. Important: You must get it centered. I recommend you do not lie the printer down on it's side, as the bearings on the 12mm rods will shift some. Take it slow! Mount adapter and make sure it is centered, by mounting motor and leadscrew.. run the bed up and down some.. do the same after you attach the anti-backlash nut. Just insert 2x m3 nuts into the bottom of the piece. Find 4x fitting screws with round head. Loosely mount the Anti-backlash nut and then tighten it down when you are sure it is centered. Custom Section Why I used m3 screws instead of m4? To conserve space and make the item stronger, and because it's not normal having such short m4 screws lying around :) Custom Section You need to cut material away from the Anti-BackLash nut If you use the bed-cover for Ultimaker 2, you need to cut away some of the base of the Anti-BackLash nut. You can use this adapter as a guide for cutting. Custom Section I strongly recommend using a pillow-block to fix your lead-screw in the top before using this adapter!
With this file you will be able to print Anti-Backlash nut mounter/adapter - TR8 with your 3D printer. Click on the button and save the file on your computer to work, edit or customize your design. You can also find more 3D designs for printers on Anti-Backlash nut mounter/adapter - TR8.