Anti Elephant Foot Isolator
thingiverse
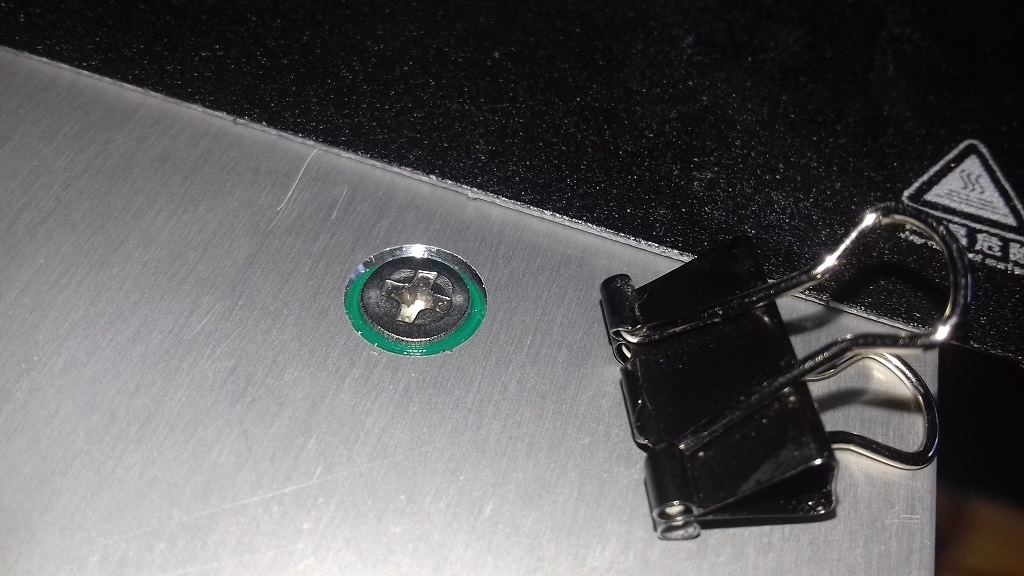
This is one often overseen cause for elephant-foots. The printer starts as soon as the printbed has heated up, but the printbed-screws are still cold. But this changes as the print progresses. They will also heat up, elongate, and give the springs room to push the printbed slightly up, creating an elephant foot. With this isolators the screws will only very slowly warm up, or wont heat up at all. The holes of my printer were deep enough to give the Isolators home. See https://www.thingiverse.com/thing:4861467 for further compensation. It might not be the only cause for elephant foots, but this one is the easiest to eliminate. Print time is under 1 minute. Use vase mode and wall thickness 0,3mm. Be sure to deactivate any negative initial layer horizontal expansion and enable print thin walls in Cura. After installing heat the printbed up to 70°C, let the screws settle down and the PLA fill up any irregularities. One welcome side-effect is, that the screws will stick to the printbed and can't rotate, when you turn the bedlevelling-knobs.
With this file you will be able to print Anti Elephant Foot Isolator with your 3D printer. Click on the button and save the file on your computer to work, edit or customize your design. You can also find more 3D designs for printers on Anti Elephant Foot Isolator.