Anycubic Chiron 3D Printer Enclosure - legs and corners
thingiverse
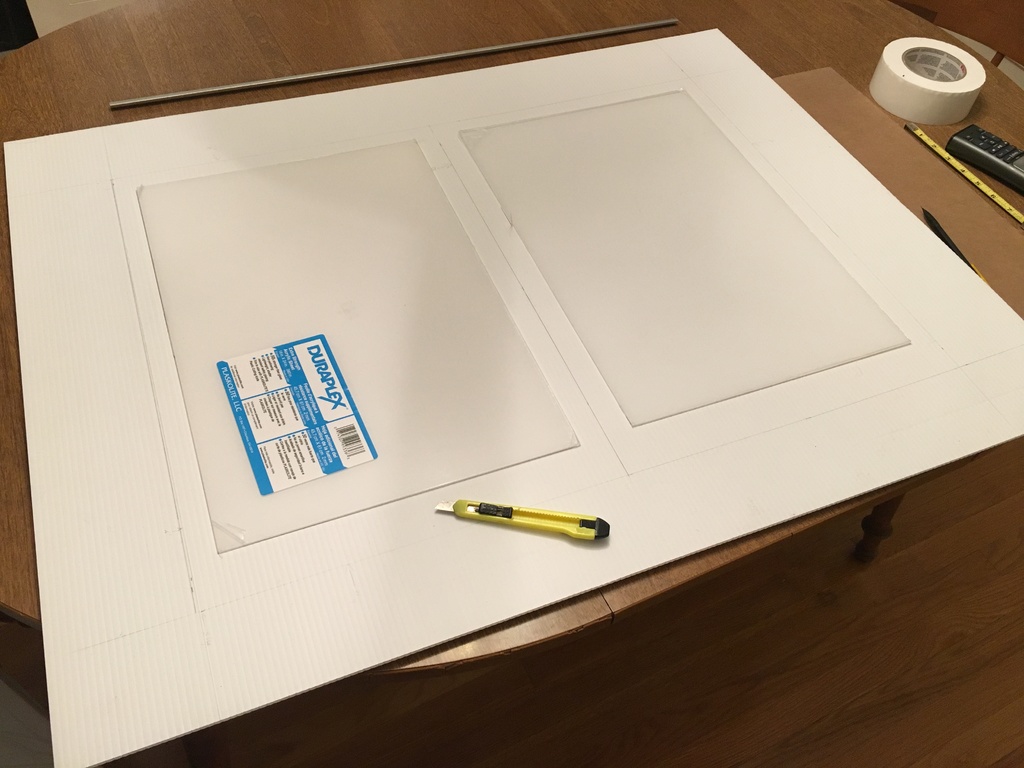
--------- Goals: --------- 1. Create an enclosure that stablizes the temperature surrounding the 3D printing area. Also enclose the filament spool. 2. To be used for filament types, such as ABS, that need stable temperature. 3.Keep the total cost low( under $100). 4. Do not sacrific quality. 5. Provide ample access through the front and sides. Provide large doors. 6. Provide ample viewing from the front and sides. Use clear plexi- glass. 7. Construction must be relatively easy and use common tools (no power tools). 8. Do not enclose the 3D printer power supply. Raise the enclosure above the power supply so there is adequate ventilation. 9. Use the 3D printer to make corners to hold the encloser together. 10. Use White Duct Tape to seal the seams between panels. -------- Costs: --------- 2 White Twinwall 4mm thick 72”x36” $18ea $36 Plastic Sheet, Home Depot 2 Clear Plexi-glass 2mm thick 24”x18” $13ea $26 Cut into 4 pieces 18”x12”( 2 for front door windows and 2 for side door windows) Lowes - note: cut free in store Role of 2” wide White Duct Tape $7ea $7 Misc self screws (had on hand) TOTAL $69 ----------- How To: ----------- 1. Cut 1 twinwall sheet into 2 36”x28”(sides), 1 36”x16”(part of back) using razor knife. 2. Cut 1 twinwal sheet into 1 36”x36”(top), 1 front 36”x28”(front), 1 36”x8”(part of back) 3. Cut a piece of cardboard 36”x4”(part of back). 4. Tape the back parts together to make 1 36”x28”(back). Cover cardboard with white duct-tape. 5. Cut 2 18”x12” holes in front, for plexi-glass windows in front doors. 6. Cut 1 18”x12” holes in each side, for plexi-glass windows in side door. 7. Tape the plexi-glass in the door cut-outs using white duct-tape(1/2” overlap). 8. Cut all the way through on the 3 free sides of the doors. 9. On the hinge side of the doors only cut ½ way through on the inside, so the door will swing outward ( re-enforce the outside hinge side with white duct-tape). 10. 3D print the leg corners, top corners&caps and door knobs. Use 0.8mm nozzle. 11. Assemble the enclosure into the corners. 12. Use white duct-tape to seal the seams between front, top, back and side panels. -------- Links: -------- Twinwall plastic sheets, Home Depot https://www.homedepot.com/p/72-in-x-36-in-x-5-32-in-Twinwall-Plastic-Sheet-COR-3672/202771364 Plexi-glass sheets, Lowes https://www.lowes.com/pd/DURAPLEX-0-08-in-x-18-in-x-24-in-Clear-Acrylic-Sheet/3143519 White Duct-tape, Lowes https://www.lowes.com/pd/3M-Tough-1-88-in-x-55-White-Duct-Tape/1000104181 Leg corner STL - this posting Top corner STL - this posting Top cap STL - this posting Knob STL https://www.thingiverse.com/thing:356075 Latch STL https://www.thingiverse.com/thing:655519
With this file you will be able to print Anycubic Chiron 3D Printer Enclosure - legs and corners with your 3D printer. Click on the button and save the file on your computer to work, edit or customize your design. You can also find more 3D designs for printers on Anycubic Chiron 3D Printer Enclosure - legs and corners.