Anycubic Chiron 400x400 Leveling Circles
thingiverse
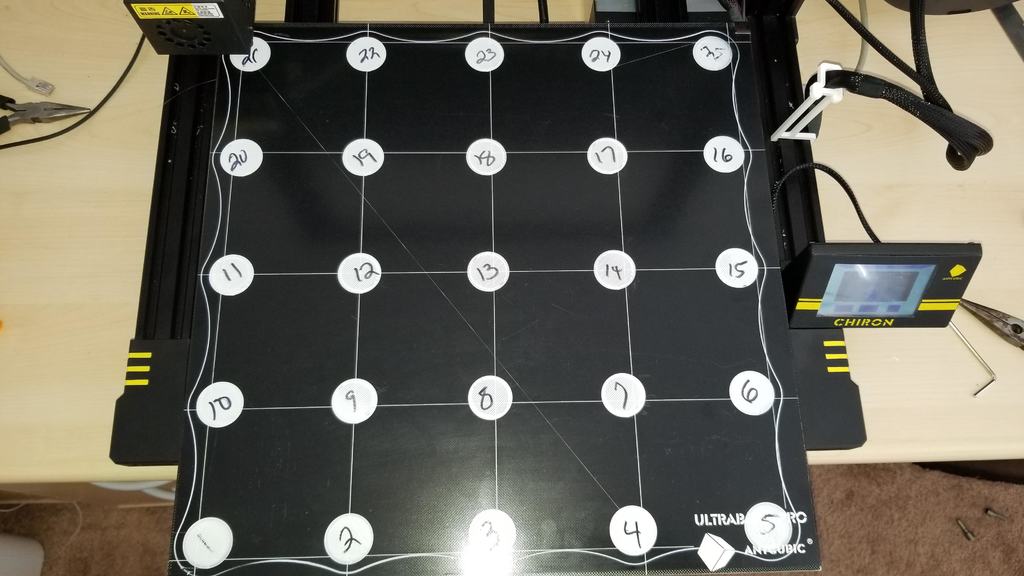
This is the quickest way to level your Chiron bed 400x400 version not the 400x380. This print takes about 25 minutes and prints a 1 layer circle on the 25 points that it does its leveling. 1 - Do a manual leveling so the bed is somewhat level. Use a sheet of paper and level various points. Besure to have the bed heated. 2 - Follow Anycubic's instructions for doing an auto bed leveling. - https://www.youtube.com/watch?v=RudXmCgobso&t=49s 3 - Instead of using their "Level_Test.gcode" use this one. 4 - As the outer ring is printing goto Tools - More - Level and begin to lower until it is close. This can be as much as -1.50 or -3.00 Do not go too much. Every printer is different. I usually stop the print and will start again before the circles start to print till the outside lines start to stick. 5 - I then let it print all 25 circles. I try to take a marker and number them like the grid. They tend to pop up and you do not know where they went. 6 - If there are gaps the print head needs to be lower -. If is is solid but very bumpy usually the print head is to close and you need to add space +. Do this print as many times as needed till is is right. Sometimes takes 2-3 times, other 4-6. I also level with the material I plan to be using (PLA, ABS, ETC..).
With this file you will be able to print Anycubic Chiron 400x400 Leveling Circles with your 3D printer. Click on the button and save the file on your computer to work, edit or customize your design. You can also find more 3D designs for printers on Anycubic Chiron 400x400 Leveling Circles .