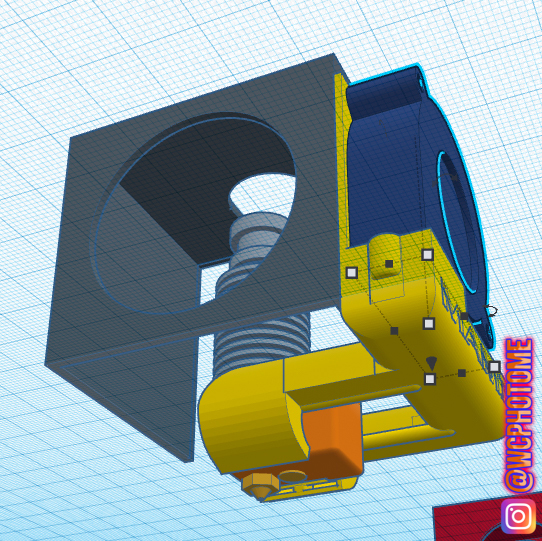
Anycubic Chiron 5015 V6 VOLCANO Cooler - BY: WCPHOTOME
thingiverse
*UPDATE - V2 Of the cooler has been added. Added a plate in front of the 5015 fan to add a bit of strength to the model. This 5015 Part Cooler is for an Anycubic Chiron with a V6 Volcano HotEnd upgrade. This will NOT work with the stock HotEnd and the ducts will hit the heater. I am working on possibly modifying this to work with the stock V5 but as of now it will only work for a V6 Volcano. The factory leveling sensor does still work with this model and fits without any issues. The uploaded model does NOT have the "MAMI" letters on the side. I would normally run the stock fan at 100% with PLA and I found that right around 30% works fine for PLA; meaning you can speed up the fan for bridging to achieve better bridging! This was designed with TinkerCAD and I am fairly new with designing models so please provide any feedback that could make this better! I printed this on my CR-10 using Simplify3D as my slicer and it was printed in one piece with supports. Originally printed with PLA and I plan to reprint the model in PETG. Also, I have a silicone sock on my Volcano and this fits fine with the silicone sock. I would suggest using a sock if you're not already to prevent the volcano from warping the ducts. MOUNTING INSTRUCTIONS The lower fan bolt passes through the cooler and mounts through one of the existing HotEnd Cover Holes. The top fan bolt will need to be drilled. 1 - Remove the stock Hot End Cover 2 - Mount the cooler and fan with the lower hole Only ( Not Too Tight, We may need to will it around ) 3 - Install the cover with the fan back onto the printer, line everything up and make sure the two ducts sit flush against the bottom of the stock HotEnd cover. ( The stock cover mounts with 3 bolts, you may not be able to install the right side lower bolt ). TIP, Use a smaller bolt and through-bolt it with a nut and bolt. 4 - Also make sure the fins are sitting evenly in between the heater. 5 - Make sure the top hole for the fan matches with the hole in the cooler and slowly drill a pilot hole to mark where the hole should be drilled without drilling all the way through. You could also use a PICK TOOL to make the hole. (Again make sure everything is lined up perfectly before marking where the top hole will be drilled) 6 - Remove the cover and fan duct from your printer, finish drilling the hole using the pilot hole mark we made, put it all together and DONE! FOLLOW ME! I am a photographer who got into 3D modeling and 3D printing so that I could make props for fantasy photoshoots! Follow me on Instagram to check out some of the Crazy Cosplay Photoshoots me and my Waifu have done with 3D printed Props! Me: @wcphotome Waifu: @fiddykittykitsune
With this file you will be able to print Anycubic Chiron 5015 V6 VOLCANO Cooler - BY: WCPHOTOME with your 3D printer. Click on the button and save the file on your computer to work, edit or customize your design. You can also find more 3D designs for printers on Anycubic Chiron 5015 V6 VOLCANO Cooler - BY: WCPHOTOME.
