Anycubic Chiron Y-axis back stabilizer (WARNING)
thingiverse
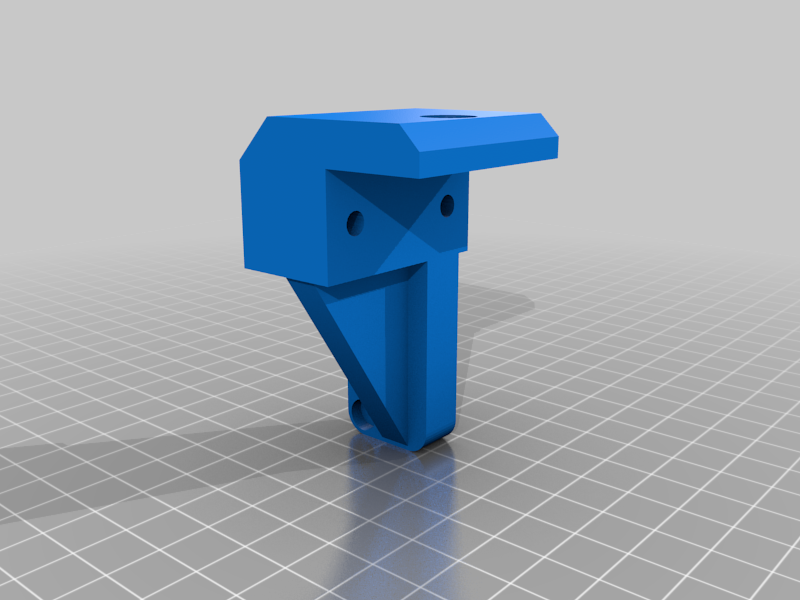
WARNING!!! It's a sloppy design, you shouldn't screw into a motor like that, because you can disrupt shaft & rotors allignment. Screws should be put diagonally, design should be remixed Instruction: Remove flex mount for motor, it's useless and stupid. Unscrew original M4 left screw, so your motor will be perpendicular to the belt as it should have from the factory. You will need: 2x М3х50 DIN7985 3x M4 dropnuts 1x M4 washer 2 x Screw M4x18mm 1 x Screw M4x12mm Locktite (I used Permatex blue) Be careful when unscrewing and screwing into a motor, its threads are weak and can be easily broken (as 1 of mine did). That's why you will need a locktite. Screwing can be uncomfortable, so I recommend using a small screwdriver or an angled one. The best option is using HEX or TORX head M3 screws, but I didn't have them in my hardware stores. It's a very tight fit, so don't worry if it would seem that the holes are not lining up. I ended up doing next: 1) Putting M3 long screws in the 3d printed stabilizer 2) Then putting them into the motor holes all the way. Don't tighten them, you will need to pull them out later 3) Lightly screw in M4 bolts into the profile 4) Take out on of the M3 long screw, put some locktite on the end, screw all the way. Gently tighten it 5) The same with the other one 6) Gently tighten all M4 screws
With this file you will be able to print Anycubic Chiron Y-axis back stabilizer (WARNING) with your 3D printer. Click on the button and save the file on your computer to work, edit or customize your design. You can also find more 3D designs for printers on Anycubic Chiron Y-axis back stabilizer (WARNING).