Anycubic i3 Mega conversion to linear rails
thingiverse
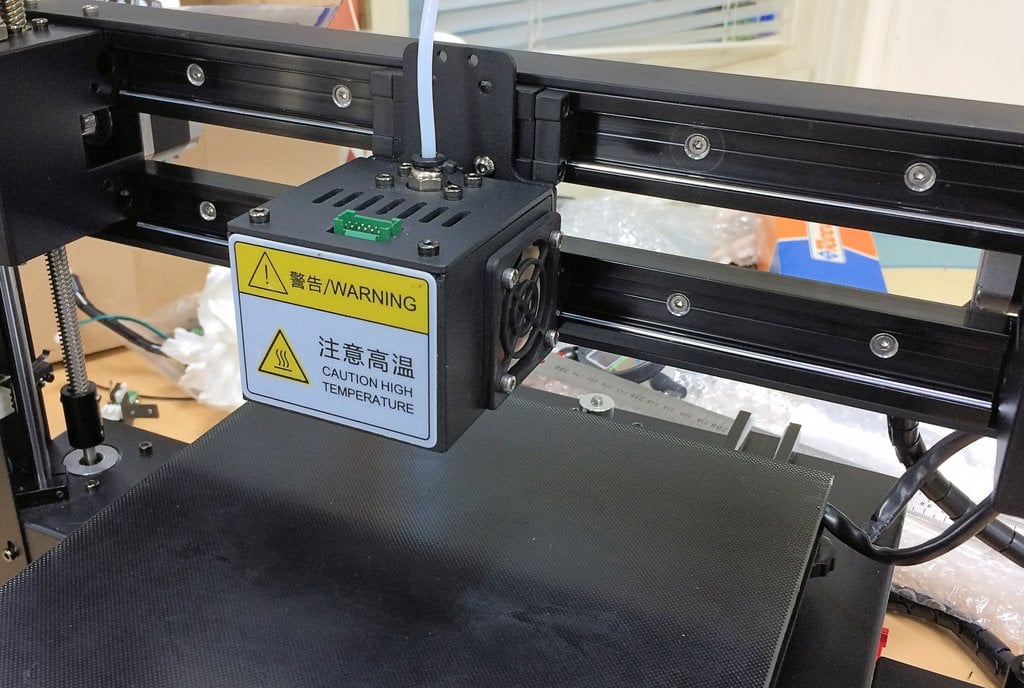
I decided to upgrade my i3 Mega to have robust linear rails instead of the original steel rods with noisy linear bearings and massive play. To achieve this, I ordered some SGR10N rails and roller blocks from an Aliexpress shop (https://www.aliexpress.com/store/1760039). The seller is very helpful and accommodating, offering to cut the rails to any length desired. I had them cut the Y-rails to 370mm. The build platform: Unfortunately, I misordered three 4-roller blocks instead of three 3-roller blocks for the Y-axis. However, I was able to modify them to fit the available space below the print-bed by cutting and machining them. Installing the rails on top of the i3's base case is straightforward if done carefully. It involves measuring accurately, drilling, and tapping holes precisely. Since the case wall is only 1mm thick, additional nuts are used to prevent thread breakage. After installing the rails and adjusting the preload on the roller-blocks, the print-bed base-plate needs new holes. I had to drill some extra ones due to the wrong blocks. The 3-roller blocks would have fit perfectly into the existing holes. A 4mm spacer is needed between the blocks and the bed to prevent belt-holder contact with the base-case. Once this is done, reassemble the print-bed, including the Ultrabase. If the drilling and assembly are precise, you should now have a stable (no bending) and smooth-running build platform with zero play in any direction. Then for the gantry-carriage: I used two 300mm/3-roller blocks stock items (https://www.aliexpress.com/store/product/High-quality-Aluminum-Square-Roller-Linear-Guide-Rail-1pcs-SGR10N-Length-300mm-1pcs-SGR10N-3UU-three/1760039_32796707704.html). To mount them instead of the steel rods with linear ball-bearings, I used two pieces of 30x30x3 aluminium T-profile. Cut it to length, cut out space for the X-axis stepper, and mounted the linear rails on the profiles. The profiles themselves are kept by a number of M3 screws, held by tapped thread into the profiles. Then the profiles + rails are dialed in on the i3 Mega's gantry, still with the original rods attached (for copying spacing between both Z-axis bearing-and-guide assemblies). The holes to be drilled are copied from the dialed-in hole positions in both profiles. Then drill into the steel assemblies and tap with M3 thread. On the side of the extruder, two 5mm holes are drilled to let the extruder's mounting M4 screws pass through. Finally, it's just a matter of removing the rods and reassembling the gantry with the newly constructed profiles and rails. The Hot-End mounting plate fits back onto the roller blocks. Only 2 screws per block are used, and they make a sturdy connection between upper and lower rail. As both X- and Y-axis limit switches do not fit their original positions/mounting anymore, both are relocated. For the Y-axis, a long M3 screw was put in the build-base-plate, for the X-axis a new mounting bracket was made and screwed under the lower profile, kept by two M3 screws. Have fun looking at the pictures, and here: https://youtu.be/YPMQjcqoc24 you'll find a short movie. Note: The attached .STL has nothing to do with this project; it's just required to publish this post. It's the fan-cover seen on the first photo by the way.
With this file you will be able to print Anycubic i3 Mega conversion to linear rails with your 3D printer. Click on the button and save the file on your computer to work, edit or customize your design. You can also find more 3D designs for printers on Anycubic i3 Mega conversion to linear rails.