Anycubic I3 Mega - SD card reader flipper
thingiverse
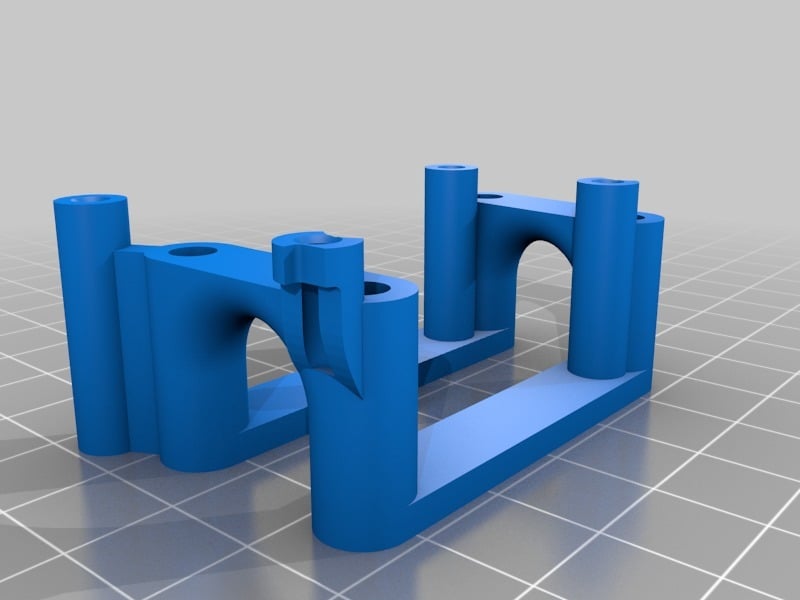
2018-09-28: V5 Things are getting smoother and more stable now :). 2018-09-23 ... later :) V4 Because this project is still a work in progress, I'll be using this thing as a base for a doubleMOSFETHolder and a cable management system. I've made some changes to the frame to accommodate the new design. Now, one can easily lay all the cables between the original mounts for the SD card reader before mounting this thing - okay, most of the cables fit, but a few don't ... yet :). The roundings at the "upwards" moved frame parts are for better bridging while printing and to smooth out the cable way. 2018-09-23: V3 Since I've installed TMC2208 V1.0 stepper motor drivers, I had to rotate the connector plugs on the TRIGORILLA board by 180°. This rotated plug (especially the one for the x-axis) comes closer towards the pcb's edge and collides with the SD card flipper. I took a sharp knife and made two cuts through the existing thingi, but if you're doing a new print, you can choose whether to include the cutout when using TMC2208 V1.0's or not :). So I added two lines at the beginning of the scad-file: // Change this to false if You don't use TMC2208 V1.0's and didn't have to rotate the stepper-motor-connectors (expecially that one for the x-axis) TMC2208V1 = true; // in case change to: TMC2208V1 = false; 2018-09-06: V2 In preparation for using this thing as a base for creating a combined SDflipper, Dual-MOSFET-mount and maybe a fan-mount and a cable-management, I made some changes inside the scad-file for easier mounting, full use of params, etc. ... accidentally erased the V1-files while uploading the V2-files. 2018-08-28: V1 First attempt in OpenSCAD, but so far only a raw copy of the TinkerCAD-thingi. 2018-08-27: V0 Done in TinkerCAD, all non-functional necessary parts positioned more or less "by eye". _______________________________________________________________________ Since I didn't want to do my first print with a pair of claws, I decided to create this thing. The original SD card reader thingi fits on the mounts with light pressure, but the board won't fit ... there are some bits and bobs at the board that collide with the thing. So, quick decision to create a new thingi ... and after a few hours learning how to use TinkerCAD ... tada: here it is. As far as I'm a german engineer, it has to fit perfect - let's say like a wet silken glove ... but unfortunately it's more like the iron glove of a knights armor. One knows from changing tires, one has to push (or pull for getting it off again) over the longest diagonals: starting top left and numbering the old mounts clockwise 1-3-2-4-1-3-2-4 a.s.o. until it touches the ground or becomes free. But because I'm always thinking about what may come next - and there's usually something that comes next - this new thingi is perfect in three ways: a) It is fixated with all four screws b) The SD card reader board is also fixed with four screws instead of the original three ones and c) It sits really tight on all four mounts, so it may be a good base for a later designed MOSFET-holder. Two hints for mounting: a) Dismount the stepper-fan-mount from the casing before working on the flipper - I didn't do that and hated every second :). b) Because the bevelled edge for the M3-screw threads is a little too small, it may be clever to screw them all in when the thingi is still free ... then the screw thread is formed into the PLA and the screws may fit better. One weird fact: The inner and outer wall of three tubes for the original mounts have only very small connections towards the rest of the thingi - maybe when changing to a MOSFET-holder, I'll take a closer look at this too ... for now it's good for me.
With this file you will be able to print Anycubic I3 Mega - SD card reader flipper with your 3D printer. Click on the button and save the file on your computer to work, edit or customize your design. You can also find more 3D designs for printers on Anycubic I3 Mega - SD card reader flipper.