Anycubic Photon/Photon S leveler (REMIX)
thingiverse
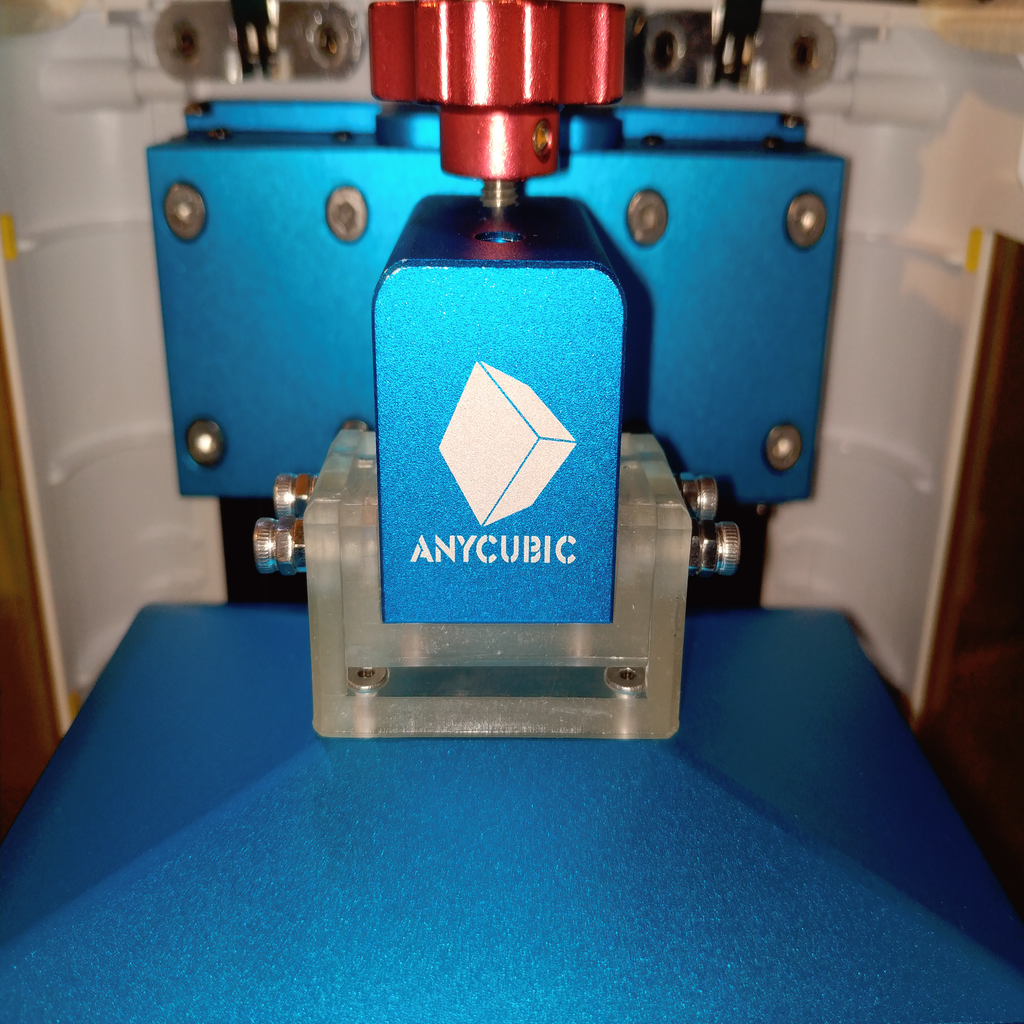
I remix the Anycubic Photon leveler by Kron01 as I was experiencing difficulty when inserting the nut. I also reduce the size and remove the central part for the spring. Using M3 12mm for the four lock screws, which are more secure than the original screws. Lock washers can be used on the side if desired, but they were not necessary in my case. When leveling, make sure to adjust the lock screws so that the bracket can still wiggle slightly and move up and down. Let the build plate drop 0.1mm at a time after homing, and you can even align the bracket as it is being pushed up when the build plate touches the flat surface below. Ensure the build plate is flat on the bottom surface and hold it there while locking the four screws. We're not done yet - we need to ensure the build plate is parallel with the bottom surface using either the paper method or the Flint Read method. When you lightly unlock the main knob, you'll notice the build plate still wiggles in rotational motion, which is okay as long as it's already parallel with the bottom surface. Now move down 0.1mm at a time until you can no longer make any movement on the build plate with the flat surface, then lock. Move up 0.1mm three times to achieve a level of 0.3mm, and set that as Z=0. I observed that there's no up or down movement on the build plate even when the main knob is lightly unlocked, but there's a slight rotational play. When the build plate is pushed down just enough to stop this rotational play, that's the best level to achieve, then we can define our Z=0 0.3mm above that level as suggested by the Flint Read method or simply set Z=0 when you can no longer push the paper but can pull it with resistance using the paper method. Printed with six perimeters and six top and bottom solid layers at 20% infill to ensure strong solid shells either vertically or horizontally. Update: I've added version two of the bracket, which is more compact and uses less material while still working well. A resin printed version was created for testing, and it looks great and sturdy. The opening on the side for the screws has been made narrower for better grip. Further update: the resin printed bracket is significantly better than the filament printed part, with better grip on the screws and a sturdier design. I experienced issues with PLA material over time, where the screws would turn and cause leveling problems. In contrast, the resin printed bracket remained steady for several prints and movements, aside from having a cleaner look.
With this file you will be able to print Anycubic Photon/Photon S leveler (REMIX) with your 3D printer. Click on the button and save the file on your computer to work, edit or customize your design. You can also find more 3D designs for printers on Anycubic Photon/Photon S leveler (REMIX) .