Anycubic photon Z Axis upgrade, the easy way
thingiverse
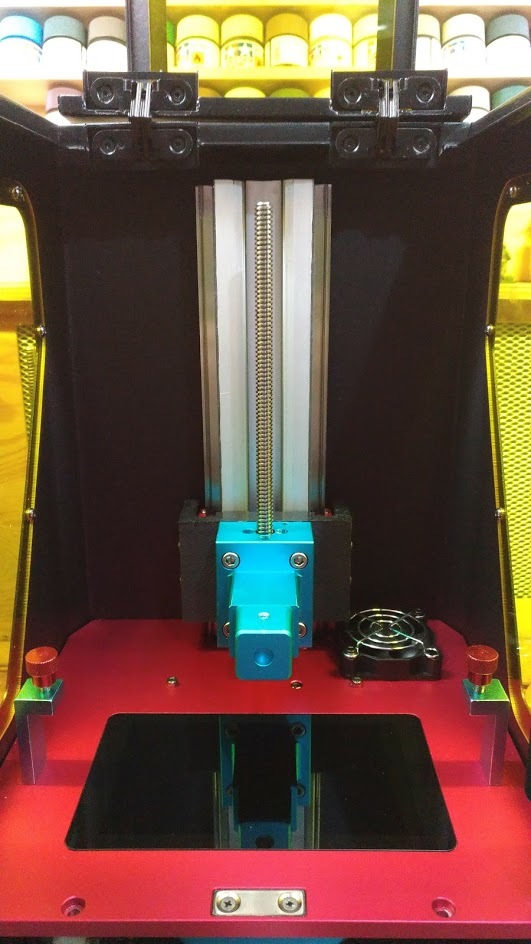
Here you find an upgrade for the Z axis of the Anycubic photon. My own Z axis never worked properly, plagued by annoying Z wobbles. I discovered a straightforward solution without resorting to drilling or CNC parts - just some glue and 3D printed components. The necessary parts include: - Two MGN12 rails measuring 230mm each - Two MGN12H carriages (I used ones that were originally 250mm long, but trimmed them down) - Eight M3x12mm bolts - Four M5 nuts - A tube of Araldite 2-component glue designed for metal To implement the upgrade: 1. Apply glue to the rails and attach them to the old Z axis. Use tools to ensure all parts are properly aligned and securely fastened. 2. Inspect the width with a caliper to confirm it's consistent on both sides. Adjust as needed using your tools of choice. 3. Print the STL file for the adapter. 4. Mount the carriages onto the rail. 5. Attach the original platform holder to the adapter. 6. Securely attach the adapter to the carriage, carefully adjusting bolt torque to achieve smooth movement. 7. Reassemble all printer components and enjoy your upgraded Z axis!
With this file you will be able to print Anycubic photon Z Axis upgrade, the easy way with your 3D printer. Click on the button and save the file on your computer to work, edit or customize your design. You can also find more 3D designs for printers on Anycubic photon Z Axis upgrade, the easy way.