Anycubic Predator Lighting ring Neopixel project.
thingiverse
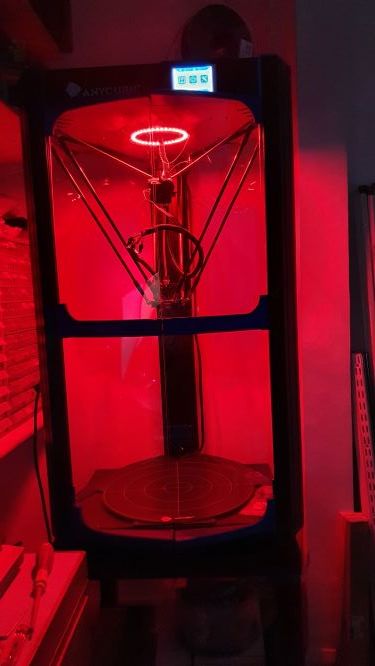
I usually fit my printers into an enclosure of some kind which usually have some form of illumination but the Predator is such a large machine and can be adapted with its own enclosure, I figured I'd install its own independent lighting system. My Predator is still running the standard mainboard with a Raspberri Pi providing wifi connection via Octoprint. My last dabblings with Neopixels on my Tronxy X5S were controlled via Marlin and they worked well, but that wasn't an option for me with the Predator, at least not in its current state so I had a look around and checked out some Octoprint Plug-ins. I've gone with "WS281x LED Status." Update. 17.Jan2021. I've added a dual ring version which accepts the next sized LED ring which has 32 LED. Part listed below. Please excuse the photos of the dual ring fitting as I only had one 4mm M2 screw available to hold in the ring and it's a bit on the piss. It looks a lot better with the four screws fitted This project will be split between the hardware and electronics and I'll try to give a few pointers on the software setup too as I go along, especially if I get any issues. The first thing you need is the hardware. 1. One x 132mm 40 element Neopixel LED ring. https://www.ebay.co.uk/itm/40-LED-132mm-Ring-WS2812B-RGB-LED-Neopixel-compatible/132996155873?hash=item1ef73049e1:g:07wAAOSwLi1ckkf~ 1a.(Optional). One 32 element LED ring 110mm. https://www.ebay.co.uk/itm/WS2812B-SK6812-round-Ring-5050-RGB-Addressable-Pixel-LED-Lamp-Arduino-5V/302322020079?hash=item4663cbeeef:g:mL4AAOSwX9FZHyec 2.One x 24 Volt, - 5 volt DC 10Amp buck converter. https://www.amazon.co.uk/gp/product/B07L6528VM/ref=ppx_yo_dt_b_asin_title_o01_s00?ie=UTF8&psc=1 3. Originally I had a separate buck converter for the Pi but it caused stability issues so I ended up running the Pi and Neopixels from the 10 Amp Buck converter so this small 12 volt to micro USB was removed. Use an old USB to USB micro charging lead but make sure it's one with a right angle plug such as : https://www.amazon.co.uk/StarTech-com-30cm-Micro-USB-Cable-Black/dp/B003YKX6W2/ref=sr_1_1?dchild=1&keywords=micro+usb+right+angle&qid=1609430790&sr=8-1 4. A raspberry Pi and SD card of your choice. You can find these everywhere. 5. Four (eight if dual ring)off, M2 x 4mm Cap head screws (Neopixel ring fixing). (My screw box) 6. a bunch of female to female dupont jumper wires https://www.amazon.co.uk/AZDelivery-MB-102-Breadboard-Kit/dp/B07KYHBVR7/ref=sr_1_33?dchild=1&keywords=breadboard+jumper+wires&qid=1609174888&sr=8-33 7.A few feet of 1.0mm2 speaker wire. https://www.amazon.co.uk/electrosmart-Black-Strand-Speaker-Cable-Red/dp/B06ZYB5XQF/ref=sxin_9_ac_d_rm?ac_md=3-2-c3BlYWtlciB3aXJlcyByZWQgYW5kIGJsYWNr-ac_d_rm&cv_ct_cx=speaker+wire&dchild=1&keywords=speaker+wire&pd_rd_i=B06ZYB5XQF&pd_rd_r=a8f61600-440b-4163-b3ea-0ec07a734eec&pd_rd_w=vrRwX&pd_rd_wg=oybiG&pf_rd_p=17aec670-a34a-456d-b214-b9a882c785b0&pf_rd_r=FPXZQGEJ9R1A5ENB93XS&psc=1&qid=1609176059&sr=1-3-fe323411-17bb-433b-b2f8-c44f2e1370d4 8. Some fork crimps and a crimping pliers for that professional touch. 9. 4x M2.5 x 4mm (or 6mm) (Raspberry Pi mounting). 10. 2x M3 x 4mm (or 6mm) (Buck converter mounting). 11. 1x M4 x 12mm screw and nut (Stub plate fixing). 12. Logic Shifter 3.3V - 5V. : https://www.amazon.co.uk/gp/product/B07LG6RK7L/ref=ppx_yo_dt_b_asin_title_o01_s00?ie=UTF8&psc=1 First thing to do is print the mounting plates and the LED ring holder. See printing instructions. While this is going on if you have another printer, you can start preparing the Predator. You will need to move the filament runout sensor to inside the control electronics compartment. A lot of folk have already done this due to the potential to snag up on the wiring harness or filament when the printer homes. There's a "Thing" here with a decent guide by Seafax with the caveat that you do not discard the guide tube fitting that you remove from inside the control compartment as these instructions suggest. You'll need it later for this project. https://www.thingiverse.com/thing:3665598 Rest of the instructions follow below. Update 31 December 2020. Removed the Work in Progress" Status now as it seems to be working as advertised. If anyone has any feedback, feel free to drop me a line.
With this file you will be able to print Anycubic Predator Lighting ring Neopixel project. with your 3D printer. Click on the button and save the file on your computer to work, edit or customize your design. You can also find more 3D designs for printers on Anycubic Predator Lighting ring Neopixel project..