AnyCubic Predator Silicone Sock
thingiverse
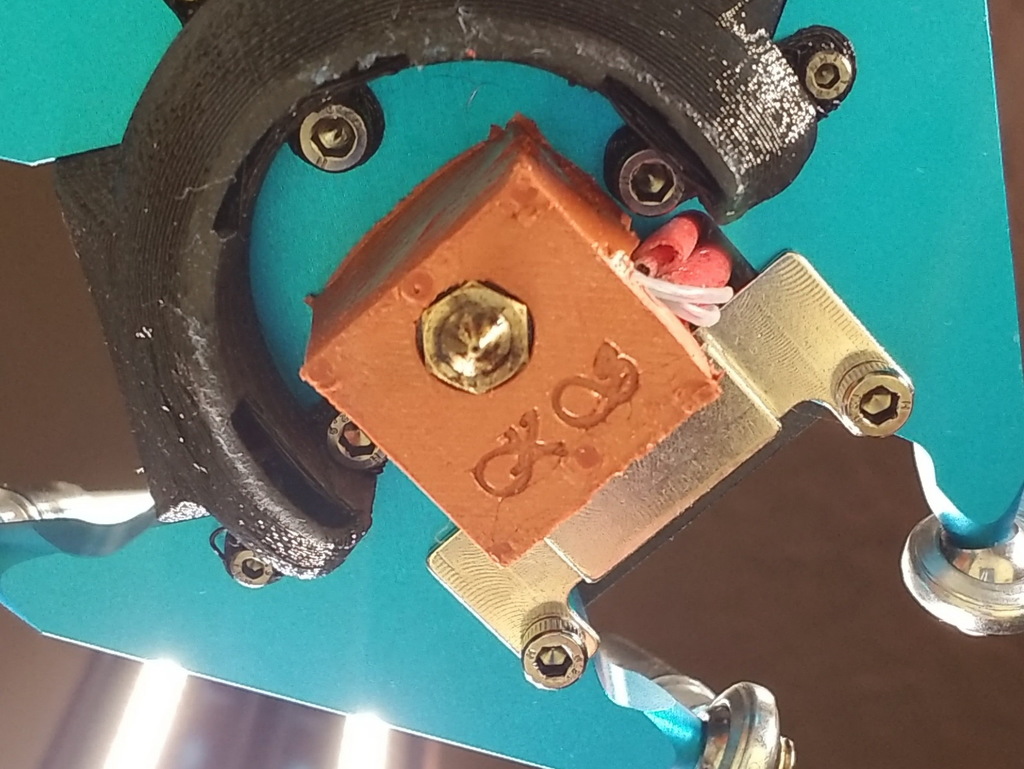
<b> Edit:</b> <i><b>Note 1:</b> The use of a sock during bed levelling may be an issue if your probe does not fit tightly on its mount. There is not a lot of space between the back of the probe and the block. I test fitted my probe with the thicker walled sock and it fits snugly. However I can't guarantee that this will be the same on your printer. Be aware of this when you fit your probe for levelling.</i> <i><b>Note 2:</b> I have not tested how much clearance a sock allows when printing to the outside edges of the build plate. Due to the nature of the Delta design there tends to be some tilt to the effector when it is reaching its outer limits. Because of this the outside corners of a sock may come close to the print surface. I considered chamfering the outer edges of the sock to help (if this is the case) but decided that it would make removal from the mould more difficult. It is probably just as easy to slightly trim off the outer edges with a side clipper.</i> <i>If you notice this as a problem please leave a comment and I will look at angling the bottom edges.</i> <i><b>Note 3:</b> Personally, I would not recommend the use of a Sock on the Predator while using the stock cooling shroud. At least on my machine, the vents for the shroud are too close to the effector base and actually blow towards the block more than the print surface. With a sock, extending out and around the block, this will probably limit the airflow hitting the print. Using the sock with an improved cooling shroud should work fine, but always check for any possible interference of air flow.</i> <b><i>27/01/2020</i></b> I have uploaded the new version of the Predator Sock Mould. Version4 The silicone walls are thicker so it should provide a little better insulation and be a little stronger. It is a little more difficult fitting over the block while installed on the printer as you need to get the top of the sock past the probe base and over the top of the block. Its not too difficult but it may require a small screwdriver or toothpick to help push it through. Don't try and force the double thickness of the top and wall through at the same time. Bend the sock out so the top slides through before the wall. I have included a pusher block that can be used to help push the centre out of the casing, and if you print two casings you can place one on top of the other to help slide the sock out. These are not necessary but some may find it makes the removal process easier. I would strongly recommend the soap/IPA release agent (noted below) and allow extra curing time as the thicker walls may take longer for the silicone to harden up enough for removal. I would suggest allowing 48 hours to be sure. <b>Note:</b> If you do start taking the mould apart and notice the there are soft parts leave it longer to cure. You can also repair damaged parts by carefully spreading some more silicone over the damaged areas and then allowing it to cure. <b><i>23/01/2020</i></b> I am experimenting with a couple of different release agents. 1. Petroleum Jelly dissolved in mineral spirits. Take a small amount of mineral spirits and add petroleum jelly to it. Warm it up and allow the petroleum jelly to dissolve. Add enough PJ until it reaches saturation. Keep it in a closed glass container. This appears to work well but the smell is a little much for in the house. 2. 1 part dish soap to 2 parts 99% Isopropyl Alcohol. I mix up a small amount as its really easy. Mix the two parts together well before applying. I believe that both of these work better than plain dish soap. The solvent allows the release agent (PJ and dish soap) to be spread easily and thinly. They both released about the same but I think I prefer the IPA Soap better just because it was a little easier to mix and with my limited test, it did appear to release a little easier. I have included a photo showing the released pieces sitting on the rough printed PLA. The pieces are flipped over to show the detail on the released silicone. I am in the process of testing a thicker sock build for the Predator. When it has been tested and checked for fit I will add it here. <b><u>Summary</u></b> I had already made a custom silicone sock mould for my MPMD so I decided to create another for my AnyCubic Predator. For additional photos and other basic information you can go to my other mould for the MPMD www.thingiverse.com/thing:3501929 For the silicone I used Permatex ULTRA COPPER gasket maker which I got for under $10 CAD. One tube makes a lot of socks. There are 4 parts to the mould. I printed with supports (touching the bed) and a skirt only. It probably doesn't need the supports but I wanted a clean hex opening in the base for the nut as well as the same for the machine screw head on the top. I altered the design a little because I couldn't reach the nut with an M3 20mm originally. With the new design it reaches and actually extends a little. I probably could remove the indent on the top but was too lazy to remove and test it. Once the parts are printed ensure they fit together properly, sand or file parts that need it to ensure you have a good fit. Also test fit your 20mm M3. I preset the nut in the base to make it easier to assemble. Start by soaping down all mould parts before assembling. Place the casing on the base first and add some high temp silicone to the container. Ensure that the corners are filled before adding the centre piece. There should not be any liquid soap on the parts or it will mix in with the silicone and cause other issues. Carefully place the centre on the protruding alignment rod and press down slowly. Note: The centre piece needs to be oriented correctly before placing it. I did not add any key to ensure that it would only fit on one way. Make sure the two larger protrusions are near the top. Once the centre piece is in place fold in any extra silicone over the top and remove any excess silicone or add if needed, then place the top piece on. Ensure that air pockets have been filled. Slowly squeeze the top piece down removing any excess silicone that squeezes out the vent holes. Use a 20mm M3 machine screw and nut to tighten the parts together. Notes: Before applying silicone wipe the mould down with dish soap which acts as a separating compound. Don't leave excess soap inside. Wipe it lightly with a paper towel to remove any excess. Squeezing the silicone through the tiny spout hole is really hard so I found that using a tube squeezer made it much easier. I assembled the base and the casing and then filled the space a little less than 1/2 full. I then placed the inner block and pressed it down slowly allowing the silicone to squeeze out around the block. I made sure it folded back in over the block. Add a little more, if needed, to ensure it covered the top of the core. I then carefully placed the top and pressed it down to a point where I could use the screw to tighten the top down. There should be enough silicone in the space to allow it to squeeze out the vent holes but not too much so that it comes out between the casing and the top. The lid should tighten down snugly but be careful not to over-tighten. Allow the silicone about 24 hours to cure before disassembling. The parts should separate fairly easily. I remove the top and bottom and then press the centre part out. If you print an extra casing it can be placed underneath to hold the top casing when pushing down. Trim off any excess silicone using a small set of scissors or clippers. Note: Don't expect perfect results all the time. If you do not let the silicone cure long enough or you don't have enough release agent on your mould expect some bad results. I also believe that if soap mixes with the silicone it inhibits its ability to cure which will cause soft areas in the sock which will require extra time to cure. I Have included a picture of a failed casting so you can see what to look for. Keep in mind that the pieces are quite thin and can tear easily. If you are having a really hard time getting the sock out of the mould it is probably due to insufficient release agent and possibly silicone that has not cured long enough. Rather than forcing the part out leave it another 24 hours and hopefully it will be cured enough that it will release from the sides. If not clean up the mould and try again.
With this file you will be able to print AnyCubic Predator Silicone Sock with your 3D printer. Click on the button and save the file on your computer to work, edit or customize your design. You can also find more 3D designs for printers on AnyCubic Predator Silicone Sock.