Apple Pocket Pi Handheld Games Console
thingiverse
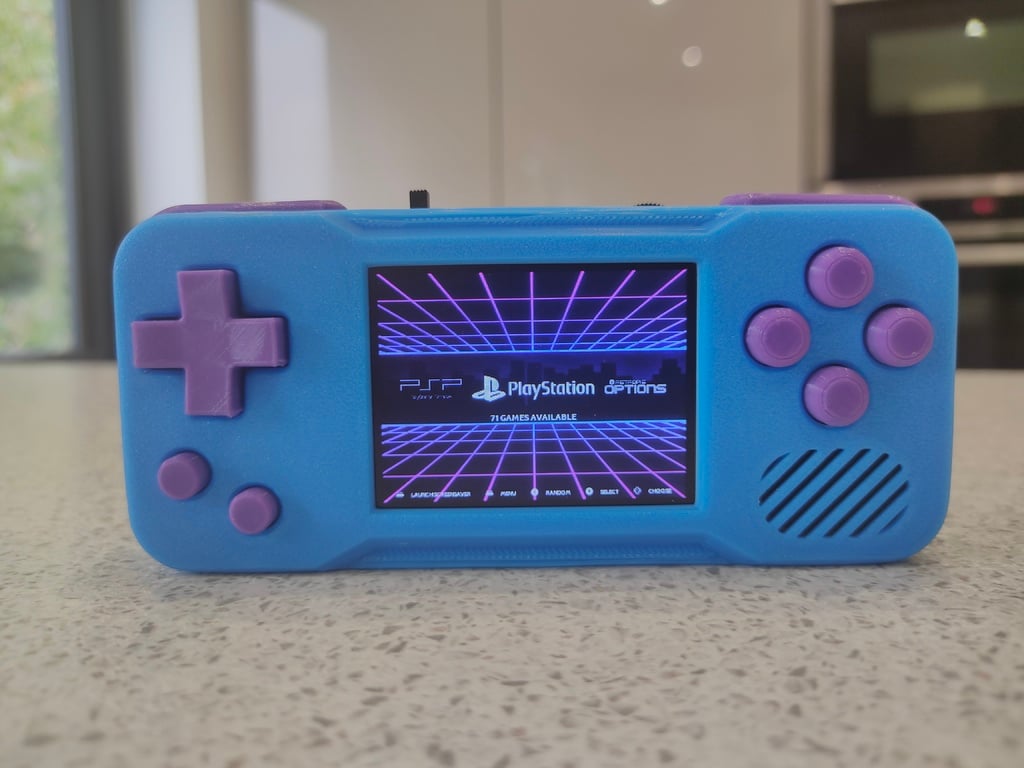
<h1>The Apple Pocket Pi!</h1> <h3>This is a homemade, retro, handheld gaming console with all the buttons and shell fully 3D printable!</h3> The little brother of my other [homemade retro console the ApplePi](https://www.thingiverse.com/thing:5781120) The design goals for this project were to build a pocket-sized handheld console which was as easy to assemble as possible whilst keeping costs low for the required functionality. <h3>Specification</h3> - 13.5cm Width x 5.9cm Height x 2.4cm Depth - Raspberry Pi Zero 2 W powered - 2.4 inch 320 x 240 SPI screen (capable of 60fps+ with fbcp-ili9341 drivers) - 3000mAh battery (providing 4 hours+ gameplay time on a single charge) - Synchronous 500mA charging via USB-C - Mono audio with a low pass filter controlled by a volume wheel potentiometer - D-pad, 4 face buttons, start and select buttons and L/R shoulder buttons - Mini-HDMI video output, Micro USB input - Built in Wi-Fi - Built-in safe shutdown hardware to ensure software/OS is correctly shutdown before power is killed - Visible LED indicators for "charging", "charged" and "low battery" - On-screen low battery overlay Running RetroPie this console is able to emulate a huge range of consoles to a high level (Atari, Amiga, Neo Geo, NES, SNES, Gameboy, Gameboy Advance, Nintendo DS, PlayStation etc) and even perform to playable levels with some games on more demanding systems (N64, PSP etc). <h3> Full build guide </h3> **The full build guide for this project, including full parts list with sourcing links, detailed instructions, build tips with plenty of photographs, screenshots and code are available at Instructables:** <p><a href="https://www.instructables.com/Apple-Pocket-Pi-3D-Printable-Retro-Handheld-Games-/">www.instructables.com/Apple-Pocket-Pi-3D-Printable-Retro-Handheld-Games </a></p> <h3> Printing Settings </h3> I used Cura as my slicer and printed all parts with a 0.2mm layer height, 0.4mm nozzle, 1.2mm wall thickness, 1.6 mm top/bottom thickness and 15% infill. The rest of the settings will depend more on the setup and accuracy of your 3D printer. I would recommend using a slower than usual print speed though if you want to get a smooth finish and accurate dimensions for screw holes. For materials many different plastics could be used, but I chose PLA+ for the shell as it was good value and easier to print with compared to PETG whilst still providing plenty of heat tolerance for this project. The buttons were printed in TPU to give them a smoother more "rubbery" feel, although these could also be printed in PLA+ with no problems. 1. Print the "Shell_Front.stl" face down to the build plate with supports enabled to allow for the bridges at the top and bottom, whilst also stopping sag on the port holes. I also used support blockers to prevent the slicer placing supports in the screw holes for the power switch (see the image included). 2. Print the "Shell_Back.stl" back down to the build plate with supports enabled to prevent sag on the USB-C port hole. 3. Print the "D-Pad.stl" in one of two ways. You can print it in the orientation it is saved in for an easier print, or for a better finish print it on its side and rotated 45 degrees. I also then dropped the model slightly down on the z-axis (-0.151mm) so that the bottom edges of the d-pad cross JUST touch (see the image included). This orientation will provide a much smoother finish to the surface, but may result in some distortion to the shape. No supports are needed for either printing option. 4. Print 4 x "Face_Button.stl" in the provided orientation with no supports. I enabled ironing for the top layer to get a good finish on my TPU buttons. 5. Print 2 x "Start_Button.stl" in the provided orientation with no supports. I enabled ironing for the top layer to get a good finish on my TPU buttons. 6. Print 2 x "Shoulder_Button.stl" in one of two ways. You can print them with the large flat top of the button face down to the build plate, but this will likely result in a messy curved corner. For a cleaner finish print them in their provided orientation, but drop them very slightly under the build plate until the side of the button JUST touches (see the image included). To keep things symmetrical, you can also rotate one of the buttons 180 degrees around the y-axis, this means that the same side will have the "flat" edge once they are fitted in the case. 7. Print 2 x "Shoulder_Button_Pin.stl" in the orientation provided with a good sized brim to prevent them falling over during printing. Remove the brim after printing. 8. Print the "Screen_Support.stl" in the orientation provided. 9. Print the "Speaker_Screw_Extender.stl" in the orientation provided. 10. Print the "Pi_Screw_Guide.stl" in the orientation provided. Once all the parts are printed test out how the fit is for the buttons in the front shell, the pins in the shoulder button holes, and how well the two halves of the shell fit together. Depending on the quality of the print you may find that some zits/blobs need to be cut off and some areas need to be sanded down to level them out. The fit of the shoulder pins into their respective holes, should be snug, but not tight. A bradawl and/or modelling knife can be used to make the holes slightly larger, and sandpaper can be used to smooth/thin out the pins themselves. Make sure they fit into their respective holes in the front and back of the shell, and when the shells are joined together they are held in place (they should have a little movement inside their holes, but not enough to pop out when the shell is closed). Ensure all the supports have been removed from the two halves of the shell (particularly the small support underneath the overhang for the left shoulder button. To get a cleaner feel for the buttons use coarse, followed by fine, sandpaper inside the button wells for the A, B, X, Y, Start and Select buttons. It will make them much smoother when pushed if you spend some time on this step. <h3> Questions? </h3> If you have any questions about this project, or are interested in building it, then just leave a comment!
With this file you will be able to print Apple Pocket Pi Handheld Games Console with your 3D printer. Click on the button and save the file on your computer to work, edit or customize your design. You can also find more 3D designs for printers on Apple Pocket Pi Handheld Games Console.