AprilTag VR Mount
thingiverse
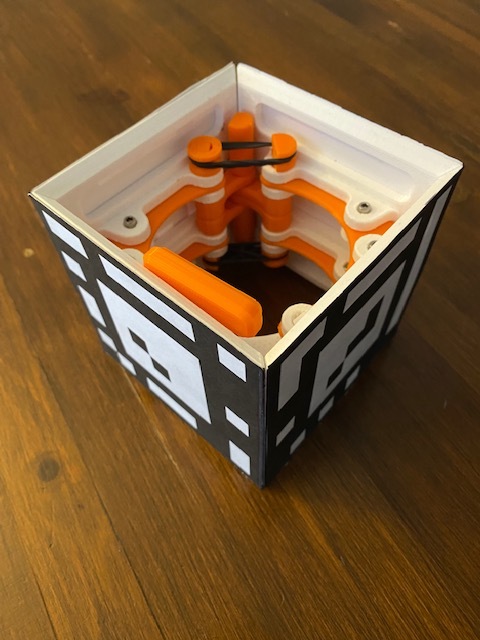
For use with AprilTag VR trackers. See below for full BOM for a single AprilTag mount. Two can be used on the legs/ankles, and half of one can be used for hip tracking. Note, BaseMountFold may be too large depending on your print bed. If this is the case, BaseMountNonFold can be used. BaseMountFold X2 - OR- BaseMountNonFold BaseMountLink X4 BandRetentionPin X2 BandRetentionCap X2 Hinge X4 HingeLimitPin X1 HingeLimitCap X1 Lock X1 LockingPin X1 Pins X1 Non Printed Parts M3 x 16mm X8 M3 nuts X6 Rubber Bands X2 Depending on printer resolution and other settings, some holes may need to be drilled out, but they should be a good fit for the most part. Depending on the strength of the rubber bands, you may not need the locking pin, but I found that it helps keep it more secure. While it hasn't happened to me, be careful not to get pinched by the mechanism when it closes. I normally wear them with either just socks or sweats on, or both. If you wear them against bare skin, you may need to add foam to keep them in place. For the AprilTags themselves, you will need to resize them yourselves to fit these. I did the best I could to modify the images, but still ended up having to fill in some spaces with a sharpie. For reference, each square side of the mount is approximately 108mm x 108mm. Apriltags can be printed and secured to the mounts via glue or double sided tape. I found that cardstock paper worked best as it is slightly more rigid than normal paper. Credit and thanks to ju1ce for the software and work that went into it. The github for it can be found here: https://github.com/ju1ce/April-Tag-VR-FullBody-Tracker#start
With this file you will be able to print AprilTag VR Mount with your 3D printer. Click on the button and save the file on your computer to work, edit or customize your design. You can also find more 3D designs for printers on AprilTag VR Mount.