AR-15 Brass Catcher - Picatinny Rail Version
thingiverse
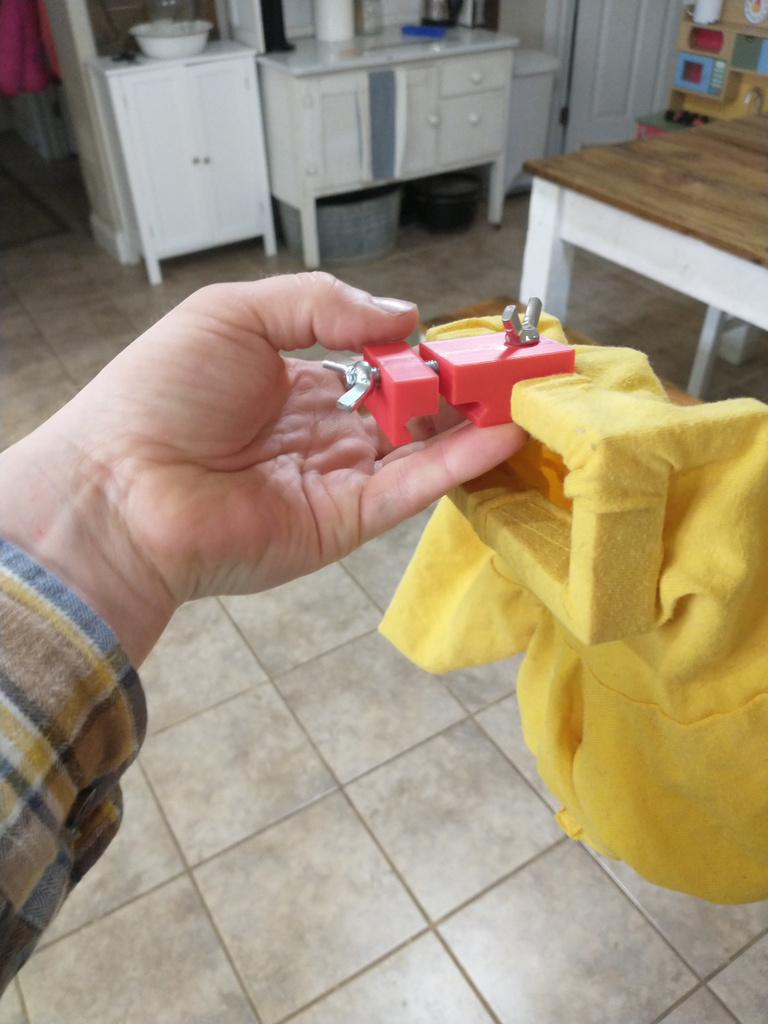
This is a brass catcher for AR-15s with a picatinny rail on top (basically any except for carry handle AR-15s). It attaches to the top rail, and then the frame is positioned so that it covers the ejection port. The main frame has 3 different holes on the top so that you have options to choose where on the rail the brass catcher attaches, in case sights or other accessories are in the way. To make it, print one each of the following pieces: - main_frame_ar15.stl - flat_top_ar15_connector.stl In addition to those pieces, assembly will require the following hardware: - 1 6mm bolt at least 27mm long - 1 threaded 6mm stud approximately 41mm long - 2 wing nuts Alternatively, you could use a second 6mm bolt that is 27mm long in place of the 6mm stud and the 2nd wing nut, but the drawback is that attaching and removing from the AR-15 might require a tool, so I prefer the threaded stud and wingnut. Like the pistol brass catcher, once the frame is printed you will need to fashion a bag of some sort to actually catch the brass. I cut the sleeve off of an old t-shirt and used it, but anything could work. To assemble: 1. Make the bag and attach it to the main frame. The 3 holes (or at least the 1 you will be using) need to be clear. Or, do what I did and just punch a hole through the bag material where the holes are in the frame. 2. Take the longer piece of the flat_top_ar15_connector.stl and connect it to the top frame. Do this by placing the connector on the top frame so that the holes line up. Then run the bolt up from the inside of the frame and through the holes. Screw on the wing nut. 3. Screw the threaded stud into the 2nd hole of the part from step 2 until it is tight.The part has 6mm threads built into it, so the stud should screw in just fine. 4. Slide the smaller piece of the flat_top_ar15_connector.stl over the threaded stud in such a way that you can see the outline of where the picatinny rail will fit and loosely screw on the wing nut. Assembly is complete. To attach to the AR-15: 1. Make your rifle's dust cover is closed. It is important that the dust cover is not open. If the rifle does not have a dust cover then don't worry about this step. 2. Loosen the wing nut that is on the threaded stud so that the two halves of the rail connector fit around the picattiny rail. 3. Tighten the wing nut so that the brass catcher is securely attached to the rail. 4. Rack the charging handle so that the dust cover door opens into the brass catcher. 5. You are now ready to load and shoot. I've included the OpenScad scripts for anyone who wants to make modifications. The main_frame_ar15.stl and flat_top_ar15_connector.stl are the STL files for the respective parts. The rail.stl file is a library that I am in the early stages of writing for working with gun rails. The threads.scad file is a library that I did not write that is released under the GPL version 3 or later. Both of the libraries are used by the flat_top_ar15_connector.stl file.
With this file you will be able to print AR-15 Brass Catcher - Picatinny Rail Version with your 3D printer. Click on the button and save the file on your computer to work, edit or customize your design. You can also find more 3D designs for printers on AR-15 Brass Catcher - Picatinny Rail Version.