AR15 Bolt Ejector Removal Tool
thingiverse
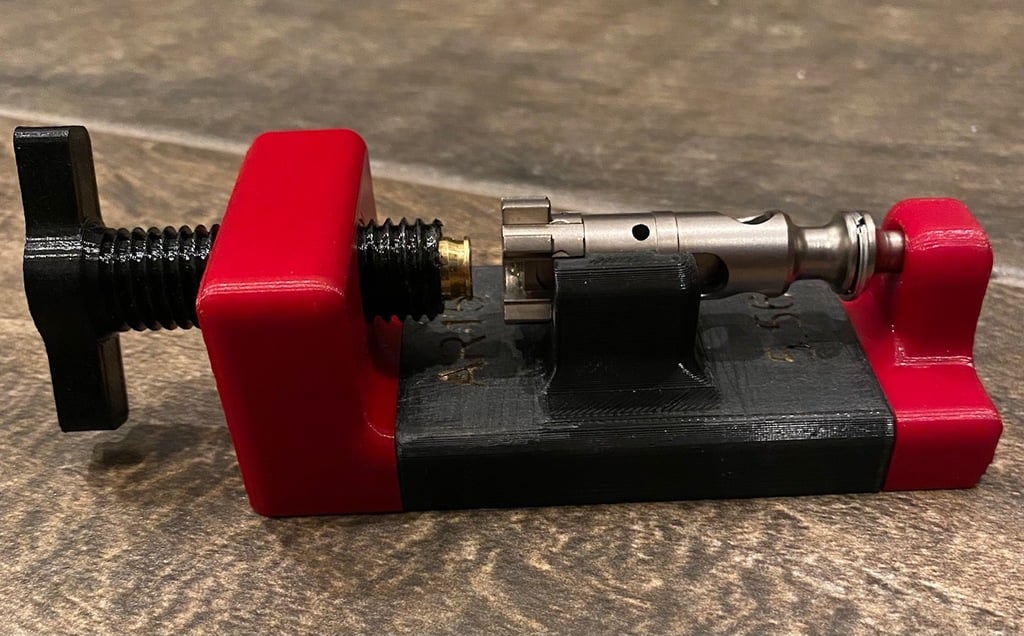
First, shout out to @ian99rt. This is a fantastic tool that works perfectly! I remixed the main body into 3 separate parts that press fit together. Add super glue or epoxy to keep parts together. I put super glue on the tabs and sprayed the pockets with Insta set CA accelerator. I also resized it properly so the .stl files are the correct sizes. ***Edited 8/29/2022 -- Adjusted tabs on Main Body for a better press fit. The video was made before this adjustment. The fit was too tight and distorted the bottom. Add some Super Glue or epoxy to keep parts together. -- Made the hole in the Tail the proper size to eliminate the need to drill. -- Made the Screw hollow to accept two 5.56/.223 cases. Printing screws vertically makes great threads and eliminates the need for supports, however, it also makes the shaft very weak. Making the Screw hollow to accept the brass 5.56/.223 cases adds strength to the shaft and provides a brass end to press against the ejector, as God intended. See Notes below. Printing Directions: -- Main Body: Bottom down. Normal supports for bottoms of tabs. Cut them off with a box cutter. No sanding or scraping is needed. -- Screw Housing: Flat side down, hole vertical. Tree Supports, Touching Buildplate, for threads and fillets. The Tree Supports will easily screw out and leave perfect threads. No tapping is required. -- Tail: Flat side down. Tree Supports for fillets. The hole for the bolt tail is the correct size - No Drilling needed! -- Screw: Screw knob down. No Supports. Notes: -- It might take a few tries and a little pressure to get the Screw started. You may need to clean up the threads at the end to help it along. Be patient and make sure it is going in straight. A little mineral oil or grease may help. -- It's not necessary but I found that printing the Screw in PETG makes it work a little more smoothly. For the hollow Screw: -- Cut two 5.56/.223 cases to 31.5mm each. -- De-cap one case to allow for air escape. -- Press the case that still has the spent primer into the knob end all the way until it is flush with the surface of the knob. -- Press the de-capped case into the other end. You should be left with about 4mm-5mm of brass case protruding from the end of the screw. https://youtu.be/UDS1lsudZ80
With this file you will be able to print AR15 Bolt Ejector Removal Tool with your 3D printer. Click on the button and save the file on your computer to work, edit or customize your design. You can also find more 3D designs for printers on AR15 Bolt Ejector Removal Tool.