Arasaka Thermal Katana - Cyberpunk 2077
thingiverse
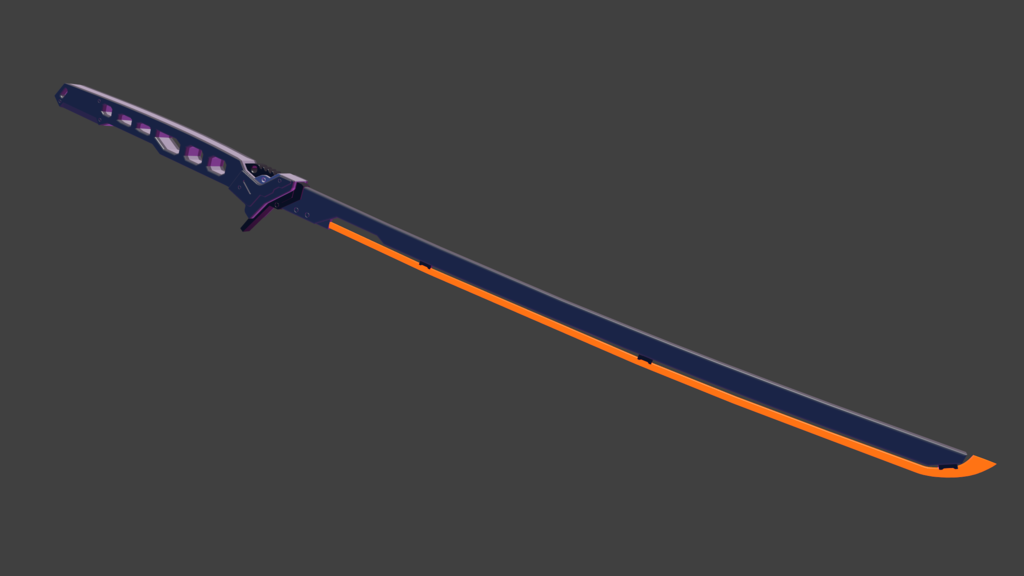
I saw the Arasaka Thermal Katana and wanted to make my own. PLEASE NOTE: THIS IS A WIP. I HAVE NOT PRINTED OR TESTED IT. PRINT AT YOUR OWN PERIL. Several people in the comments have said there are fitment/tolerance issues between multiple parts. Do not download and print this if you aren't ready to hand fit things! I will EVENTUALLY go through and fix the tolerancing, but I have other projects to do! The overall length is around 1.2m. Blade length is around 80cm. Not sure if this is a good scale for a katana or not, all Google said was "blade length over 60cm". Better assembly instructions to come when I get around to it. Refer to the assembled vs. exploded images for general assembly guidance. The parts are cut up to fit on a 220mm bed (like the Ender 3 and similar sized printers) and are provided in the ideal printing orientation. You're gonna either need to have your overhangs and supports on lockdown or have some good sandpaper and files on hand. Hardware needed: -1x 2mm self tapping screw, 6mm long -6x M3x6 SHCS (secure the grips to the tang) -4x M3x10 SHCS (secure the tang halves together) -Adhesive for whatever material you use -EL wire (made to work with this: https://www.amazon.com/gp/product/B013FZHD1K/ref=ppx_yo_dt_b_asin_title_o01_s00?ie=UTF8&psc=1) 1) Print all pieces. 2) Adhere the pieces marked "[name]_[side]_[orientation]" to each other using your huge brain to figure out the order. 3) Adhere the blade pieces together. Lower number suffix glues up with the next highest number suffix. 4) Adhere the edge pieces together. Same assembly logic as step 3. 5) Glue Guard into the Tang. 6) Glue Blade into the Guard. 7) Fit Edge Clips to Blade (no glue yet, lowest number goes at the base of the blade, highest number at the tip). 8) Glue together the Edge. Same assembly logic as step 3. 9) Disassemble EL wire control box and put the PCB in the void in the front of the tang. Secure with 2mm self-tapping screw. Route wires along channels, might have to solder the wires together if there's a connector. 10) Secure the Tang pieces together with M3x10 SHCS. 11) Shim the wires going to the battery with copper or something so they will accept power from a battery. Haven't worked this part of the design out yet. Maybe harvest parts from the battery box and hot glue them in place? 12) Secure the Grips to the Tang with M3x6 SHCS. 13) Take the tip off of the EL wire and route it through the blade. Cut to length after measuring. 14) Fit Edge up to the Edge Clips and make sure the orientation is correct. If it's not, reorient them until it sits properly. The Edge Clips have a slight curvature to them, so they should only fit well in one possible orientation. 15) Glue Edge Clips into Blade. 16) Glue Edge to Edge Clips. Notes: -The Edge pieces are meant to act as a diffuser for the EL wire. Print them out of something transparent. -This is a WIP so you will probably have to do some extra fitting for everything to work right. -Haha rectifier go BZZZZ Cyberpunk 2077 is the intellectual property of CD Projekt Red. This is fanart.
With this file you will be able to print Arasaka Thermal Katana - Cyberpunk 2077 with your 3D printer. Click on the button and save the file on your computer to work, edit or customize your design. You can also find more 3D designs for printers on Arasaka Thermal Katana - Cyberpunk 2077.