Arc Reactor Mark I
thingiverse
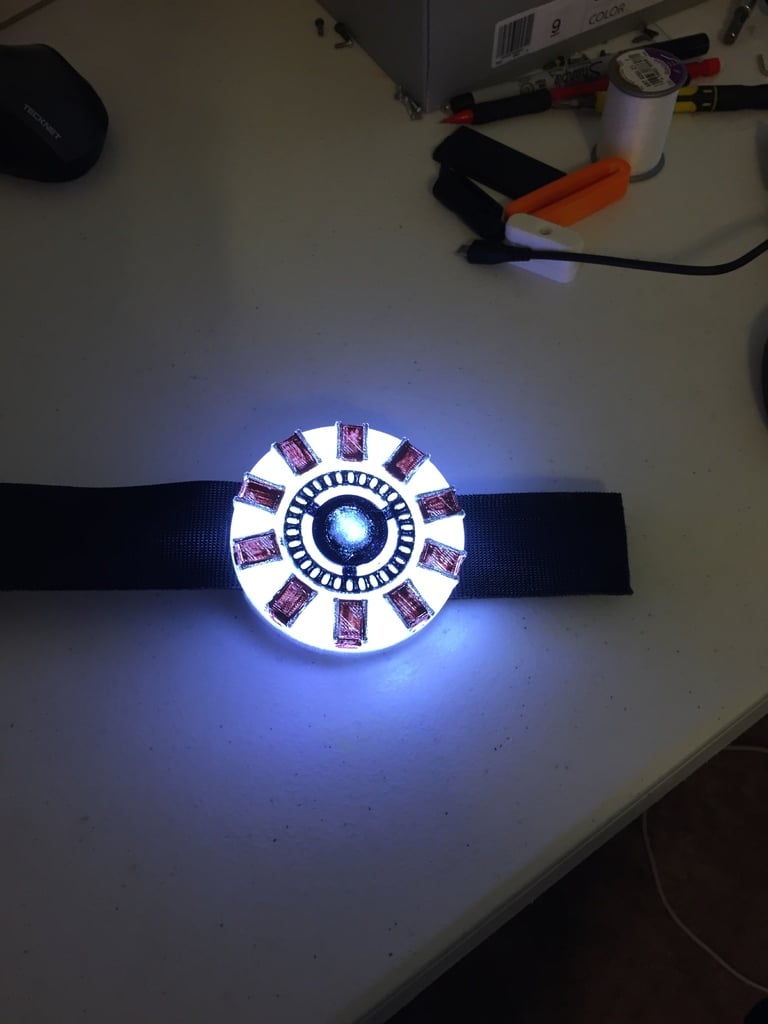
This year I wanted to make a costume that was a little more original, and still went a long with my subtle side. So, I decided to create a Tony Stark costume! There are lots of Iron Man costumes out there, very well done I might add, but I haven't seen Tony Stark around much. So, here it is, my Arc Reactor, controlled by my phone, over Bluetooth. I wrote a very simple program to change colors using an app on my phone to switch through them. Design: I had seen other Arc Reactor prints in multiple pieces, and requiring assembly. I didn't want to do that with mine, I like simple, so I designed a one piece Arc Reactor in Autodesk Inventor, and painted it with some low cost paint from Walmart. It prints flat, rotate it 90 degrees so it is laying down on the printer bed, and print with no support material. I like to design things to avoid support material when I can. I printed it using clear PLA, 1.75mm clear plastic. With clear plastic, it is important to print at 100% infill, so the light diffuses properly. Electrical: Arduino is awesome! I used a Bluno Beetle, programmed it using the Arduino IDE. For the LED lights I used 2 generic neopixel rings, a 12 Pixel RGB LED ring for the outer lights, and a 7 Pixel RGB LED ring for the inner core lights. It is all powered by a cheap power bank, 5 volts output. Programming: Here is the code I wrote, using the NeoPixel Library. // #include <Adafruit_NeoPixel.h> #define strip_pin A2 #define strip2_pin A1 #define strip_count 7 #define strip2_count 16 Adafruit_NeoPixel strip = Adafruit_NeoPixel(strip_count, strip_pin, NEO_RGB + NEO_KHZ800); Adafruit_NeoPixel strip2 = Adafruit_NeoPixel(strip2_count, strip2_pin, NEO_RGB + NEO_KHZ800); int neo_delay (500); int showType = 0; char switch_show; int done = 0; void neo_setup() { strip.begin(); strip2.begin(); for(int i=0;i<strip_count;i++){ strip.setPixelColor(i, strip.Color(150,150,150)); strip.show(); delay(1); } for(int i=0;i<strip2_count;i++){ strip2.setPixelColor(i, strip2.Color(150,150,150)); strip2.show(); delay(1); } } void setup() { Serial.begin(115200); neo_setup(); } void loop() { if (Serial.available()) { switch_show = Serial.read();// add it to the inputString: Serial.println(switch_show); cycle_show(); } } void cycle_show() { switch (switch_show) { case 'a': done = 0; colors(0,0,0); colors1(0,0,0); break; case 'b': colors(0,0,150); break; case 'c': colors(255,255,255); break; case 'd': colors(255,255,255); delay(200); colors(0,0,0); break; case 'e': colors(0,0,0); delay(10); colors1(0,255,0); break; } } void colors (int a, int b, int c){ for(int i=0;i<strip_count;i++){ strip.setPixelColor(i, strip.Color(a,b,c)); strip.show(); delay(1); } for(int i=0;i<strip2_count;i++){ strip2.setPixelColor(i, strip2.Color(a,b,c)); strip2.show(); delay(1); } } void colors1 (int a, int b, int c){ for(int i=0;i<strip_count;i++){ strip.setPixelColor(i, strip.Color(a,b,c)); strip.show(); delay(1); } } //
With this file you will be able to print Arc Reactor Mark I with your 3D printer. Click on the button and save the file on your computer to work, edit or customize your design. You can also find more 3D designs for printers on Arc Reactor Mark I.