Arcade Button Light Switch
thingiverse
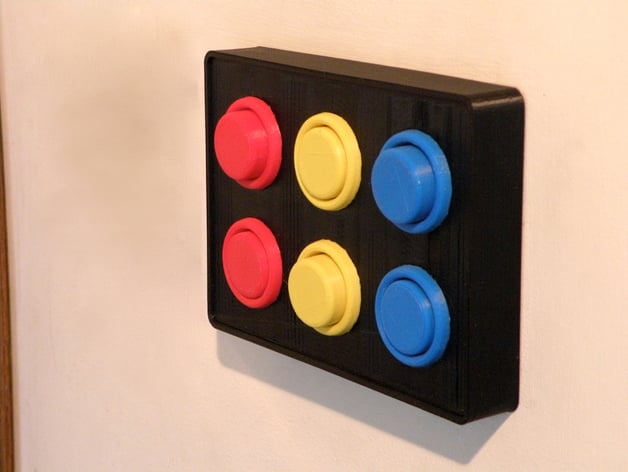
Revamp your light switches with colorful combinations of button and box designs. Choose from single, double, or triple switch configurations for customization. Note that this works only for rocker switches, while toggle switches need replacement. To begin, select and print the required lids, boxes, and plates based on your chosen configuration. For the printed parts, rings demand support during printing in MakerWare. Some designs have a 0.015 deep pocket at the back to ease removal from the printer bed. Prepare for part assembly by potentially smoothing or filing edges for proper fitment. Rings may require the most attention for seamless sliding of buttons. Apply hot glue to the rear side to attach rings onto the lid, followed by assembling the box and lid together. Ensure a snug fit without squeezing the wall sides while gluing. For final assembly, ensure correct spacing from the wall using a light switch spacer if necessary. Fasten adapter plate screws cautiously to avoid bending tabs. Insert buttons into rings and snap the complete assembly onto the adapter plate, ensuring a flush fit with the wall. Adjust as needed for optimal alignment. Now, enjoy playing with your new arcade-style light switches, assigning fun names to buttons, and decorating the lids for added flair.
With this file you will be able to print Arcade Button Light Switch with your 3D printer. Click on the button and save the file on your computer to work, edit or customize your design. You can also find more 3D designs for printers on Arcade Button Light Switch.