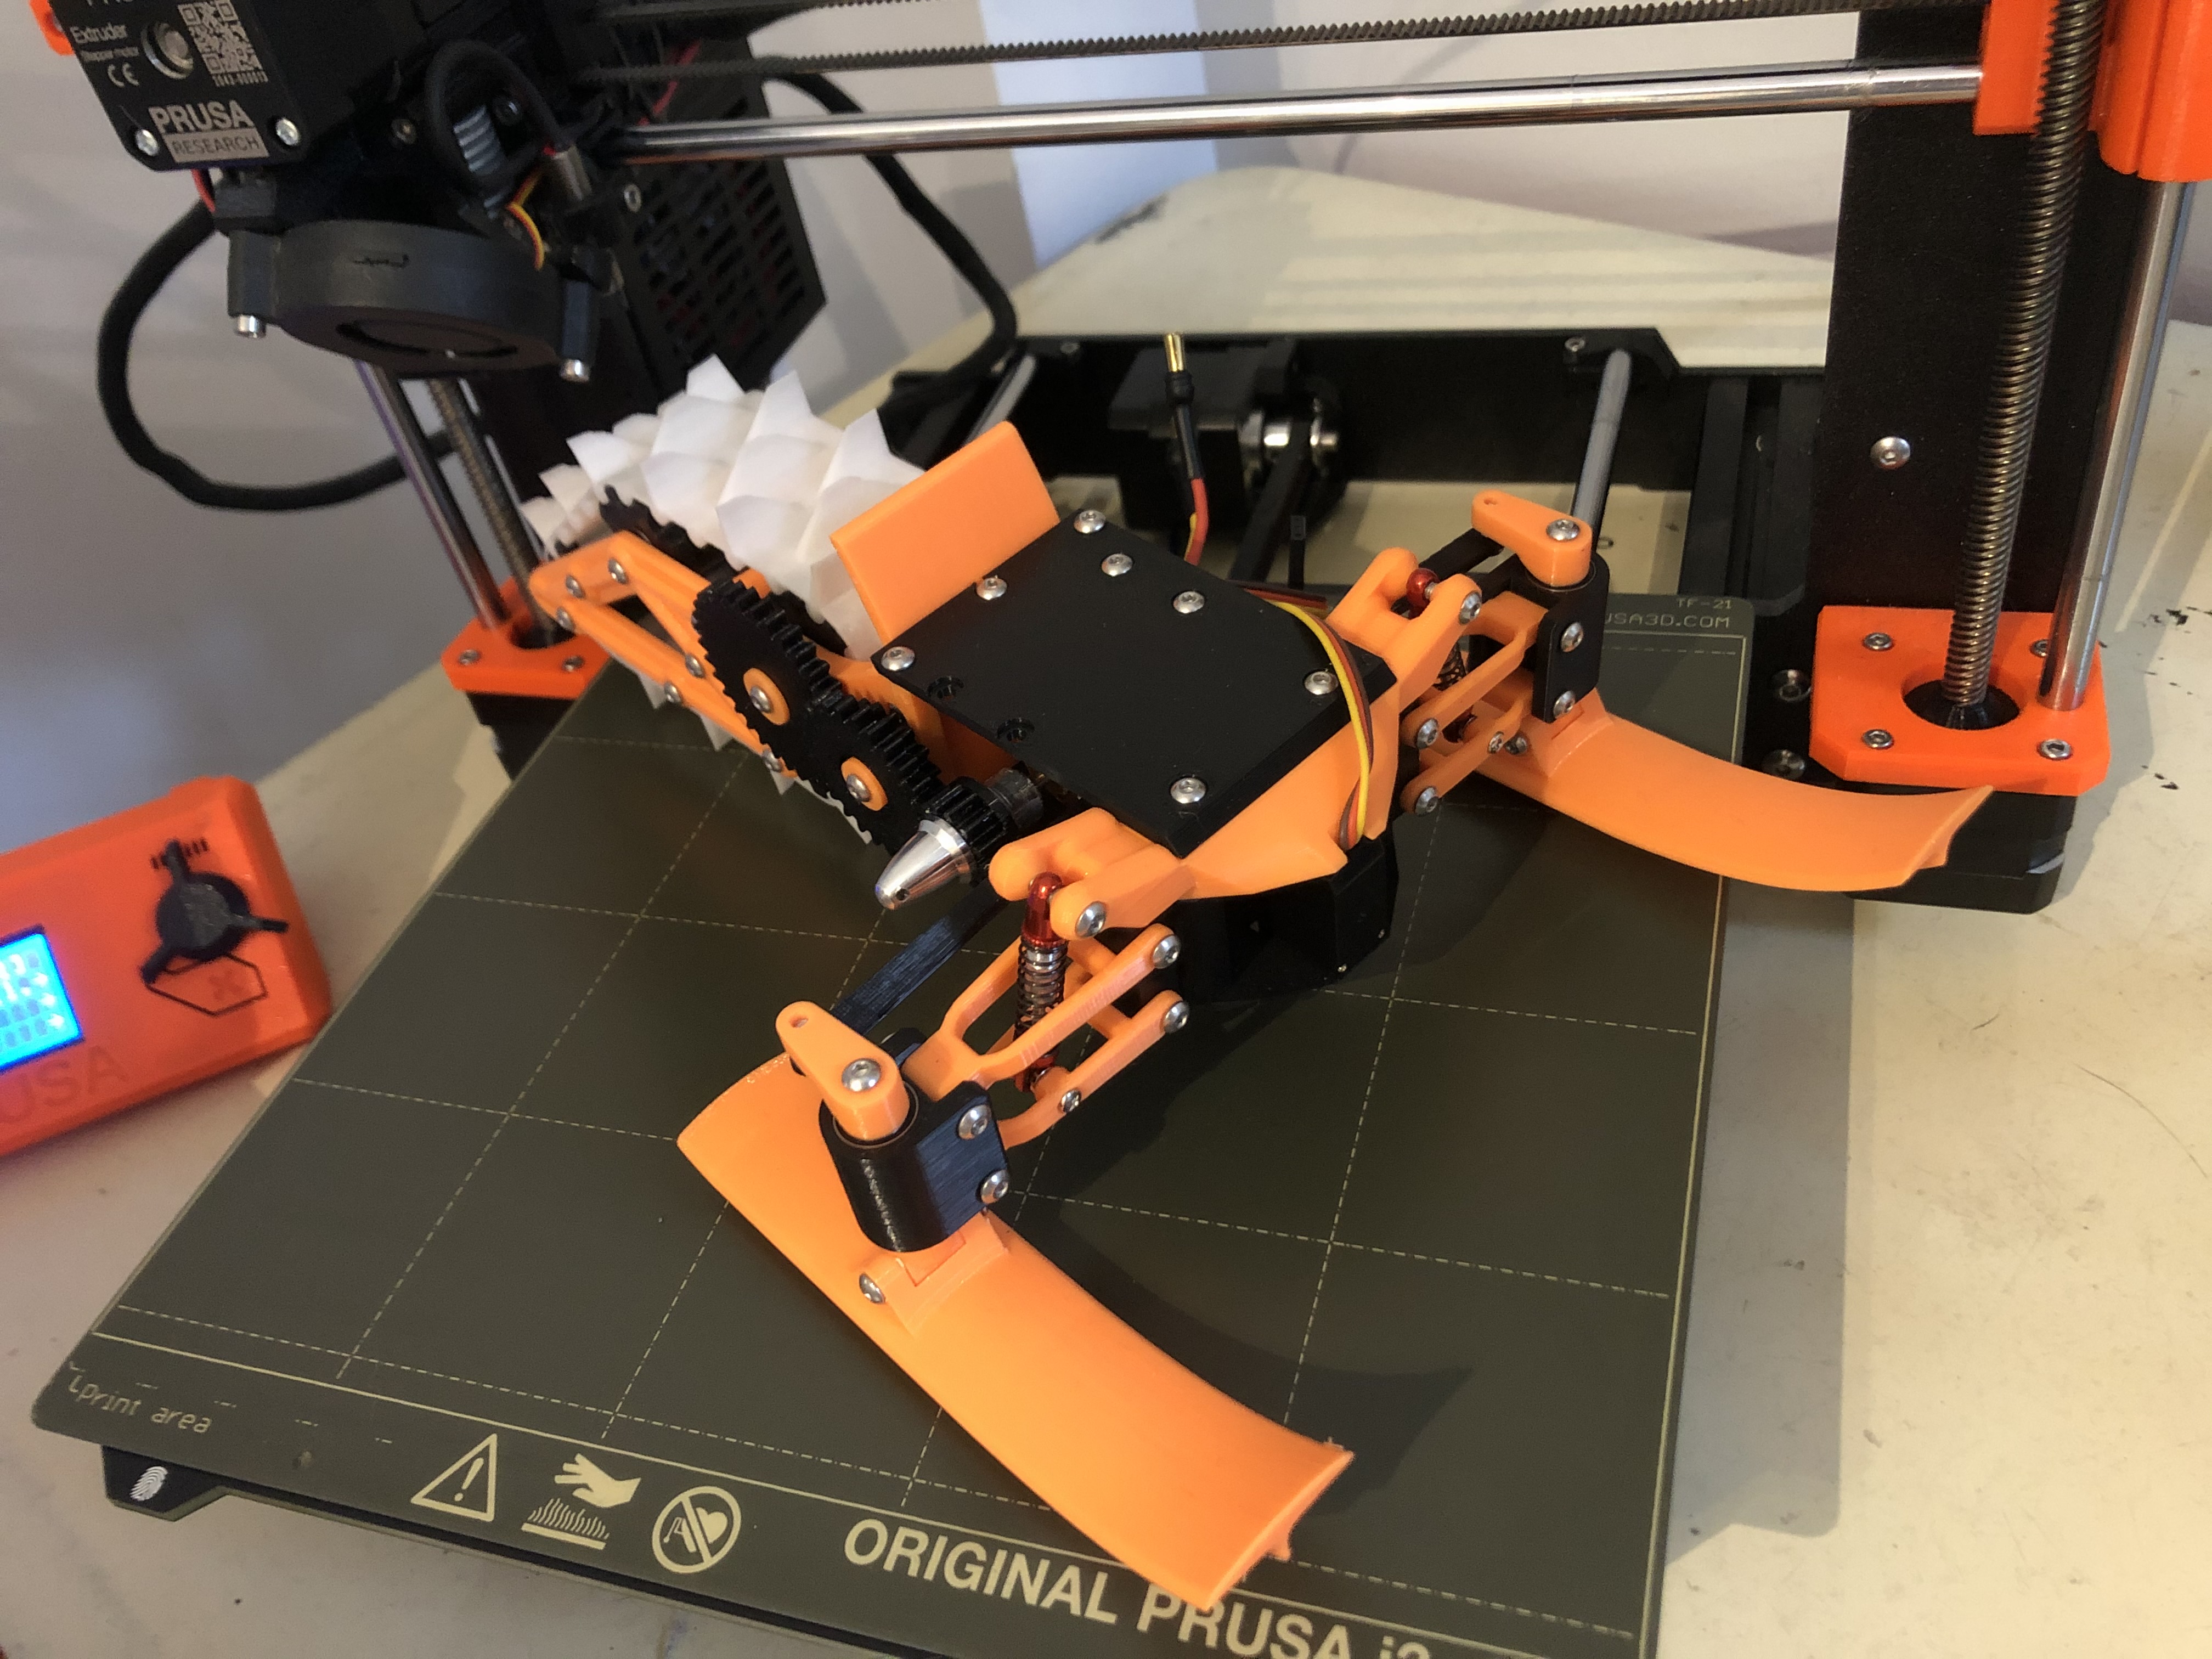
Arctic Tinyrider RC snowmobile
prusaprinters
<p>It's my remix scaled down of the snowmobile of 3Drcnc.</p><p>Lot of work and test on this open source project to make it easy to print, easy to build, powerful, reliable and easy to buy parts to make it (same screws and bearings for all the build)</p><h3><i><strong>Description under Video:</strong></i></h3><p> </p><p><strong>Build Guide Video: </strong></p><figure class="media"><oembed url="https://youtu.be/Brg1yoeNB7A"></oembed></figure><p><strong>Demonstration video:</strong> </p><figure class="media"><oembed url="https://youtu.be/7EO6LgxKWQM"></oembed></figure><figure class="media"><oembed url="https://youtu.be/D3DiUTS3wpk"></oembed></figure><figure class="media"><oembed url="https://youtu.be/IF48WOiwzRA"></oembed></figure><p>what you need:</p><ul><li><strong>75x M3x8 BUTTON HEAD SCREW</strong></li><li><strong>14x BEARING MR128: 8x12x3,5</strong> (buy 20 if you want to change your gearing ratio more easily)</li><li><strong>2x SHOCKS WPL D12</strong> (2screw M2,5 included with shocks for bottom shocks mounting) A<i>lternately you can print hard shocks and buy 2x M2,5x15</i></li><li><strong>SERVO EMAX ES08MAII</strong> <i>Alternately you can use any 9g standard size servo metal</i></li><li><strong>ESC 30A</strong> (I use cheapest brushless esc 30A)</li><li><strong>MOTOR BRUSHLESS 2212/2200KV</strong> (I found better speed and torque with high kv motor and appropriate gearing) but you can use any motor with max 28mm diameter front or rear mounting. I designed the pinion with 5mm hole for the 2212 outrunner motor or 3,175mm hole with m3 grub screw for inrunner motor. Motor mount holes dimensions: 16mmx19mm</li><li><strong>260g Pla</strong> (200g snowmobile + 60g for solid track)</li><li><strong>60g PETG</strong> or heat resistant filaments (gearing and motor mount)</li><li><strong>22g TPE 85A</strong> for flex track (95A TPU work really less efficiently) <i>Alternately you can use solid PLA track</i></li><li><strong>1,1M of 1mm steel wire for solid track</strong> : (28x3,8cm) A<i>lternately you can use flex track</i></li><li><strong>3s lipo 650-1500mah </strong>(650-800mah 3s lips work great with good ratio between time/weight/power/size)</li><li><strong>Radio and receiver </strong>2channel minimum</li><li><strong>Velcro</strong> for esc/receiver/battery installation</li></ul><p><strong>Support needed for ski, left side plate, right side plate</strong></p><p><strong>STL are in good orientation for printing</strong></p><p><strong>Designed for printing with 0.2mm layer height</strong></p><p><strong>At the end of each parts file name the quantity of parts to print is indicated (if more than one)</strong></p><ol><li><strong> Motor Mount and all gearing printed in PETG with</strong><i><strong> 2 wall/100% infill/no cooling</strong></i></li><li><strong>Track printed in TPE 85A with </strong><i><strong>1wall/0% infill/5bottom/6top layer </strong>(print slowly and don't use retraction with this filament if you don't have direct drive extrudeur)</i></li><li><strong>Drive gear part 2 printed in PLA with 2 wall/100% infill</strong></li><li><strong>All other parts printed in PLA with 3 wall/20% gyroid infill/4bottom/6top layer</strong></li></ol><p> </p><p>If your printer has a good calibration, all parts are supposed to fit perfectly together and some other parts like bearing (inside and outside), spur gear and servo ski hinge fit with tight tolerance, it’s normal. You can sand it a little if it's too hard to insert/remove parts. Tested on Prusa MK3S+ and Creality Ender 3v2</p><p>On the Upper shocks mount and arm mount, arrows point to the front to help during assembly</p><p>If you project to use gearing in PLA+, pinion melt after 2/3mn run at high speed, it's not a good idea. I didn't broke any PETG gear</p><p>You need to glue idler male and female together or you can print idler in 1 part with support </p><p>I use gearing with ratio 3 or 4,1 (G3/G4,1) with 12 teeth pinion gear for my 2212/2200kv motor but I design all gearing for ratio between 2,1 at 8,8. you can calculate the ratio with this formule→ ratio=(teeth spur gear: teeth small middle gear)x(teeth big middle gear:teeth pinion gear)</p><p>I don't use waterproof electronic and I don't have any problems with water, even when I finish with 2cm of snow on the electronic. I just use tape to protect unused receiver connector pins</p><p>motor and esc stay under 45° during the run with TPE 85A and draw only 5A at full throttle during static test</p><p>you can expect approximately 10mn of run depending the snow conditions, electronic setup and temperature</p><p>I didn't test power difference between solid track and flex track but flex track make less vibration and work more quietly: it's better for high speed</p><p>If you use TPU95A for the track you need to cut the little bridge between each round shape and use a more higher gearing<strong> </strong>ratio to avoid motor overheating</p><p>It's a very reliable and resistant design. If you are using the same setup and print settings as me you can pretty much use it non-stop and don't have to worry about parts breaking while using it. During all my test, I always pushed the snowmobile at the maximum of is potential and the only part I broke was the rod linkage because of a huge front impact. Design make it able to do a lot of rollover/flip witouth breaking </p><p>I use Esun PLA+, Esun PETG, Esun Elastic TPE 85A</p><p> </p><p><strong>G-code included for </strong></p><p><strong>-Prusa MK3S+</strong> with standard 0,2mm quality, filament setting Esun PLA (standard) and prusament PETG modified (245° during print, without cooling and 0,8mm retract). Lot of modifications in setting for TPE profil (loose idler screw the maximum as possible)</p><p><strong>-Creality Ender 3V2</strong> with 0,2mm quality, filament setting Prusament PLA (modified lower speed) and Generic PETG (modified lower speed), no retraction to profil for TPU track </p><p>If you have any idea for improve this design you can send me a text or use step file</p><p>i Inclued Step file with my upgraded Tinyrider in progress to test for better performance </p><p>I use same hardware/électronique for V2, just design improvement </p>
With this file you will be able to print Arctic Tinyrider RC snowmobile with your 3D printer. Click on the button and save the file on your computer to work, edit or customize your design. You can also find more 3D designs for printers on Arctic Tinyrider RC snowmobile.