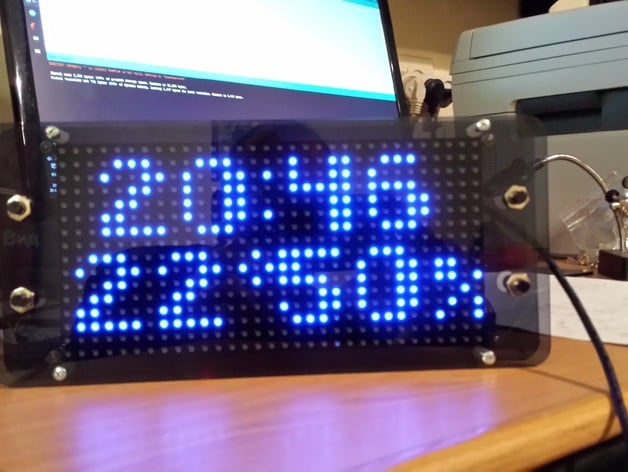
Arduino based clock using 16x32 RGB LED matrix
thingiverse
Arduino Based Clock with Illumination, Temperature, and Humidity Sensors Using a 16x32 RGB LED Panel Inside the clock.zip file lies everything needed to replicate this remarkable timepiece. Eagle schematic and PCB layout files, sketches, and case drawings await your attention. In the seeedstudio_gerber_files.zip folder, you'll find Gerber files tailored for Seeedstudio's Fusion PCB service. Upload these files to place an order; the total cost should be approximately $120. If more explanations are needed to reproduce this design, I'm happy to provide them upon request. Here's a step-by-step account of how I brought this project to life: 1. The LED panel arrived, and it was time for its first test. 2. After making necessary adjustments, the first prototype took shape. 3. With each refinement, the clock neared completion. To build your own version, follow these instructions carefully: Parts List You'll need the following components: 1. 16x32 RGB LED matrix panel - $25 Any 16x32 RGB LED matrix with a HUB75 interface and 1:8 scan rate will suffice. 2. SparkFun Humidity and Temperature Sensor Breakout - HTU21D - $15 3. SparkFun Level Translator Breakout - PCA9306 - $7 4. DS1307 - $4.74 5. CRYSTAL, 32.768KHZ, 12.5PF - $1 6. ATmega328 with Arduino Optiboot (Uno) x2 - $11 7. CRYSTAL, 16MHZ x2 - $0.7 8. E-SWITCH x2 - $0.2 9. MCP1700 - $0.3 10. RUEF250U FUSE (optional) - $0.35 11. Socket, DIP Socket, 28 x2 (optional) - $1.3 12. BATTERY CONTACT FOR 12MM CELL - $0.5 13. Ceramic Capacitor, 22 pF x4 14. Molex connector 4pin x2 15. Molex connector 2pin 16. Ceramic Capacitor 1 µF 17. LED 5mm x2 18. Ceramic Capacitor 0.1 µF x10 19. Resistor 10k x6 20. Resistor 4.7k x2 21. Resistor 330 x5 22. Resistor 1k x2 23. Electrolytic Capacitor 100 µF x2 24. DC Barrel Power Jack/Connector I hope I haven't missed anything essential. If you're not interested in incorporating temperature and humidity sensors, you can save nearly $22 by forgoing the HTU21D and PCA9306.
With this file you will be able to print Arduino based clock using 16x32 RGB LED matrix with your 3D printer. Click on the button and save the file on your computer to work, edit or customize your design. You can also find more 3D designs for printers on Arduino based clock using 16x32 RGB LED matrix.
