Arduino controlled photogrammetry 3D-scanner
thingiverse
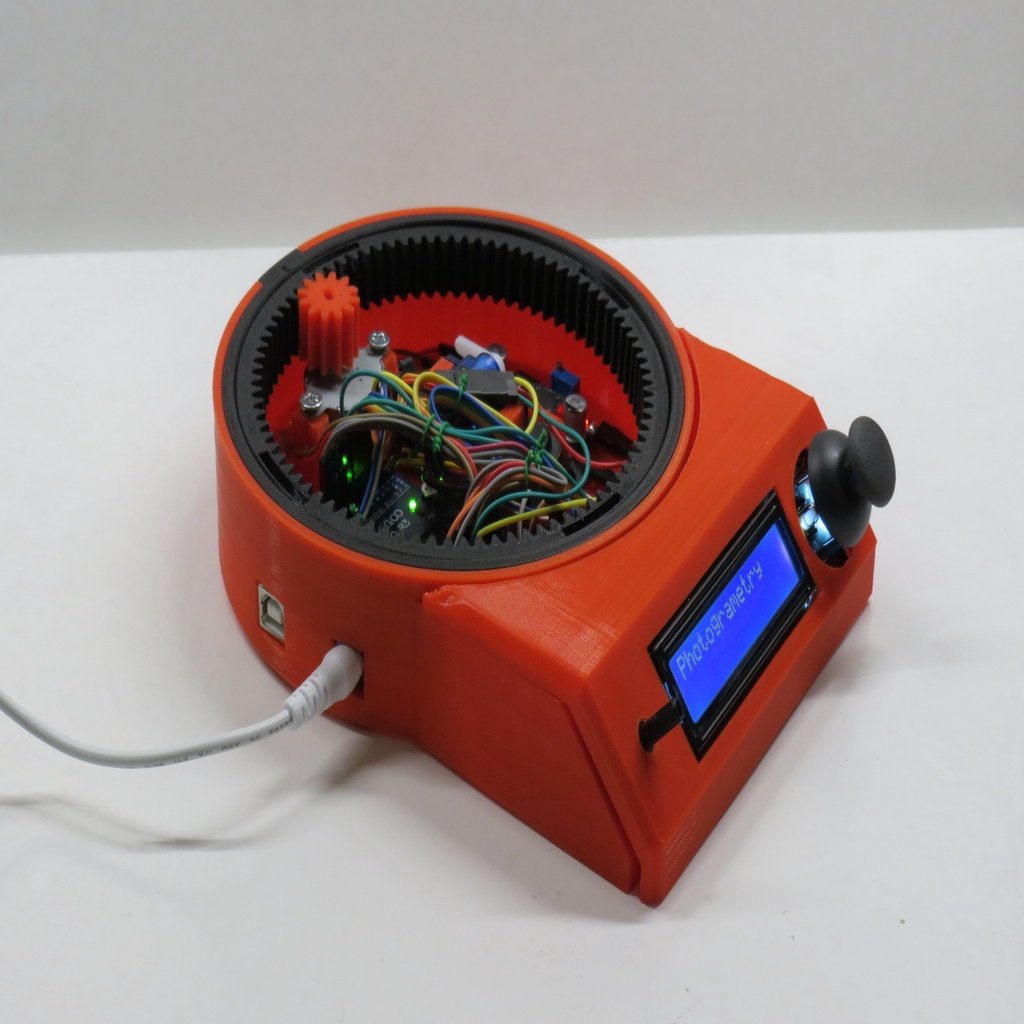
I upgraded my hand-cranked turntable to include a stepper motor for cinematic shots and 360-degree photo capture. The new design incorporates features that make it more functional than a regular turntable. One of the key improvements is the addition of a Bluetooth remote, which allows users to control the camera remotely using a smartphone connected to the remote inside the turntable. I chose this solution because Apple devices often have trouble connecting to HC-05 and HC-06 Bluetooth modules. The user can adjust the number of photos taken from 2 to 200 through the Arduino program. These images can be converted into 3D models later using photogrammetry software, which I use is Autodesk Recap Photo. In addition to photo capture, the turntable also features a joystick for manual control and a DC-DC step-down regulator for power supply management. The stepper motor driver and controller are connected to the Arduino board, allowing for precise motor control. The design includes a 3D-printed housing with a removable top plate for easy access to the electronics. I used a variety of materials, including aluminum and PVC, to create a sturdy and durable structure. I've made my project files available for free so that others can build their own turntables. If you'd like to support my work, please consider making a donation through PayPal. You can find more of my projects on Thingiverse, including the Universal Motion Controller, 3D-printable Davinci catapult gift card, and Arduino-controlled photogrammetry 3D-scanner. Have a nice day!
With this file you will be able to print Arduino controlled photogrammetry 3D-scanner with your 3D printer. Click on the button and save the file on your computer to work, edit or customize your design. You can also find more 3D designs for printers on Arduino controlled photogrammetry 3D-scanner.