Arduino IR Sensor Module Case
thingiverse
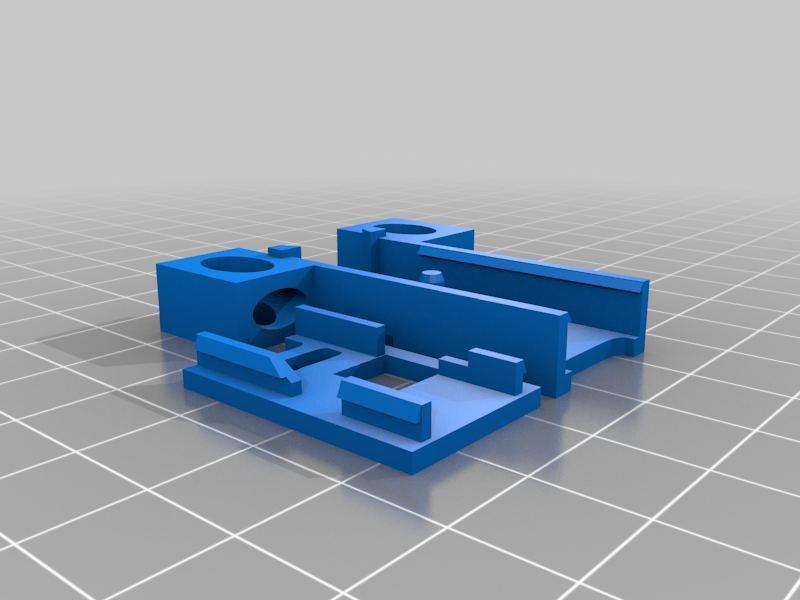
This is a 2 piece case for a standard IR module or photoelectric module for arduinos or other small robotics projects. I developed these in order to fix the IR modules to racks and pipes in an inventory setting to detect inventory levels. The design allows large Zip-ties to be passed through holes at the base of the case to fix it in place. It is made to securely fix a 3-pin male connector made for standard WS8212 LED strips. You can buy them in bulk sets of 50 from amazon. 1. place the IR module into the box base, putting the post through the module hole. 2. align the top of the module box so that the post is in the middle of the horizontal slot. 3. press the top and bottom together until a *click* is heard. 4. Push the 3-pin connector all the way in until an audible *click* is heard. To remove the sensor from the connector, lift the connect upwards about 30 degrees to allow the connector to slide out. The module posts may need to be pressed back down gently. Once the top and bottom of the module box is shut on a module, the only way to remove it is to destroy the box. I recommend using snips to make a small cut on the front wall of the box, next to the diodes. This will split the 3d-printed connection points on both sides and the assembly should easily come apart.
With this file you will be able to print Arduino IR Sensor Module Case with your 3D printer. Click on the button and save the file on your computer to work, edit or customize your design. You can also find more 3D designs for printers on Arduino IR Sensor Module Case.