Arduino mass production adapter
thingiverse
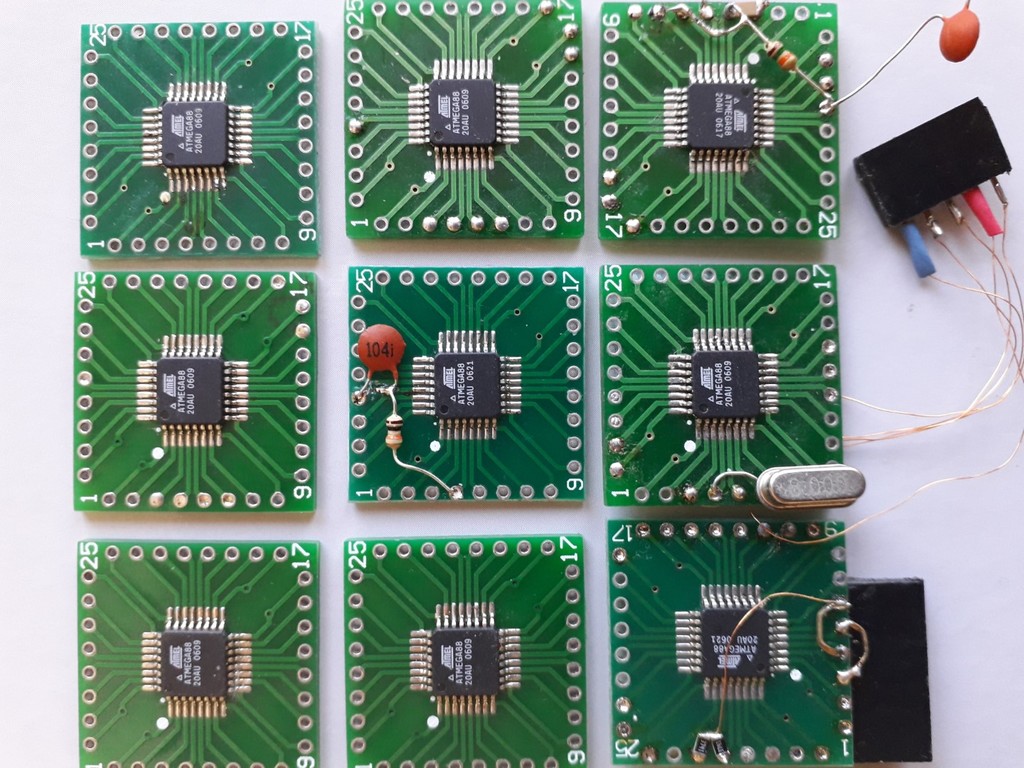
Arduino adapters for mass production Arduino board prices went up lately, and since I had a lot of Atmega88 chips lying around, it was time to mass produce my simple Arduinos. With the adapters one can load the Arduino ISP and/or user program into a raw chip in seconds. Solder the TQFP chip on the ready-made PCB, drop it in the adapter. The pogo pins make contact and off you go. The minimalist Arduino board has just two additional components, runs on 8 MHz internal clock, supply range 2.7 to 5V. Supply it with 3.3V so no level shift necessary for 3.3V devices. Atmega 8, 88, 168, 328 all OK. Parts : TQFP32 Atmel chip, TQFP32 adapter PCB, pogo pins 1.3 mm head, flat cable with connector, USB to serial adapter (must have DTR signal), working Arduino(UNO) or USB_ISP board. Source : Aliexpress, Ebay etc. Software : Extreme Burner AVR. 3D print the parts. Get a TQFP adapter board and drill up the pogo pin positions to 1mm (see pin arrangement below). Cut a similar sized perfboard PCB and drill it to 1mm as well. Push three pogo pins through, check pin height with the 3D piece and solder them in the adapter board from the back, avoiding any solder getting to the neck of the pin. When doing this push the pins into the second PCB so that they just protrude and solder these points too. Accuracy is important. Solder in the rest of the pins, there is room for filtering capacitors and the reset RC circuit between the PCBs as well. Finally, pull in and solder the (flat) cable on the assembly. Solder the chip on the TQFP PCB, see below how. No other components are necessary at this point. ISP program load : push and hold the PCB in the AVR-ISP adapter and run the Arduino example ArduinoISP, or Extreme Burner with the correct ISP hex and fuse files. Select 8Mhz internal clock, rest is default. Both programs report a successful write. Program your first board with an Uno and save the files and fuse data for Extreme Burner from there. User program load : lock the PCB in the adapter (with a matchstick, see picture), connect to USB-Serial adapter. Pin arrangement AVR-ISP adapter : 3 GND, 4 +5V, 29 Reset, 15 MOSI, 16 MISO, 17 SCLK. 100nF SMD between 3-4. Pin arrangement Arduino adapter : 3 GND, 4 +5V, 29 two parts connect : 10kOhm to pin 4, 100nF to DTR, 30 RXD, 31 TXD. 100nF SMD between 3-4. The adapter's RXD connects to the USB Serial's TXD and vice versa. If this does not work, swap wires, beep out the connections with a DVM : Arduino 30- CH340 2, 31-3, DTR - 13. The minimalist Arduino system: Atmega chip, 10k from chip29 to chip4, 100nF to 29 (cut PCB track to pin 29 and solder the 100nf through cut, creating a decent DTR point on the adapter PCB). For a full system, see the Arduino schematics. If you add a quartz crystal, need to re-run AVR-ISP with new clock settings. Soldering the chip on PCB with a normal soldering iron: smear flux on PCB, position the chip, pick up very small amount of fresh solder with the iron's tip. Position the iron along the centerline of the chip's corner pin. Touch the solder tip to the very end of the chip's pin, heat it up to see the tin flowing in. Solder the opposite corner, check position once more and repeat this with all pins. Never approach a pin from the side, this will shortconnect many pins at once. Use solder wick with flux to remove the shortconnection.
With this file you will be able to print Arduino mass production adapter with your 3D printer. Click on the button and save the file on your computer to work, edit or customize your design. You can also find more 3D designs for printers on Arduino mass production adapter.