Arduino Micro IR Case
thingiverse
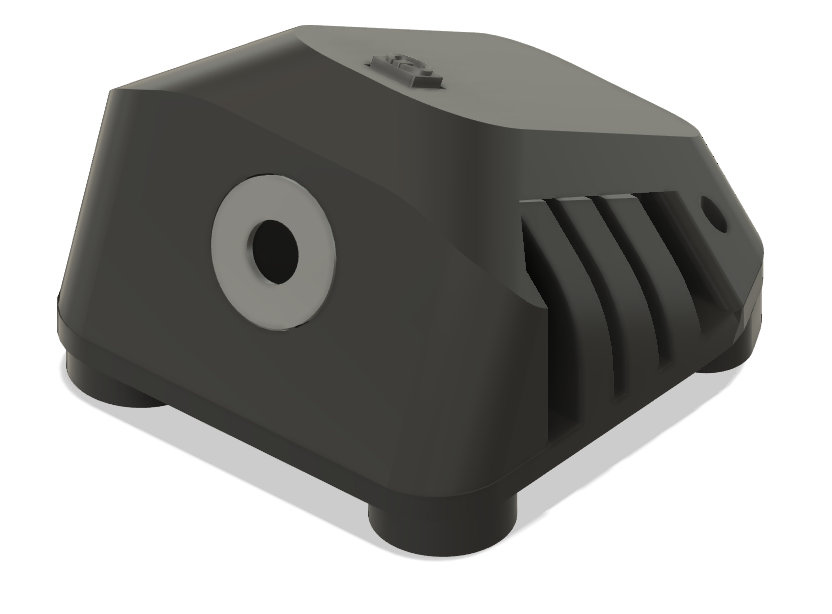
3d Print: 1x Bottom.stl 1x Button.stl 2x Foot (Preferably soft material) 1x Footb1.stl (Preferably soft material) 1x Footb2.stl (Preferably soft material) 1x Lock 1x Top Other Materials: 1x Arduino Micro 1x TSOP4838 IR-module 38 kHz 1x Shim Washer 1x Floppy Disk 6x Small Screws 1. Put ir-module through front of case(might have to cut some of the inner stop off depending on size) 2. Solder Ir-module to Arduino Micro with short thin wires. Please check your ir-modules schematic for pins. 3. Put the Arduino Micro in the bottom part with usb pointing towards the back. 4. Screw the lock piece with the indent facing forward to the bottom part with the Arduino in between. 5. Place the button in the top part square hole. Then place the top part on the bottom part. Button should slot into the lock piece dent and clicking the button should click the button on the Arduino. 6. Screw the circular foot pieces on the front bottom of the case so that it screws the top and bottom together. Then attack the two irregular feet at the back so that they match the bottom case. 7. Take the disk out of the floppy disk and glue it on the bottom of the shim washer. Make sure to not get any glue in the center of the washer. Then cut around the washer so there is no floppy drive disk visible on the outside. 8. Put a small amount of glue where the washer should be, then glue the washer to the case. Make sure to check so that the ir works through the floppy disk. Done. I spent some time sanding mine and then painting it.
With this file you will be able to print Arduino Micro IR Case with your 3D printer. Click on the button and save the file on your computer to work, edit or customize your design. You can also find more 3D designs for printers on Arduino Micro IR Case.