Arduino Nano Pin Protector
thingiverse
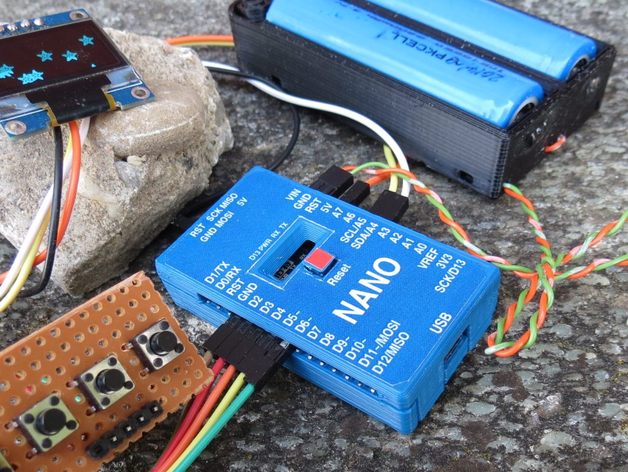
I really enjoy working with an Arduino Nano (or one of its numerous equivalents), as it offers the same functionality as the Uno, but on a significantly smaller footprint. Nevertheless, what I prefer less are the vertical pins located underneath the PCB, since they are exposed to the workspace and therefore vulnerable to wrong contacts and even shorting due to tools or other metallic items on the desk. Also, given that the leads are connected to the lower side of the PCB, it can be difficult to maintain the Nano upright, ensuring that the pin labels and LED indicators on the top side remain visible. This project aims to address these challenges by making all pin connections horizontal and providing a casing around the Nano that safeguards all pins from accidental exposure and keeps the Nano in a stable horizontal position. To achieve this, right-angle pin headers are mounted on the upper side of the Nano PCB instead of traditional straight headers. Two 15-pin single-row and one 3x2-pin double-row pin header arrays are required. By doing so, all connections to the Nano become horizontal and are safely "hidden" between the upper and lower parts of the shell. The newly exposed horizontal pin connectors increase the surface area of the Nano casing, allowing for ample space to attach a sticker on the top shell with legible labels identifying each pin in a clear font. The top part of the shell features a cutout for the four LEDs and incorporates an integrated RESET button printed in-situ, secured by its tapered shape. Considering that various variants of the Nano design exhibit slight differences in LED placement and RESET button position, their longitudinal alignment is adjustable through parametrized values (ledy and resety) measured in millimeters from the USB end of the PCB, making it straightforward to adapt as needed. In addition to this SCAD file, a corresponding PostScript document is available that generates labels for affixing to the top portion of the shell. Similar to the first file, this script allows customization of the exact position of the RESET button and LEDs (using the same variables ledy and resety). For convenience, ready-to-print STL files and PDF documents are provided for the three primary variants of the Nano: Original Arduino Nano, "Baite" Compatible, and "New" Nano 3.0 Compatible with small LED spacing. To utilize these assets, measure the distances between LEDs and the RESET button from the USB end of the PCB, then print out corresponding STL files or modify the SCAD and PS sources accordingly to create customized shells and labels. Updates have been implemented: - An enhanced version of the Nano Pin Protector features improved airflow under the lateral pins to facilitate better ventilation beneath the Nano PCB. Furthermore, an additional variant (ledy=33 and resety=27) is included, allowing for a snugger fit on select Nano versions. - Individuals seeking more powerful 32-bit microcontroller boards similar in size, price, and compatibility with the Arduino IDE may wish to investigate my new Maple Mini Pin Protector, which leverages a different board type but shares the core principles of the original design.
With this file you will be able to print Arduino Nano Pin Protector with your 3D printer. Click on the button and save the file on your computer to work, edit or customize your design. You can also find more 3D designs for printers on Arduino Nano Pin Protector.