Arduino & Raspberry Pi workbench
thingiverse
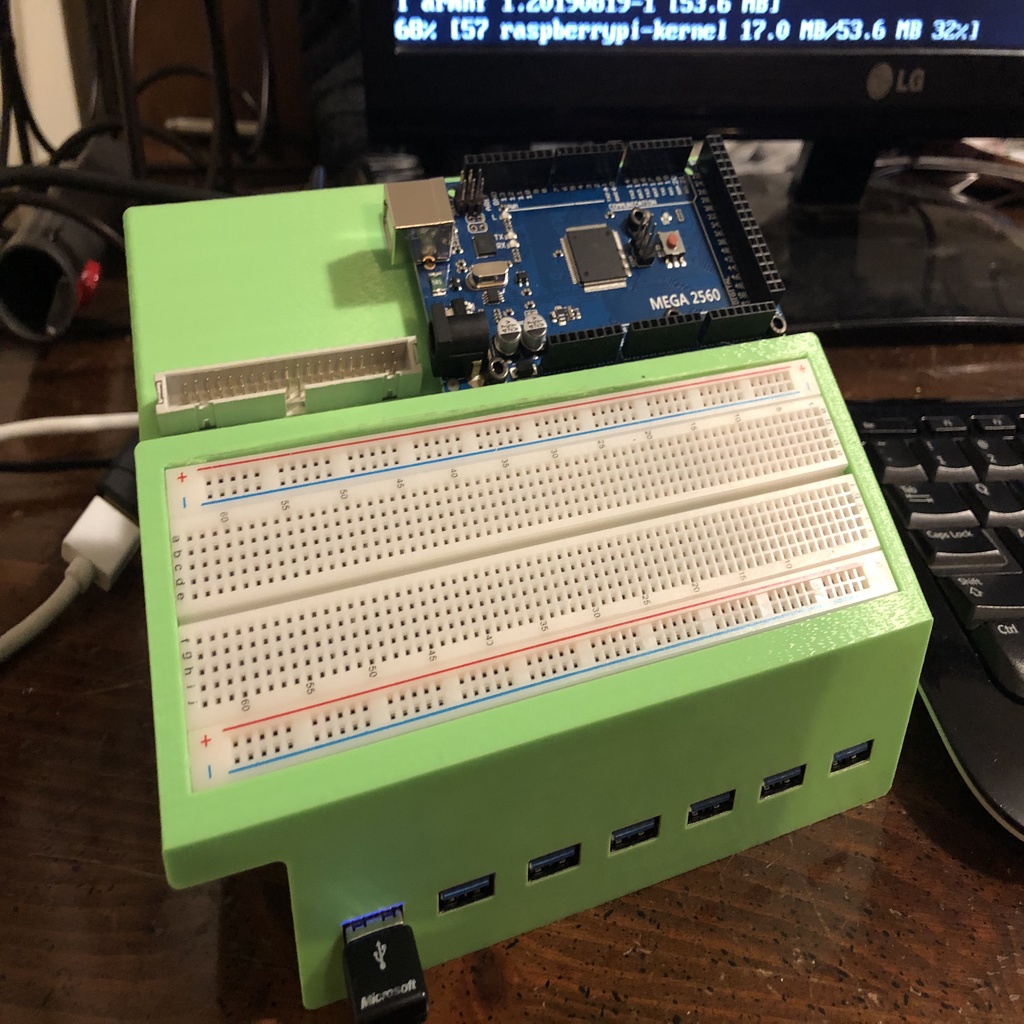
I've made some improvements to the original Pi workbench and think everyone will be pleased. This version puts the Raspberry Pi inside, provides active cooling via a 40mm fan, a power switch via a 1/4 inch rod, a mount for an LM2596, a rear cover, and drive tray. The drive tray slides in and the attached rear cover clips into place via the ridges created by the 3D printer. The internal mount is only useful for an LM2596, which isn't enough for a Pi 4B. You'll have to use a different DC/DC converter or just power it externally. The coupler connects a 1/4 inch rod to the power button on the USB hub. The deck has holes to clip any Arduino that matches the Mega/Uno profile to the box, and you can snap them on and off easily. Be sure to use paper or plastic washers with the screws on your Arduino – I learned this the hard way and found out you can break traces without them. Use an 8" ribbon extension cable to expose the Pi headers outside the box. It's a bit tricky to put in place, but you only need to do it once, and the drive tray/rear cover will lock the connector into place. While I designed this for a Pi 4B, you can use any SBC compatible with the Raspberry Pi Model B form factor, like a Rock64.
With this file you will be able to print Arduino & Raspberry Pi workbench with your 3D printer. Click on the button and save the file on your computer to work, edit or customize your design. You can also find more 3D designs for printers on Arduino & Raspberry Pi workbench.