Arduino Train with track and wagons
thingiverse
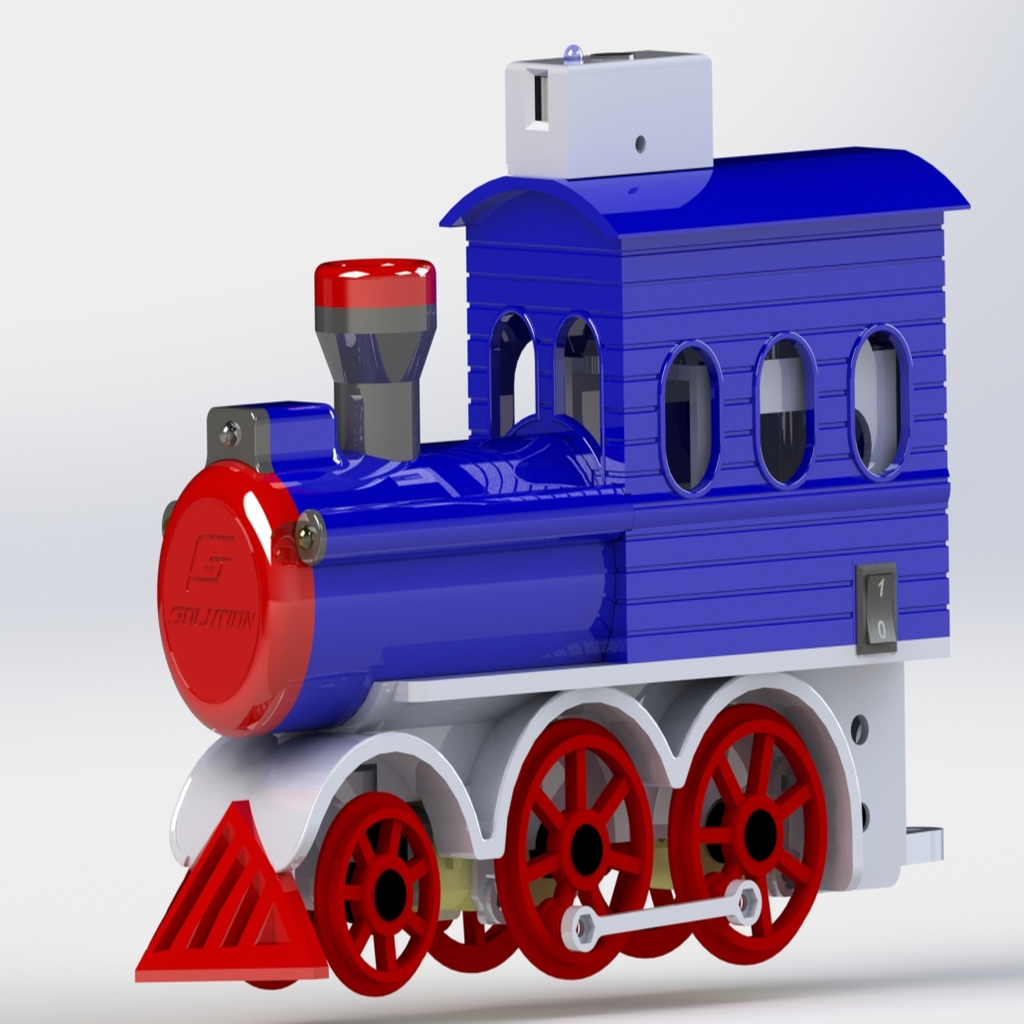
This is a project built during Christmas holidays. It's a train powered by two 3V motors and a Chinese 18650 battery powerbank. An Arduino Uno board controls the motors and lights while receiving IR commands. The train can be controlled with any infrared remote, and I'm using one from my TV. The program includes features like soft stop, speed regulation through remote control, programming the number of turns, and playing Jingle Bells. Attached files include circuit diagrams and the Arduino program. The motor control board has five LEDs that must remain on when the main switch is in the ON position to meet the powerbank's minimum consumption requirement. This ensures continuous operation by maintaining a fixed consumption of about 75mA with the LEDs and Arduino board. Initially, I considered using an L298N board but realized it's not possible due to its minimum voltage requirement of 6V, which exceeds the powerbank's 5V output. To overcome this, I designed a small circuit controlling the motors through a BD230 transistor, documented in the project files. If you have flat head masonry nails and don't know what to do with them, they can be used for creating non-motorized axes by cutting off the heads and setting them to 38.5mm long. Each section of train track has an angle of 30º; to complete a turn, you'll need to print 12 sections.
With this file you will be able to print Arduino Train with track and wagons with your 3D printer. Click on the button and save the file on your computer to work, edit or customize your design. You can also find more 3D designs for printers on Arduino Train with track and wagons.