Arduino UNO / CNC Shield Enclosure for CNC Router (MillRight M3)
thingiverse
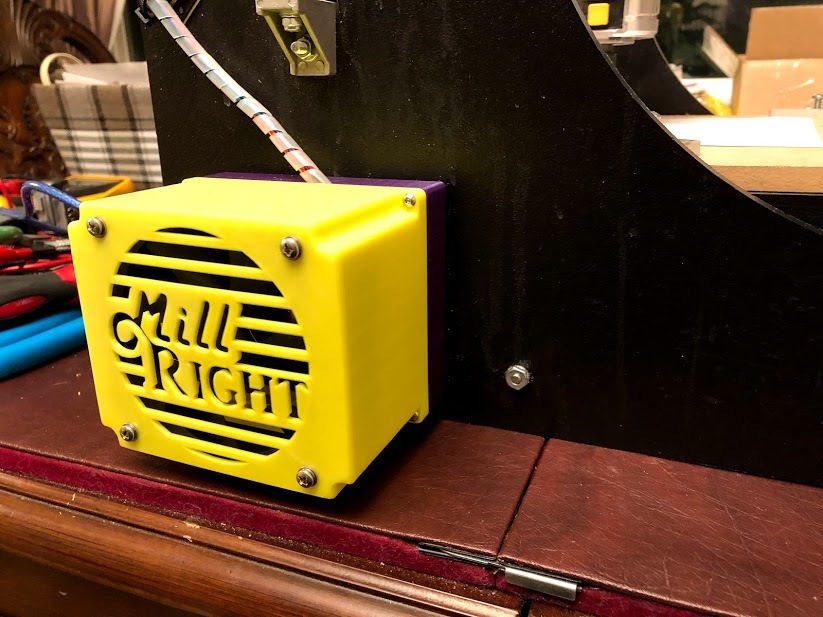
The MillRight M3 is an excellent hobby CNC router kit, perfect for those on a budget. It delivers impressive performance without breaking the bank, and I can attest to its value firsthand. While it's a budget-friendly option, this kit doesn't come with an enclosure for the electronics and fan, so I designed one myself to keep sawdust at bay and protect the electronics from damage. Plus, it looks sleek and finished! To give it a custom touch, there's a MillRight logo in the fan grille – or you can opt for a plain grille if that suits your style. This enclosure attaches seamlessly to the side of the M3 router, right where the stock electronics sit, without requiring any extra drilling. It's a straightforward installation process that won't take up too much time. First, run an M3 tap through the Arduino UNO mounting holes on the base plate or use self-tapping screws for a secure fit. Then, mount the base plate to the two existing mounting holes on the side of the M3 router. Route the wires through the notches in the top and bottom of the base plate for a clean look. Secure the power connector to the base plate with two nylon zip ties. Next, attach the fan to the enclosure cover using screws and nuts that fit perfectly. Finally, screw the cover onto the base with M3 screws – easy as can be! UPDATE 09-JAN-2019: To ensure seamless compatibility, I've converted the .stl files to millimeters, so they'll scale correctly in your slicer software when opened.
With this file you will be able to print Arduino UNO / CNC Shield Enclosure for CNC Router (MillRight M3) with your 3D printer. Click on the button and save the file on your computer to work, edit or customize your design. You can also find more 3D designs for printers on Arduino UNO / CNC Shield Enclosure for CNC Router (MillRight M3).