Arduino Walker-Bot
thingiverse
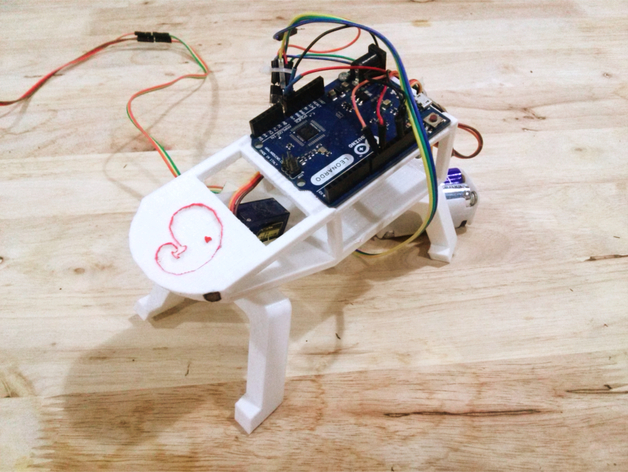
This was a bot used to teach workshops about using an Arduino to control a walking robot. The robot moved only forward and backward but showed users how to wire up a joystick, power switch, batteries, and servos to an Arduino and then program it all to work. Instructions // Code for a 3D Printed Robot // Learn more at: http://www.instructables.com/id/3D-Printed-Robot/ // This code is in the Public Domain // Add the servo library #include <Servo.h> // Create two servo instances Servo myservo; Servo myservo1; int frontPin = 9; int backPin = 10; int FrontBalanced = 91; int BackCentered = 102; int angle = 25; int backRight = BackCentered - 10; int backLeft = BackCentered + 10; int xPin = A4; int yPin = A5; const int FRONT = 1; const int BACK = 2; const int LEFT = 3; const int RIGHT = 4; void setup() { myservo.attach(frontPin); myservo1.attach(backPin); myservo1.write(FrontBalanced); myservo.write(BackCentered); Serial.begin(9600); } void frontLeg(int x) { myservo1.write(x); } void backLeg(int x) { myservo.write(x); } void loop() { int x = analogRead(xPin); int y = analogRead(yPin); Serial.print("x :"); Serial.println(x); Serial.print("y :"); Serial.println(y); int direction = 0; if (x > 700) { direction = BACK; } else if (x < 300) { direction = FRONT; } switch (direction) { case FRONT: front(); break; case BACK: back(); break; default: straight(); } delay(1); } void front(){ frontLeg(FrontBalanced + angle); delay(50); backLeg(BackCentered - angle); delay(200); frontLeg(FrontBalanced - angle); delay(50); backLeg(BackCentered + angle); delay(200); } void back() { backLeg(BackCentered - angle); delay(50); frontLeg(FrontBalanced + angle); delay(200); backLeg(BackCentered + angle); delay(50); frontLeg(FrontBalanced - angle); delay(200); }
With this file you will be able to print Arduino Walker-Bot with your 3D printer. Click on the button and save the file on your computer to work, edit or customize your design. You can also find more 3D designs for printers on Arduino Walker-Bot.