Around-the-nozzle cooling ring
thingiverse
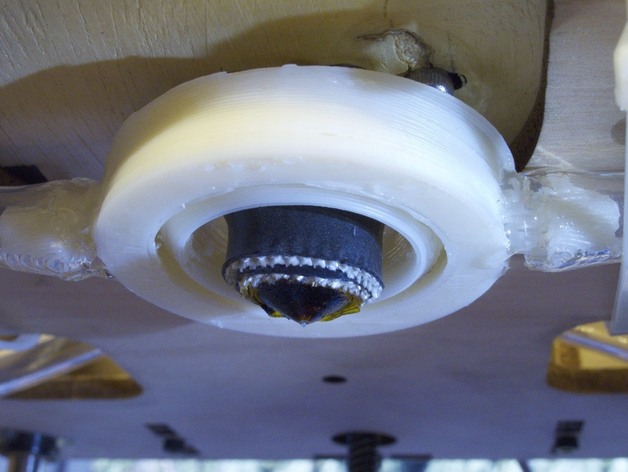
This is another cooling design, inspired by (but not directly based on) thing 5756. I wanted to use Iwo's design, but I just upgraded to a MakerGear stepper plastruder on my Thing-o-Matic, and there wasn't enough clearance around the extruder nozzle to mount any fan ducts on the top side of the Z-stage. So, this design is a circular cooling nozzle that mounts around the extruder nozzle, just under the Z-stage. It is fed by two 1/4" PVC hoses, attached to a fan mount that sits on top of the Z-stage, near the rear of the bot. This mount holds a 40mm fan salvaged from an old graphics card. The overall airflow is very subtle- it's detectable with your hand, but just barely. But it makes a huge difference in print quality for small parts. In the attached image of two single-wall calibration boxes, both boxes were printed consecutively using the same g-code. The only difference is that one box had the cooling fan intake blocked. This design is in parametric OpenSCAD, so it should be fairly easy to adapt to other nozzle types or fan sizes. Note: This adds some extra hardware to the underside of your Z-stage. Make sure there will be clearance with anything you have sticking up from your build platform. I had to remove the nozzle wiper from my ABP. (The wiper wasn't working very well with my MakerGear nozzle anyway, so no big loss...) Instructions If you aren't using a MakerGear extruder, adjust the OpenSCAD sources for your nozzle geometry Measure your fan, and adjust the OpenSCAD sources for its radius. Print both parts. Be aware of the overhangs- the nozzle has 40 degree overhangs throughout, and the tubing barbs can be difficult to print correctly. You shouldn't need to enable support material. The only support necessary is under the hose barb, and it's been added explicitly by the OpenSCAD sources. Using a sharp knife, clean up both parts. In particular, you'll need to remove the support material from under the PVC hose barbs. Test-fit your fan. If all is well, hot glue it to the fan mount. Attach some suitable lengths of 1/4" PVC tubing to the fan. Most hardware stores carry this stuff in the plumbing section. If there are gaps or uneven spots in your printed hose barbs, you may want to seal the edges of the hose with hot glue. Make sure the hoses are long enough to curve back around to your nozzle, and then leave some extra. Affix the fan mount to your Z-stage somehow. I used just a tiny dab of hot glue. Run power to your fan, from any convenient source of 12V DC on your bot. I'm tapping power off the stepper driver that I added for the MakerGear extruder. Run the hoses through the holes in your Z-stage, and around toward the nozzle. Use zip ties to keep them snug against the underside of the Z-stage. You don't want them drooping below nozzle level. Using the printed ring nozzle as a guide, cut the hoses to the right length. Fit the nozzle into place. Again, if the hose barbs aren't making an airtight seal, add some hot glue. Use more zip ties if necessary to keep the nozzle in place, by securing the hoses near it. The nozzle should be centered around your hot-end, and make sure to leave some clearance between it and the nozzle along the whole perimeter. We don't want the nozzle melting! Finally, do a test print! The extra cooling will help the most on parts with thin pieces.
With this file you will be able to print Around-the-nozzle cooling ring with your 3D printer. Click on the button and save the file on your computer to work, edit or customize your design. You can also find more 3D designs for printers on Around-the-nozzle cooling ring.