Arrow Fletching and Nock Replacement
thingiverse
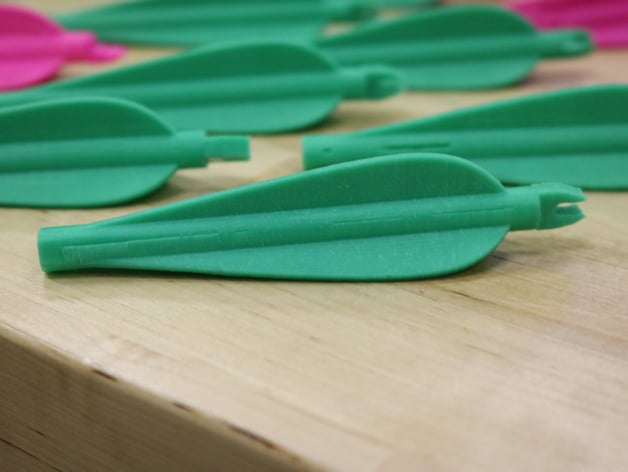
This model was created by senior Taylor Dottley and junior Kristen Casey. They got the idea from their P.E. teacher, who asked if it was possible to 3D model a replacement for archery arrows that break after use. After repeated renditions (about 25), they finally got an exact fit for the arrow shaft with everything at the correct size. The arrows fire perfectly, unless you hit a tree. Print Settings Printer Brand: MakerBot Printer: MakerBot Replicator 2X Rafts: Yes Supports: No Notes: Scale to 101.5% (2x) Scale to 102% (z18) How I Designed This We started with a blank Inventor Pro template and calipers, but it was hard to know where to begin. Arrows have been the same for so long, so we had to figure out how large the original cylinder should be that goes around the arrow shaft. Once we perfected that, we started trying to attach individually modeled feathers to the cylinder. Inventor was resistant to connecting the flat face of the arrows to the curved cylinder, but after a few days, we tried building the three arrows off the cylinder instead of attaching it directly. Using the polygon tool, we built a series of triangles and then modeled the feathers off a created face. We built the nock end separately and attached it to the design using Inventor's compilation tools. Custom Section Objectives: To 3D print, attach, and fire an arrow with the 3D printed model acting as the arrow fletching and nock. Audiences: Anyone who can understand 3D modeling and archery safety precautions. Our target audience is our high school physical education class. Preparation: The arrow shaft should be cleaned before putting the 3D printed piece on it, and the nock and fletching from the original arrow should be removed. Steps! It's easiest to first saw through the arrow to remove the nock, and then use an exacto knife to remove the arrow fletching. The printed piece should slide on and off with a normal amount of strength without coming off when fired from the bow. Results: By the end of it, you should have a fully functioning arrow that can be fired. Our tests indicate that this replacement part will last at least 70 fires without issue, but do be cautious not to hit your target as harder surfaces can break the part (such as hitting a tree or wall).
With this file you will be able to print Arrow Fletching and Nock Replacement with your 3D printer. Click on the button and save the file on your computer to work, edit or customize your design. You can also find more 3D designs for printers on Arrow Fletching and Nock Replacement.