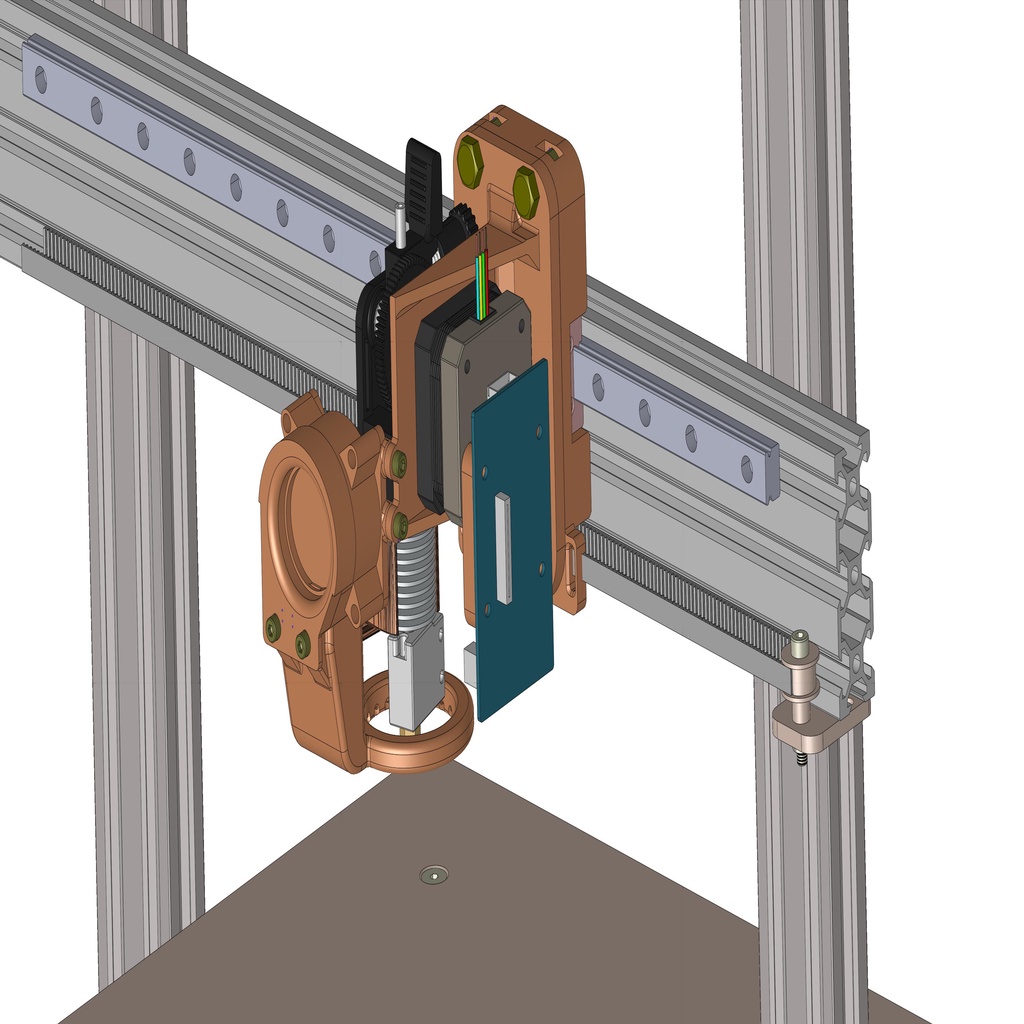
Artillery Evnovo Sidewinder X1 Linearrail mod
thingiverse
English (i used a translator because of lazyness…german below) This kit does not only include the conversion to linear rails, I also changed the V6 heat sink instead of the directly cooled titan clone. Further conversions will follow, e.g. BMG clone and BMG aluminum clone without additional heat sink. Of course, you can also use another hotend, but because the height changes you have to add another component cooler. I have also thought about a variable adjustable variant in height. I also have a cooling channel for a V5 heat sink (in this case the replacement of my Anycubic mega). For the conversion, all original parts can be used except the printed parts, the heat sink and a cable extension for the component fan. All parts have to be printed 1x, pins need to to be printed twice. The titan aluminum heatsink plate is changed to a printed one. The screws can still be used The original 40mm fan can be screwed onto the Duct Fan Blower. The screw on the base plate is intended as a contact, as the inductive sensor only reacts to metal. This must be increased a little, because the construction comes further forward than the original. The part to be screwed underneath is simply called "ProximitySensor_Spacer". Assembly instruction can be found in the files section. For the base plate and the adapter plate, I used the following print settings at 0.4 nozzle: Infill 40%, 4 wall lines, each 3-4 ground and cover layers (depending on layer height, I printed with 0,2mm) For the Duct Fan Blower I recommend using TPU, because it did not go over the heat sink from PLA. I also used cable ties to fix the channel to the KK. And yes, I printed everything except the cooling channel in PLA. I will still print PETG at some point. BOM: https://www.amazon.de/gp/product/B07L83XHKB/ref=ppx_yo_dt_b_search_asin_title?ie=UTF8&psc=1 Pcs Name Type 4 DIN 912 / M3 x 5 Cylinderheadscrew 4 DIN 912 - M3 x 6 Cylinderheadscrew 2 DIN 912 / 3 x 8 Cylinderheadscrew 3 DIN 912 / M3 x 10 Cylinderheadscrew 2 ISO 7380 / 3 x 25 Cylinderheadscrew 1 DIN 912 / 6 x 16 Cylinderheadscrew 2 DIN 934 - M6x30 Hex bolt 8 DIN 934 / M3 Nut 3 DIN 934 / M6 Nut 1 V6 Heatsink 1 extension cable for part cooler Deutsch: Dieses Kit beinhaltet nicht nur den Umbau auf Linearschienen, auch habe ich den V6 Kühlkörper anstatt dem direkt gekühlten Titan Klon geändert. Es werden noch weitere Umbauten folgen, wie zb. BMG Klon und BMG Klon aus Alu ohne zusätzlichen Kühlkörper. Selbstverständlich kann auch ein anderes Hotend verwendet werden, da sich aber die Höhe ändert muss auch ein anderer Bauteilkühler dran. Ich habe auch schon über eine variable Variante nachgedacht die man in der Höhe verstellen kann. Einen Kühlkanal für einen V5 Kühlkörper (in dem Fall der Ersatz von meinem Anycubic mega) habe ich auch noch. Für den Umbau können außer den gedruckten Teilen, dem Kühlkörper und einer Kabelverlängerung für den Bauteillüfter alle originalen Teile verwenden. Alle Teile müssen 1x gedruckt werden bis auf die Pins, davon bitte 2. Die Aluplatte am Titan wird gegen die gedruckte ausgetauscht, die Schrauben können verwendet werden. Der originale 40mm Lüfter kann auf den Duct Fan Blower geschraubt werden. Die Schraube an der Grundplatte ist als Kontakt gedacht, da der induktive Sensor nur auf Metall reagiert. Dieser muss etwas erhöht werden, da die Konstruktion weiter nach vorn kommt als das Original. Das darunter zu schraubende Teil nennt sich schlicht „ProximitySensor_Spacer“. Eine Montagehilfe in Form einer Explosionszeichnung befindet sich im Download Bereich. Änderungsvorschläge nehme ich gern entgegen. Für die Grundplatte und die Adapterplatte folgende Druckeinstellungen bei 0,4er Düse: Infill 40%, 4 Wandlinien, jeweils 3-4 Boden- und Deckschichten (je nach Layerhöhe, ich habe mit 0,2mm gedruckt) Für den Duct Fan Blower emfehle ich TPU zu verwenden, weil er aus PLA nicht über den Kühlkörper ging. Ich habe zusätzlich Kabelbinder verwendet um den Kanal am KK zu fixieren. Und ja, ich habe alles ausser den Kühlkanal alles in PLA gedruckt. Ich werde dennoch irgendwann auch mal PETG drucken.
With this file you will be able to print Artillery Evnovo Sidewinder X1 Linearrail mod with your 3D printer. Click on the button and save the file on your computer to work, edit or customize your design. You can also find more 3D designs for printers on Artillery Evnovo Sidewinder X1 Linearrail mod.
