Artillery Genius - Z brace
thingiverse
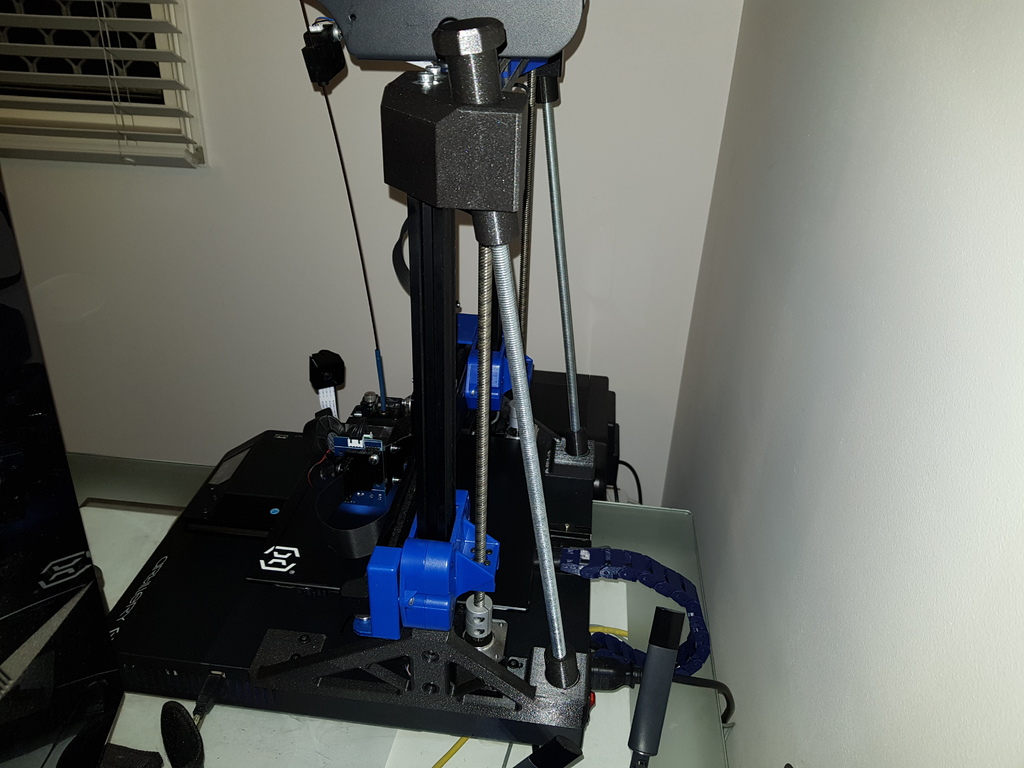
This is a remix of the 'better than nothing' z brace for the Sidewinder by Chanh Phuong adapted for the Genius. It takes it well beyond the 'better than nothing' concept by adding M10 threaded rod supports to the z axis extrusions significantly improving rigidity. Is it overkill for the Genius? depends. There two benefits that I have observed with this mod: 1. I was getting some inconsistent layer alignment on taller prints which is what prompted the design to reduce any movement of the gantry (any movement of the gantry is exacerbated as z height increases). If you wish, you can just print the 'better than nothing' side brackets which will add some rigidity on their own. 2. This system allows mechanical correction for YZ skew (i.e. z path of travel not perpendicular to y path of travel). I had some YZ skew that I had been using skew correction in marlin for but I am now correcting this mechanically which is always a better option. You can check for skew by printing this calibration print and measuring the diagonals: https://www.thingiverse.com/thing:2563185 Hardware needed includes: - 2 x M5 x 16mm bolts for the top brackets (remove the stock bolts and keep them for the side brackets) - 2 x M5 washers (optional) - 2 x M5 x (use the stock bolts removed out of the top blue plastic bracket to secure the side brackets) - 2 x M5 t-nuts for the side brackets (I printed these: https://www.thingiverse.com/thing:2161139) - note these are not subject to force and are almost not needed. - Use the stock M5 bolts in the base to secure the side brackets in their existing positions - M10 threaded rod (at least 1m length cut with a hacksaw to approx. 473mm per side) - M10 nuts x 14 - M10 washers x 6 The printed nut covers are purely aesthetic to cover the hardware - always a good idea to cover your nuts ;) Everything can be printed without supports. Print the top brackets on the large chamfer on the top outside corner as shown. The top brackets slide onto the blue plastic top bar from the side (internal profile matches). The tolerances on the side brackets are 0.1mm so make sure you have your extruder calibration dialed in for the filament you are using. It is important not to have any slop where the brackets slot into the extrusions. Use a rubber mallet to tap them in within reason. The holes on the side brackets have a 0.2mm sacrificial layer covering them for printing without supports. Just push the screws through this layer when assembling. UPDATE 3 June 2020: Updated top brackets on the bottom inside edge to sit flush with the extrusions (and other cosmetic changes only which do not affect functionality). An alternate design for the top nut covers has also been added.
With this file you will be able to print Artillery Genius - Z brace with your 3D printer. Click on the button and save the file on your computer to work, edit or customize your design. You can also find more 3D designs for printers on Artillery Genius - Z brace.