Artillery Sidewinder Ribbon Cable Clamp
thingiverse
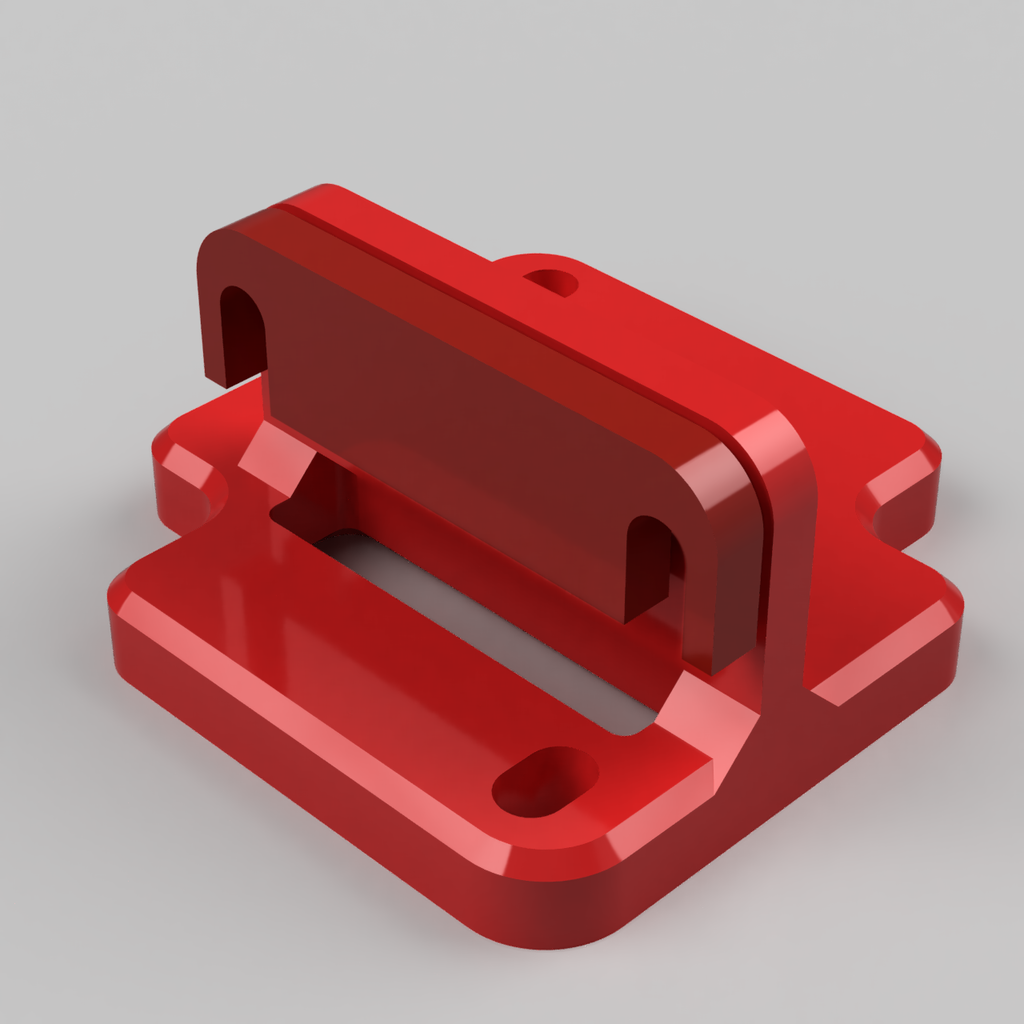
I run my Sidewinder V4 without the cover so I can clamp the ribbon cable as close to its connector as possible. This thing looked perfect https://www.thingiverse.com/thing:3945539 but when I printed it out, it didn’t fit my PCB until I widened the rear screw hole. (Artillery may have redesigned the PCB after Hara74 made his thing.) It would have worked fine with the filed-out hole, but I didn’t want to mess with loose wingnuts either. So, I redesigned Hara74’s thing to have slotted holes running 90° to his, and increased the clearance around the bolts on the PCB. This new clamp can move back and forth to get closer to the ribbon connector and can be angled slightly if the ribbon connector is soldered on askew (as one of mine is). To do away with the wingnuts, I designed the base part of the clamp with 2.5mm holes which is the correct size for a 3mm tap. I tapped the holes and used M3 x 8mm button head screws to affix the clamp bar. The clamp itself is held to the stepper motor with two M3 x 30mm button head screws. I like the button head screws because they use the same wrench as the existing screws on the PCB and the screws that hold the extruder to the carrier. To use this cable clamp, adjust it so that the cable support is parallel with the ribbon connector and perfectly aligned with the back edge of its opening. That way the ribbon will enter the connector perfectly straight, without any strain on the contacts. One of the photos shows what I mean.
With this file you will be able to print Artillery Sidewinder Ribbon Cable Clamp with your 3D printer. Click on the button and save the file on your computer to work, edit or customize your design. You can also find more 3D designs for printers on Artillery Sidewinder Ribbon Cable Clamp.