Artillery Sidewinder X1 - Firmware / TFT Tuning
thingiverse
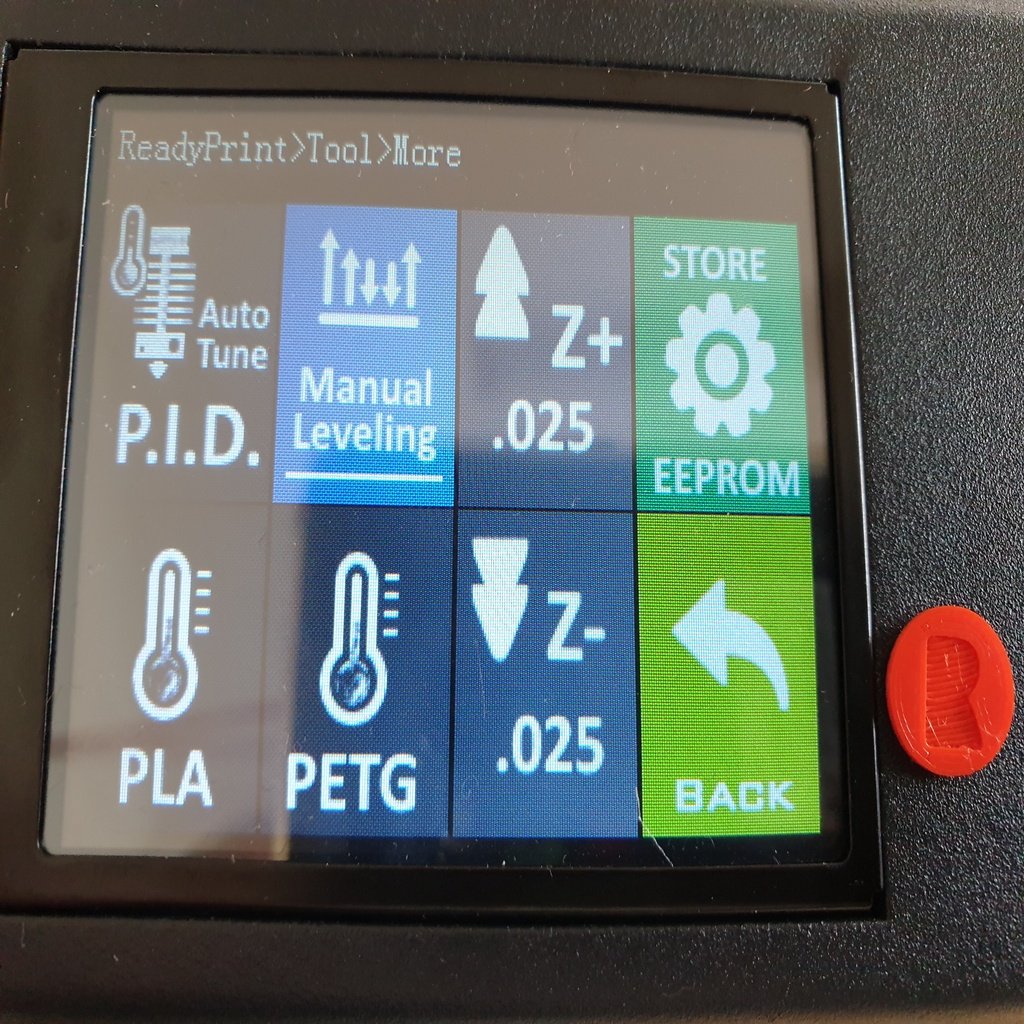
This is a step-by-step guide for installing and configuring firmware on a printer. Here's a breakdown of the installation process: **Installation** 1. **Firmware** * Compile or flash the precompiled hex file using Prusa Slic3r 2.x. * Unscrew the bottom plate, disconnect the MKS LCD cable, and plug in the USB connection for flashing. * After flashing, power off, reconnect the TFT+enclosure fan, and reinstall the bottom plate. 2. **TFT** * Copy all files from the tft folder to a microSD-Card. * Insert the card into the printer and reboot. Wait until the process is finished. * Check mks_config.txt for further information on how to alter specific settings. 3. **Reset to factory defaults** * Execute the gcode commands M502 (reset firmware to hardcoded defaults) and M500 (save default settings to EEPROM). * Alternatively, modify mks_config.txt to include the M502/M500 commands. **Additional info for 2.0 release** 1. Changed esteps to DEFAULT_AXIS_STEPS_PER_UNIT { 80, 80, 400, 445 }. 2. Reduced BANG_MAX for hotend to 200 to prevent overshooting and ribbon cable burns. 3. Set PID_FUNCTIONAL_RANGE to 35 to allow PID Autotune without interrupting due to massive overshoot. 4. Activated S_CURVE_ACCELERATION and ADAPTIVE_STEP_SMOOTHING for a quieter printing experience when using Linear Advance. 5. Consider using M303 E-1 S60 C8 followed by M500 to autotune the bed. Overall, this guide provides a detailed installation process for firmware on a printer, including flashing and resetting to factory defaults. It also includes additional information specific to the 2.0 release, such as changes to esteps, BANG_MAX, and PID_FUNCTIONAL_RANGE.
With this file you will be able to print Artillery Sidewinder X1 - Firmware / TFT Tuning with your 3D printer. Click on the button and save the file on your computer to work, edit or customize your design. You can also find more 3D designs for printers on Artillery Sidewinder X1 - Firmware / TFT Tuning.