Astro A40 Speaker Cover
thingiverse
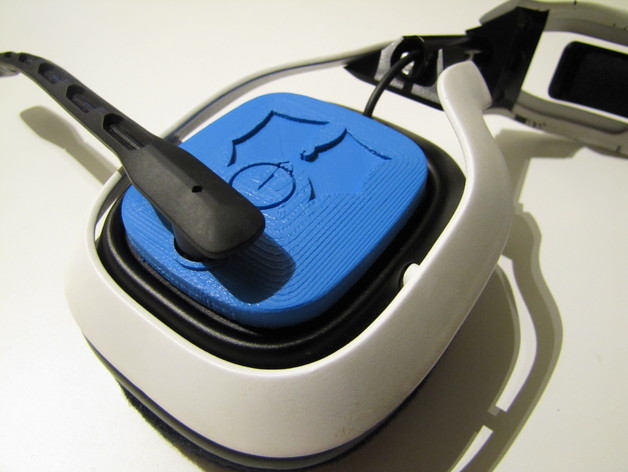
This thing is a replacement for the stock combination of magnetic shield and base plate on the headset. There are a number of different versions available here. Instructions V1 is just a flat plate, easy and fast to print. Picture 2 corresponds to V1 closed, picture 3 is V1 open. V2 comes closer to the original shape, but requires printing on top of a bed of support material, otherwise the surface looks bad. Again, open and closed designs are available The V2 closed IJMV2 is the special version I made for myself, it features my own logo embossed into a V2 closed piece, see pictures 1, 4 & 5. In order to install this, first take off the plush pads by simply pulling them off carefully (!). Undo the four screws that come to light. Next, using an exacto-knife or a small flat screwdriver, peel away the glued in piece of cloth. Don't worry, the glue is only around the perimeter and not neccessary to hold the piece back in place. Undo the four screws around the speaker grill, out with the old, in with the new and you're golden. In case you chose the open design, you should be able to reuse the felt-like piece sticking underneath the original base to prevent dust from getting into your headset . I'd advise printing this in an opaque colour, but thats personal preference and material availability.
With this file you will be able to print Astro A40 Speaker Cover with your 3D printer. Click on the button and save the file on your computer to work, edit or customize your design. You can also find more 3D designs for printers on Astro A40 Speaker Cover.