Atari SIO plug with FTDI PCB
prusaprinters
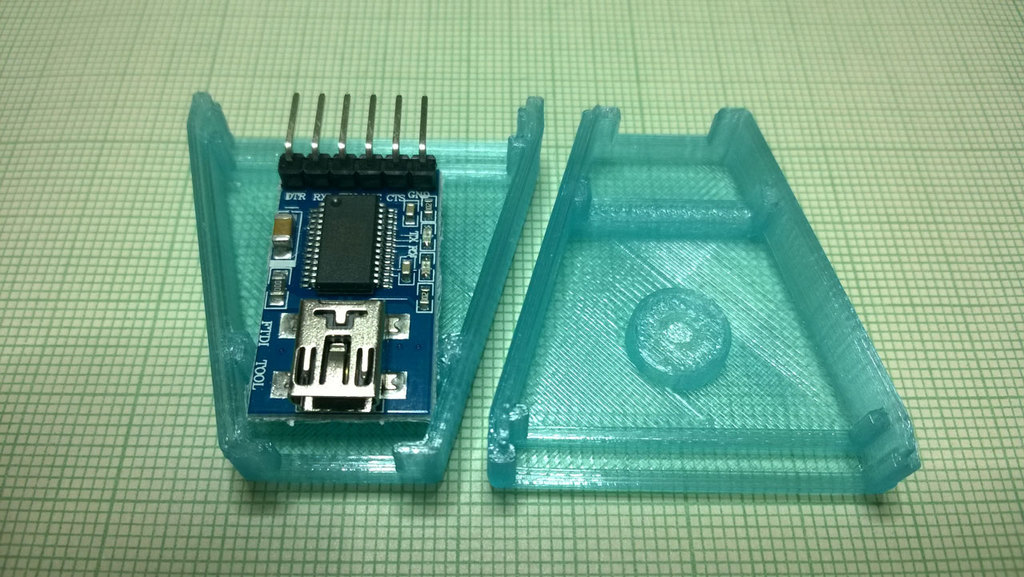
<p>I made small modification to <a href="https://www.thingiverse.com/thing:1831769">Atari SIO plug</a> in order to fit in the FT232RL USB to serial board from <a href="https://www.ebay.com/itm/310510484589">ebay</a>. The board dimensions are 26x16mm without pin header. In the Atari plug I used 3.96mm pitch contacts (for <a href="https://www.gme.sk/kontakt-pff04-01ft">example</a>). To wire the PCB you must first desolder the pin header and solder jumper to 5V on the bottom side of the PCB. Then connect:</p> <p>SIO 3 (Data In) -> TXD (through Schottky diode Atari --|>I-- TXD)</p> <p>SIO 4 (Ground) -> GND</p> <p>SIO 5 (Data Out) -> RXD</p> <p>SIO 7 (CMD) -> CTS</p> <p>The diode can be omitted if you won't use the adapter in SIO daisy-chain.</p> <p>You may want to use the transparent filament in order to see the RX/TX activity diodes on the PCB.</p> <h3>Print Settings</h3> <p><strong>Printer Brand:</strong></p> <p>Prusa</p> <p class="detail-setting printer"><strong>Printer: </strong> <div><p>i3 MK2S</p></div> <p><strong>Rafts:</strong></p> <p>No</p> <p class="detail-setting supports"><strong>Supports: </strong> <div><p>No</p></div> <p><strong>Resolution:</strong></p> <p>0.2mm</p> <p class="detail-setting infill"><strong>Infill: </strong> <div><p>20%</p></div> <p><strong>Notes:</strong></p> <p>Printed on Makerbot Replicator 2 and Original Prusa i3 MK2S from PLA, ABS and PETG.</p> </p></p></p> Category: Computer
With this file you will be able to print Atari SIO plug with FTDI PCB with your 3D printer. Click on the button and save the file on your computer to work, edit or customize your design. You can also find more 3D designs for printers on Atari SIO plug with FTDI PCB.