Atmega8A-PU filament monitor with optical encoder for Marlin firmware v2
myminifactory
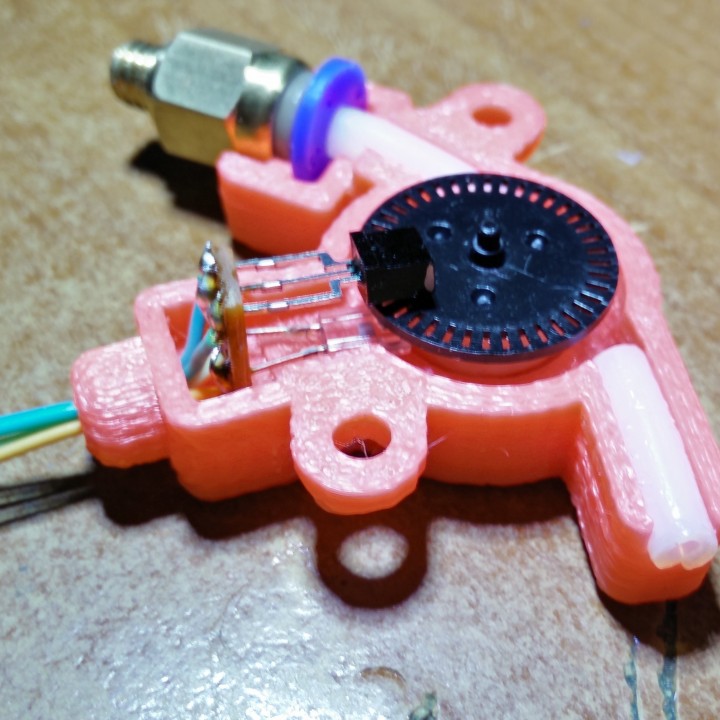
Warning: Modifying this system could break your 3D printer if you don't follow proper static discharge procedures and personal safety precautions when working with your printer. I accept no responsibility for any damage to your person or property due to use of the Filament Monitor or related systems. No guarantees of functionality or fitness for any particular use of the Filament Monitor. User accepts all risk. Atmega8A-PU filament monitor with optical encoder for Marlin 1.1.x firmware second version. I had a cheap Chinese hotend, and from time to time, I experienced filament grinding & clogging. Naturally, I searched for a filament monitor that met my needs. None of them fulfilled my requirements, so I created one. I used spare Atmega8A-PU microcontrollers and phototransistors from an old optical mouse as inspiration from two projects available on the internet: https://github.com/leuconoeSH/avr-examples and https://sites.google.com/site/tunelldev/home/filamentmonitor. I created a simple filament monitor that met my needs and has worked without any issues for 5 months already. The design is simple and cheap to implement, using parts from an old ball mouse: one encoder wheel, infrared emitter & receiver, Atmega8 microcontroller, and some 0.25w resistors & capacitors. To facilitate filament movement, I used two small pieces of PTFE tubing. I used the PORTC of the Atmega8A-PU microcontroller to sense and control the program logic. PC5 is used for the emitter LED (the LED that detects filament movement), PC4 is used for the first phototransistor, PC3 is used for the second phototransistor, PC2 is used to display operation mode, PC1 is used to signal filament stoppage, and PC0 is used to start operations. The filament monitor uses an optical encoder created by EMITTER_LED, A_RECEIVER, B_RECEIVER & wheel_alt to monitor filament movement. After power-on, the default timeout to signal filament stoppage is set to 8 seconds. There are two modes of operation: 1) If you short-press the start button, the default timeout (or the last timeout set) is used to detect filament stoppage; 2) If you long-press (at least 2 seconds) the start button, the filament monitor enters a mode where you can change the default timeout for filament stoppage detection. To set a new timeout, press and hold the start button until the desired timeout is set. The OP_MODE_LED blinks once every second if the start button is pushed. To set a timeout of 10 seconds, proceed like this: press and hold the start button, wait 2 seconds (still holding the start button), and the OP_MODE_LED starts to blink; now count each blink and when 10 is reached, release the start button. After each new timeout set, the OP_MODE_LED displays the new timeout blinking for each second in the new timeout. If you stop the filament monitor by pressing the start button at any time after start, it will display the error condition. The monitor was designed for Marlin firmware & RAMPS 1.4 board but should be easily adaptable to other configurations. To connect the monitor to RAMPS 1.4, please check the corresponding image. The signal provided by the filament monitor will be connected to D44 on AUX-2. The needed modifications of Marlin 1.1.x firmware are available in marlin.patch from support.zip archive. When the filament monitor signals the error condition, an M600 command is added to the current queue and previous and current enqueued commands are sent to the connected PC (if any), so if you use a program like Printrun, you will see in console something like: M600 triggered. Previous command: G1 X164.957 Y136.368 E4.70389 Enqueued commands: M600 Also, you should activate M600 command in Configuration_adv.h (Marlin firmware), uncomment the line // #define FILAMENT_CHANGE_FEATURE and change FILAMENT_CHANGE_X_POS, FILAMENT_CHANGE_Y_POS, FILAMENT_CHANGE_UNLOAD_LENGTH & FILAMENT_CHANGE_EXTRUDE_LENGTH accordingly to your printer setting. The monitor is split into two parts: one that can be attached to the extruder and one that contains the monitor and can be mounted to the frame, for multiple use cases. In my case, sensor_support file was used to attach the monitor to "Infill 3D 75 Geared Extruder." The sensor_case_filament_guide & sensor_case_support are not required; they're just examples of how the filament case can be used. Also, sensor_wheel should be adjusted to your particular case.
With this file you will be able to print Atmega8A-PU filament monitor with optical encoder for Marlin firmware v2 with your 3D printer. Click on the button and save the file on your computer to work, edit or customize your design. You can also find more 3D designs for printers on Atmega8A-PU filament monitor with optical encoder for Marlin firmware v2.