Atomstack R3 rotary roller upgrade
thingiverse
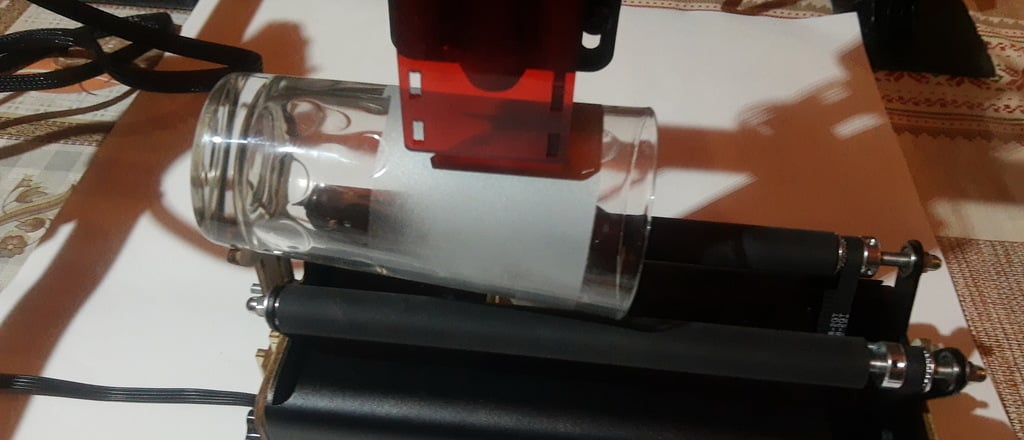
Atomstack R3 Rotary Roller Upgrade An upgrade that everyone can do, not being conditioned to have access to the 3D printer. Simply cut the pieces of plywood 4 mm (more precisely 3.8 mm). It blends perfectly without the need for glue. You must also have 25cm of threaded rod, 4mm in diameter, and 4 nuts for this. Depending on the tumbler you use, change the support bracket. With the support model, you can make a fast one, adapted to your work. Be careful when mounting the part in the middle as the long sides have an uneven mount. The smaller side comes down! All you have to do is have the R3 on the table. And be careful when you use it to connect it from the software and when you disconnect it to return with the software to the previous settings. And restart the program and the motherboard (turn off the power and USB). I was surprised not to return to my initial settings without restarting! Do a low power check initially, and don't forget to enter the size of the laser object, especially if you are printing circles. If you do not have complex geometric figures you can write directly without other settings. The writing will be slightly longer! Burn everything!
With this file you will be able to print Atomstack R3 rotary roller upgrade with your 3D printer. Click on the button and save the file on your computer to work, edit or customize your design. You can also find more 3D designs for printers on Atomstack R3 rotary roller upgrade.