Audi B6 A4/S4 Bi-Xenon Headlight Dust Cap
prusaprinters
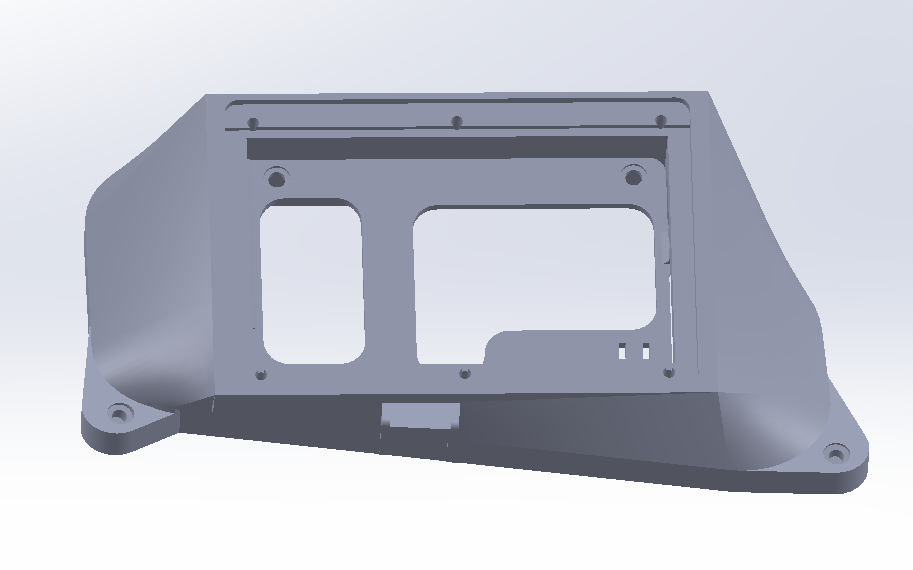
<h3>General Info & Fasteners</h3><p>The dust cap on my Audi S4 headlight was super cracked and not watertight at all so I designed this replacement. I've only used it on the right hand side headlight but if you mirror it it will probably fit the left as well. This model also has a second piece, the cable tray that is attached to the dust cap using M3 screws (I think 8mm long, I'll need to check the CAD). This just provides some spots to zip tie wires down but isn't 100% needed. Make sure the screws used to attach your xenon ballast are no longer than 10mm (12mm might work but would be tight). Mine were extremely rusty so I used replacements from McMaster-Carr. </p><p>To fully waterproof your headlight again you'll probably also have to do the o-ring mod, installing a new o-ring on the headlight adjuster screw.</p><h4>Fasteners</h4><figure class="table"><table><tbody><tr><td>Function</td><td>Dimension</td><td>Quantity Needed</td><td>McMaster-Carr Part Number</td></tr><tr><td>Attach Ballast to Dust Cap</td><td>M4x10mm Self Tapping</td><td>6</td><td>96817A510</td></tr><tr><td>Attach Dust Cap to Headlight</td><td>M4x14 Self Tapping</td><td>2</td><td>96817A522</td></tr></tbody></table></figure><p>You'll also need some 0.25in x 0.25in foam insulation strip to put in as a gasket. I used adhesive backed stuff I got on Amazon. </p><h3>Material Choice</h3><p>I'd recommend a material with a relatively high heat deflection temperature. I used HT-PET from Fusion Filaments, which has a higher HDT than standard PETG. ASA or ABS would probably be better choices and I have reprinted this in ASA just in case the HT-PET fails. </p><h3>Print Settings</h3><p>Print on the hotter side and use lots of perimeters and high infill- I used 6. Remember you want this to be watertight. Use brush on supports to put support in the gasket channel as shown in picture 2. I also recommend printing the first 8mm at 0.16mm layer height for maximum strength, after that you can up the layer height. I'm not sure if Prusa Slic3r has it but Super Slic3r has a setting to use fan on overhangs so you can print some of the steeper than 45 degree angles on the inside of this without support. </p><p> </p><p>Be careful installing it, you need to slowly slide the top tabs in and make sure the outside wall of the gasket channel is clear before you start to close it. It's easy to go too fast and snap the tabs off. </p><p> </p><p>I've uploaded the .step file of this so feel free to remix and modify. I would request that you not sell this or anything derived from it, as I spent an extremely long time getting the dimensions correct and don't think it's fair for anyone else to profit off that work. </p>
With this file you will be able to print Audi B6 A4/S4 Bi-Xenon Headlight Dust Cap with your 3D printer. Click on the button and save the file on your computer to work, edit or customize your design. You can also find more 3D designs for printers on Audi B6 A4/S4 Bi-Xenon Headlight Dust Cap.