Auto bed leveling for Wilson
thingiverse
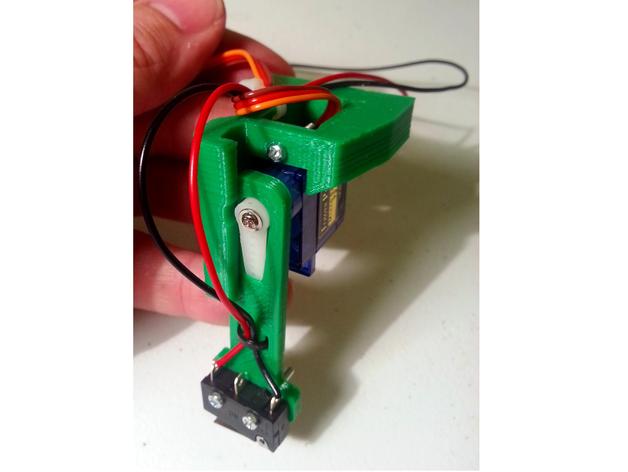
These are the printed parts needed to add auto bed leveling to the Reprap Wilson (or any machine using the direct drive extruder from that project). The design will work with either the original fan duct (Jhead hot end) or the larger one used with the e3d-lite6. Video of assembly and walk-through of the firmware changes can be found here: https://youtu.be/qsmwGBuHoBU You will also need a 9g servo, snap action limit switch, some M2 screws and nuts, and a few zip ties to keep it all tidy. Instructions Attach 70cm wires to both the endstop switch and the servo motor. Attach the endstop switch to the arm and secure wires with mini zip tie Attach the servo holder to the servo motor using the small white actuator that comes with the servo, and secure with the flat head screw (also should come with the servo) Attach the servo to the larger plastic piece as shown. Secure with an M2x16mm screw and M2 nut. The wiring from the servo should be routed through the hole on the top of the servo mount. Secure the wires from both the servo and the endstop switch to the servo mount using a second mini zip tie. Remove the two M3x30mm screws from the hot end mount. Remove the two M3 nuts that held the hot end mount screws. Re-insert the M3x30mm screws through the body of the extruder, loosely attach the M3 nuts, and then press the servo mount down to engage. Tighten. Attach the endstop switch to the Z-min connection on RAMPS. Attach the servo wires to the servo-1 connection on RAMPS. Make sure the servo power jumper is installed on RAMPS. Re-flash Marlin with auto bed leveling compiled in. additional details on setting up Marlin forthcoming
With this file you will be able to print Auto bed leveling for Wilson with your 3D printer. Click on the button and save the file on your computer to work, edit or customize your design. You can also find more 3D designs for printers on Auto bed leveling for Wilson.