Auto Bed Leveling with SG90 Servo for Tevo Tarantula (or every other 3D printer)
myminifactory
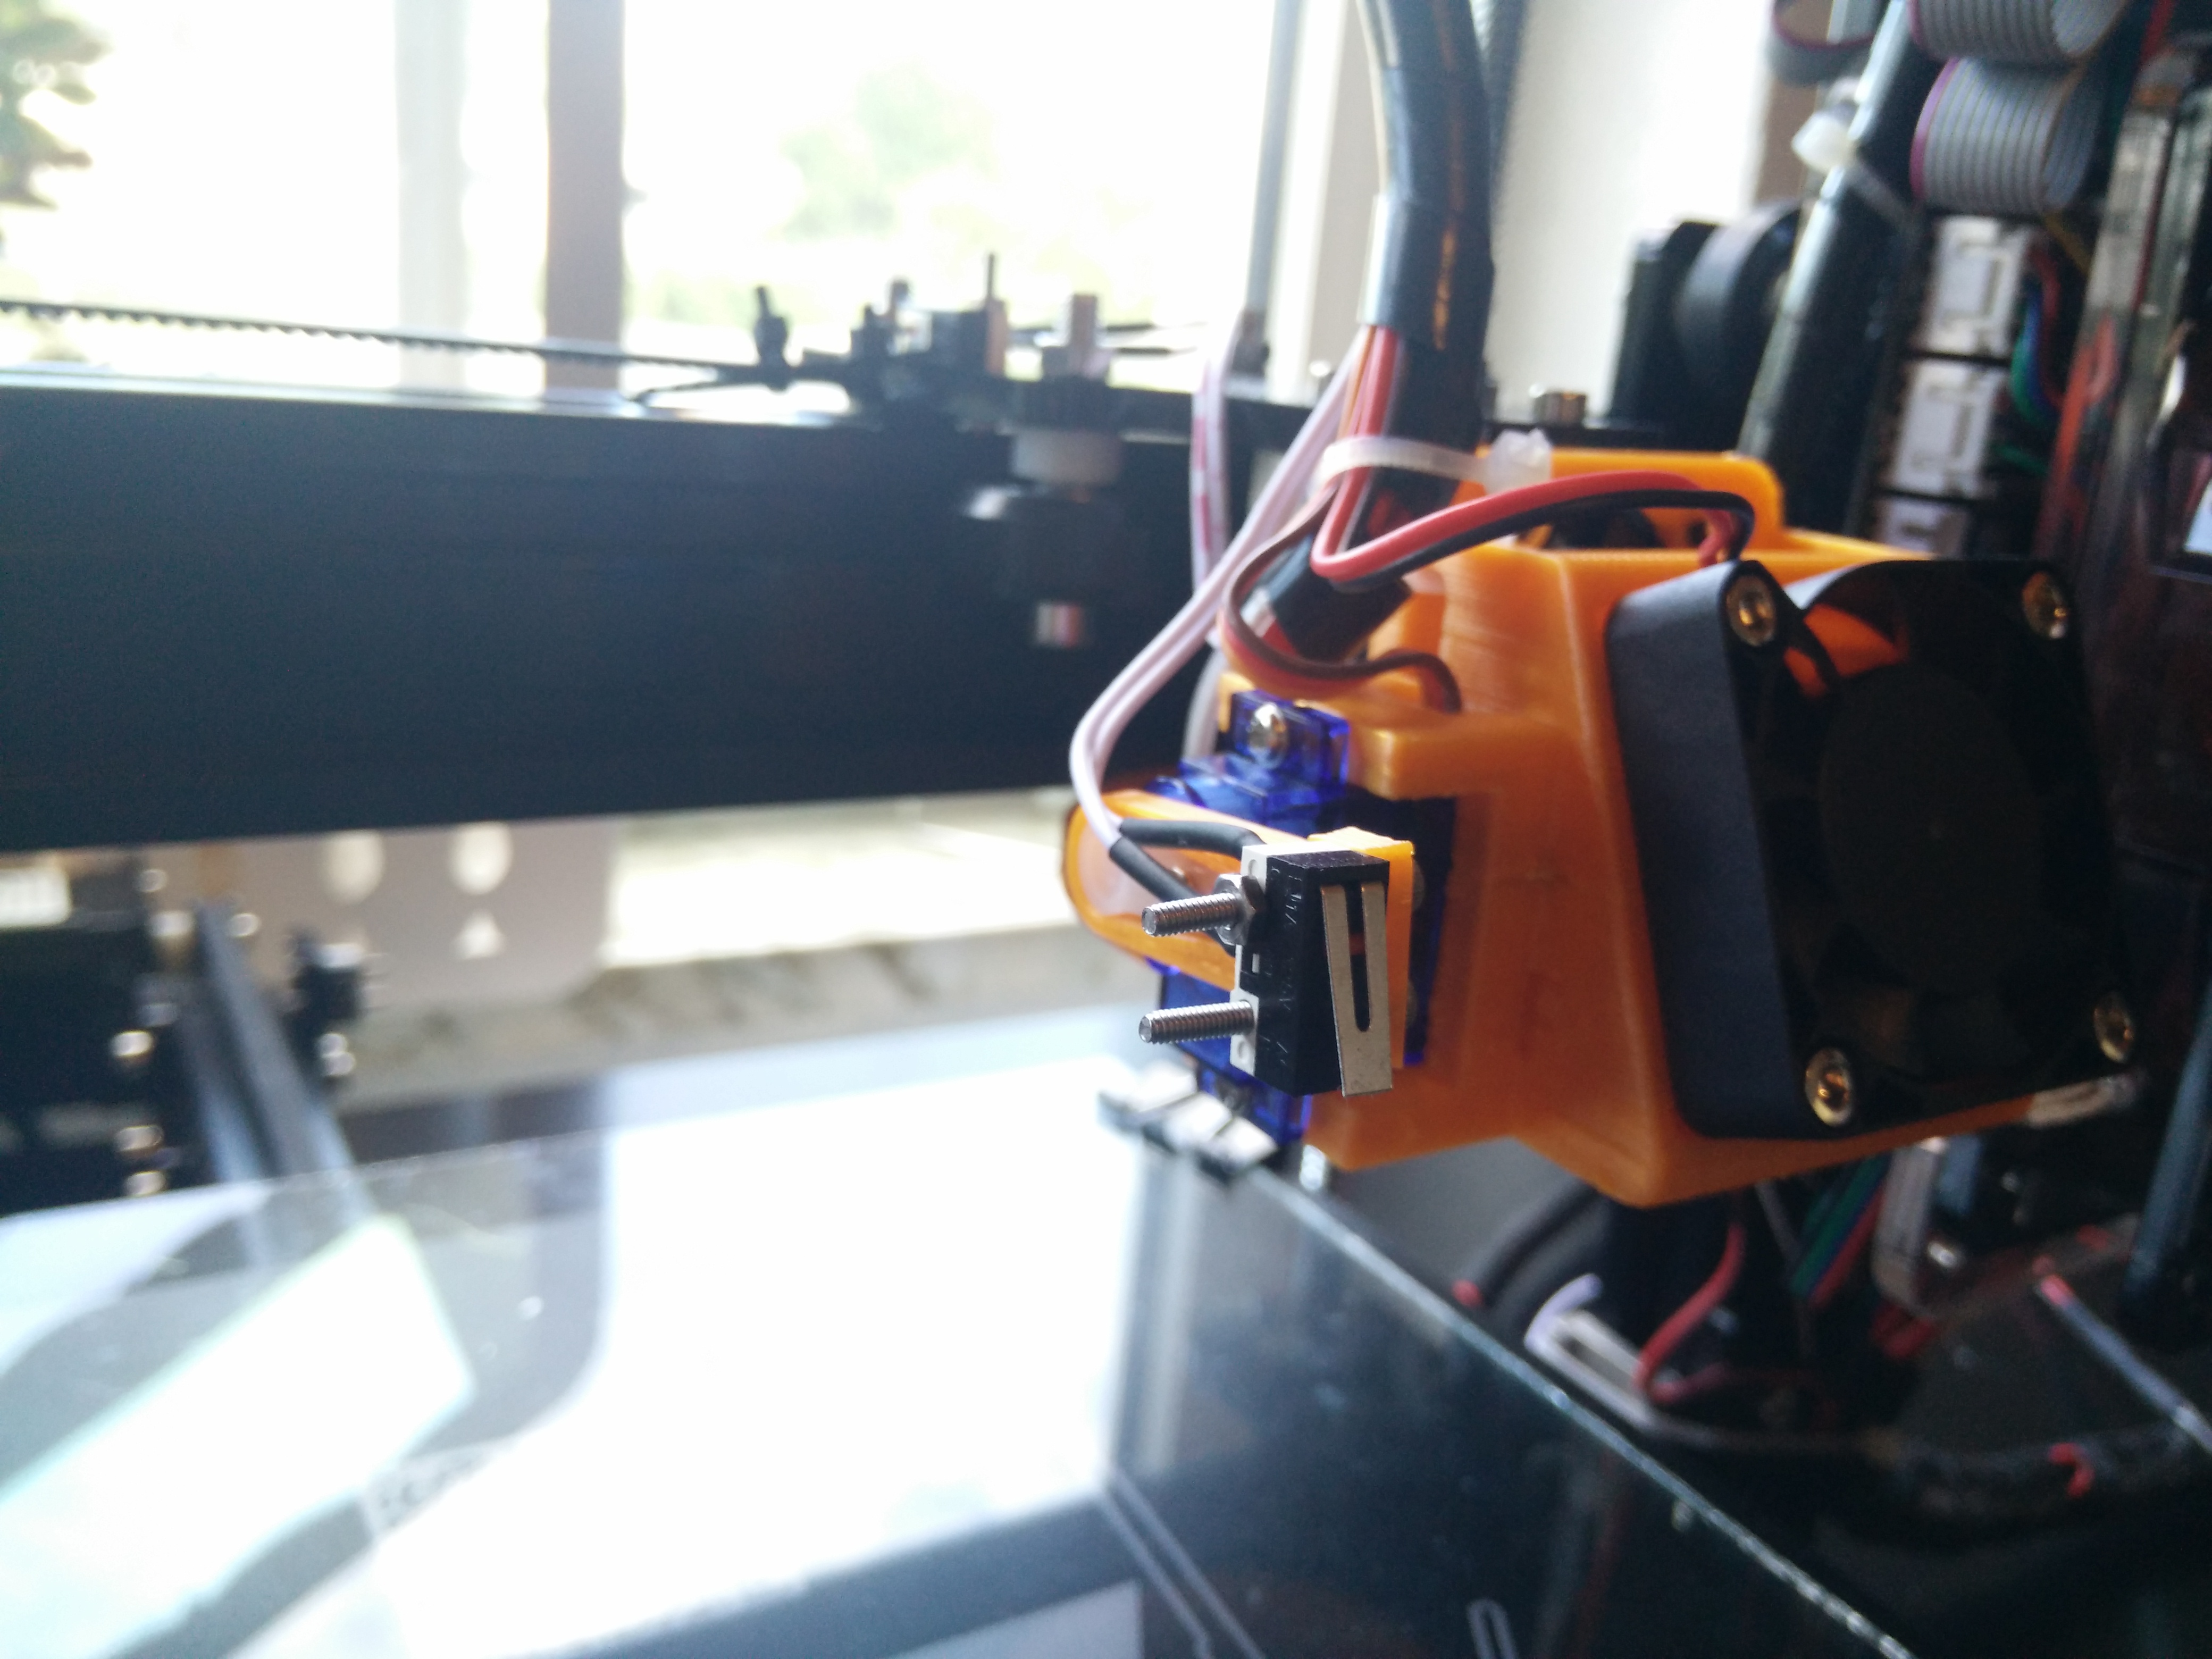
The MKS Base has no exposed pins compatible with servos (PWM). So you must use the x-max pin-out, which is defined as digital pin 2. To do this, we have to change the assigned pins in the firmware. Open Marlin and go to the 'pins_RAMPS_14.h' tab (pins_MKS-13.h redirects you to pins_RAMPS_14_EFB.h redirects you to pins_RAMPS_14.h). A quick demonstration can be found here: https://www.youtube.com/watch?v=0fFdSMcWNZM What do you need? - SG90 servo (and the accessories it came with) - The printed parts (arm + servo mount) - A ready-to-use configuration of Marlin or your preferred firmware Setting up the sensor and servo in Marlin 1.1.0 Search for (without quotes): '#define X_MAX_PIN 2' And change it to: '#define X_MAX_PIN -1' Then search for '#define SERVO0_PIN 11' And change it to: '#define SERVO0_PIN 2' Go to configuration.h and uncomment the following: '#define NUM_SERVOS 3' (Note: I had to change the line to: '#define NUM_SERVOS 1' otherwise my X-Axis had problems moving - don't know why, just for your information) Also you have to uncomment (in configuration.h): '#define AUTO_BED_LEVELING_FEATURE' And define the 'spots' where the probe should level (I use this values with the large bed): - '#define LEFT_PROBE_BED_POSITION 30' - '#define RIGHT_PROBE_BED_POSITION 130' - '#define FRONT_PROBE_BED_POSITION 30' - '#define BACK_PROBE_BED_POSITION 240' Define the probes offset from nozzle (especially the Z_PROBE_OFFSET_FROM_EXTRUDER is important and should be accurate to about 0.1mm, I ended up using -9.1, your value may differ): - '#define X_PROBE_OFFSET_FROM_EXTRUDER -55' - '#define Y_PROBE_OFFSET_FROM_EXTRUDER -35' - '#define Z_PROBE_OFFSET_FROM_EXTRUDER -8' Define the angles which the servo has to 'hold' for probing and parking (the last two numerics, the values depend on how you mount the servo arm - use M280-command to find the right values): - '#define Z_ENDSTOP_SERVO_NR 0' - '#define SERVO_ENDSTOP_ANGLES {{0,0}, {0,0}, {80,180}}' Also change: '#define Z_RAISE_BEFORE_PROBING 5' to '#define Z_RAISE_BEFORE_PROBING 20' At last, make sure the following is uncommented, or the servo will 'wobble' around while printing: - '#define DEACTIVATE_SERVOS_AFTER_MOVE' Upload your new firmware. Plug in the servo. Be careful, you have to change the servos wires (the plug is s/+/-, the pins on the board are s/-/+). Now you can use the M280-command to test the servo, e.g. M280 P0 S20 (sets servo 0 to position 20). With this command you can also find the correct values for the servo angles. After homing your X and Y-Axis (G28 X0 Y0) and running the auto bed leveling process you can use G1 Z0 to lower the nozzle onto the bed. If the Nozzle is too far away from your bed, lower the value, if the nozzle crashes into your bed, raise the value. At last, change the start script in your slicer. Replace: - 'G28 //home all axis' with - 'G28 X0 Y0 //home X and Y-axis G29 //auto level build plate'
With this file you will be able to print Auto Bed Leveling with SG90 Servo for Tevo Tarantula (or every other 3D printer) with your 3D printer. Click on the button and save the file on your computer to work, edit or customize your design. You can also find more 3D designs for printers on Auto Bed Leveling with SG90 Servo for Tevo Tarantula (or every other 3D printer).