Automated Heated Build Platform
thingiverse
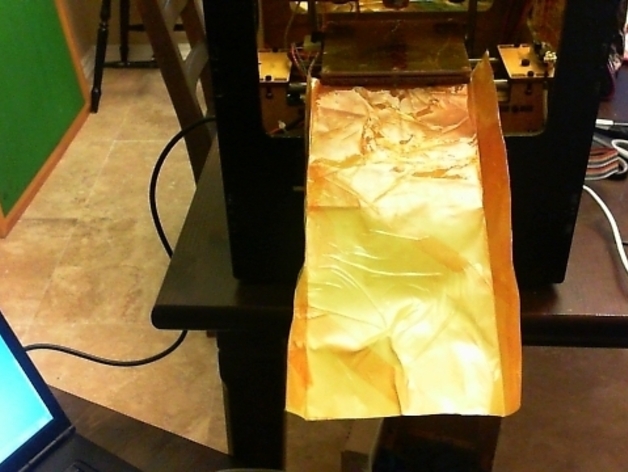
Transform your Thingomatic with a HBP into an automated printer, without extra cost, by fitting it with an ingenious slide system. This DIY solution allows you to print multiple objects in a row without needing an ABP. To make the slide, use an 8.5 x 11 paper: bend its edges at 90 degrees and wrap Kapton tape around both sides at a 45-degree angle for stability. Reinforce the slide with extra layers of tape, then cut two small 'x' shapes aligned with HBP bolts and two slits for carriage clearance. Unscrew the corner nuts on your HBP, attach the slide onto the bolt between the board and nuts. The slide automates printing by pushing completed objects off the platform and onto a steeper angle, collecting them in a box at the end. To fully automate this process, edit your end.gcode file with specific commands. This slide design is strong, even when squished, and the Kapton tape provides a slippery surface for easy print removal. Essential materials include thermal tape, paper, and dedication to DIY printing!
With this file you will be able to print Automated Heated Build Platform with your 3D printer. Click on the button and save the file on your computer to work, edit or customize your design. You can also find more 3D designs for printers on Automated Heated Build Platform.