Automatic Fish Feeder De Luxe
thingiverse
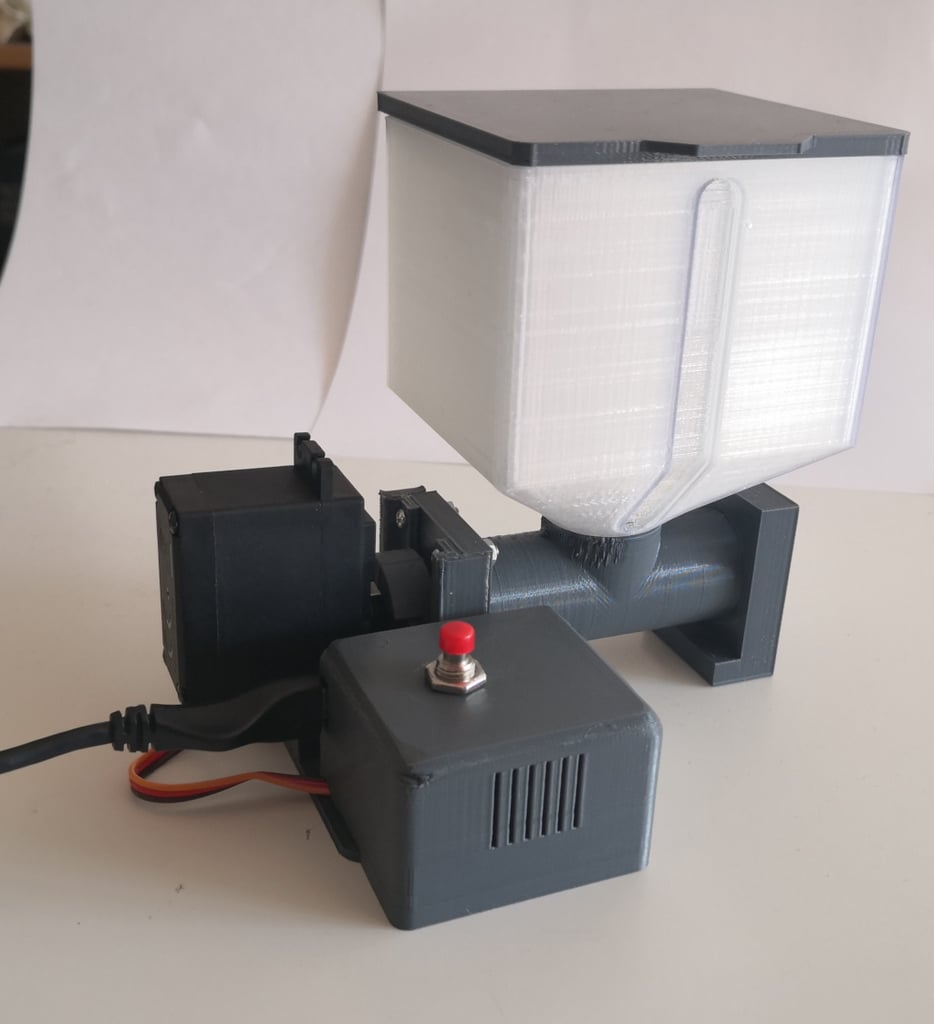
## App-controlled programmable automatic fish feeder A remix of "Automatic Fish Feeder" by coberdas The feeder is controlled through an Android app which allows you to program up to 18 feedings per day. For each feeding you can select how much food the feeder dispenses. The amount of food is adjusted by adjusting how long the servo motor runs, this can be set in increments of 0.1 seconds up to a maximum of 25.5 seconds. The amount of food that is dispensed will depend on what servo you use and what sort of food you use. With the Feetech FS5106R servo and JBL Novo GranoMix the system will dispense approximately 0.9 g/s. The system is designed for granulated food. Flakes might work, but their low density and large surface area tend to get them stuck in the throat of the hopper. I tested using JBL Novo Red, and the amount of food dispensed per activation varied widely. A lot of similar designs have problems with jamming when dispensing granulated food. This design is not affected by this form of weakness, as the FS5106R is more than powerful enough to crush any food pellet that dares to resist. It makes a nice popping sound. ## Video of system in action https://www.youtube.com/watch?v=4nPhB9u4AYY ## Improvements: * WiFi-connected so you can control the feeder via an Android app. * Uses battery-backed Real-Time Clock (RTC) module for accurate feeding schedule. * Feeding schedule is stored in feeder, independently of the app. * Auger is printed in two parts, so it can be printed without supports. It also prints slightly quicker and the end result is smoother and stronger. * Hopper has rounded corners for improved aesthetics. * Hopper has a window of thinner material so you can more easily see how much fish food is left if you print the hopper using clear plastic. * Base of hopper has been smoothed to eliminate overhangs, so it prints without supports. * Hopper lid has a lip to make it easier to open. * Connection between auger and servo has been improved to accept a wider range of servos, reducing stress due to unavoidable axis misalignment, and make assembly easier. * Servo mount can accommodate standard-sized servos. * Servo mount can accommodate full-size two-prong servo horns. * Servo mount has added lip to reduce torque stress on the auger assembly. * Wider base for added stability. * Microcontroller housing is mounted on base instead of hopper, improving stability. * Microcontroller housing clips onto base, no glue needed if you have your printer dialed in right. * Open source software and firmware available. * RTC is regularly synced to Network Time Protocol (NTP) server to compensate clock drift. * Up to 18 feeding times per day, feeding amount adjustable in 0.1 second increments. ## Parts list: * Raspberry Pi Pico W * Tiny RTC DS1307-based module * Feetech FS5106R continuous rotation servo * Push-button momentary switch, normally open, that fits a 7 mm hole. * Micro-USB cable for programming the Raspberry. * USB power supply. The power supply needs to be beefy enough to run the servo, at least 2 A is recommended. * Thin, insulated wires to connect the components. * 2x M3x12mm screws * 2x M4x12mm screws * 2x M3 nuts * 2x M4 nuts ## Alternate parts: * You can substitute almost any RTC module for the Tiny RTC, but you might have to modify the enclosure to make it fit. You will also need to modify the code. * Almost any continuous rotation servo will do, it does not take much torque to turn the auger. You can easily modify a regular servo and turn it into a continuous rotation servo. Be aware that using a too small servo introduces the risk of jamming. * It is possible to use an Arduino Nano 33 IoT instead of the Pico. The firmware and wiring diagram can be found here: https://github.com/erikjber/Fish-Feeder-Firmware ## Prerequisites: You should have a basic understanding of how to edit and upload code to a Raspberry Pi Pico board, as well as the skills and equipment needed to solder wires to circuit boards. ## Firmware for the Raspberry Pi Pico W, includes wiring diagram: https://github.com/erikjber/Fish-Feeder-Raspberry-Pico-W ## Compatible Android app: * Install from Google Play: https://play.google.com/store/apps/details?id=st.crosscheck.fishfeeder * Source code: https://github.com/erikjber/Fish-Feeder-App ## Assembly instructions: * Print the two halves of the auger at 0.1 mm resolution and glue them together. Take care to align the halves properly. * Print the rest of the parts at 0.2 mm resolution. If possible, choose a clear filament for the hopper. * Assemble the parts. Use a piece of 1.75 mm filament as a hinge. * Solder the Pico, the servo, the push button, and the RTC in accordance with the wiring diagram in the firmware repository. * Download the firmware repository. * Create a file named wifi_secrets.py in the firmware directory, add your wifi SSID and password to it as two string variables named "ssid" and "password". * Copy the firmware .py files to the Pico. * Download the Android app. It should auto-detect the feeder immediately as long as they are connected to the same WiFi network. ## Note An earlier version of this project was based on the Arduino Nano 33 IoT. The housing is still included here. The code is no longer maintained but available, with wiring diagram, here: https://github.com/erikjber/Fish-Feeder-Firmware The change to Raspberry Pi Pico W was made because it offers much better value for money, and the extra capabilities of the Nano are not required for this project. ## Media coverage This project was covered by the December, 2022 issue of MagPi. [Download the issue for free.](https://magpi.raspberrypi.com/issues/124/pdf/download)
With this file you will be able to print Automatic Fish Feeder De Luxe with your 3D printer. Click on the button and save the file on your computer to work, edit or customize your design. You can also find more 3D designs for printers on Automatic Fish Feeder De Luxe.