Automatic Platform Leveling and Z Calibration made SUPER EASY
thingiverse
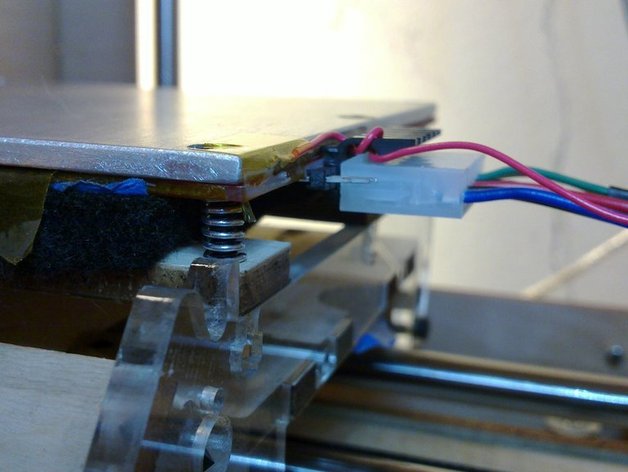
Easily create a Z-Min endstop for your Thing-O-Matic using this simple guide. With only 2 resistors, long wires, and female pin connectors, you can apply the same principle to any bot. Follow the instructions carefully, including installing compression springs (optional) and attaching the wire insulators. Remember to test your setup before proceeding with the gcode provided in Instructions Part 2. Don't forget to watch the head-exploding YouTube video for added entertainment!
With this file you will be able to print Automatic Platform Leveling and Z Calibration made SUPER EASY with your 3D printer. Click on the button and save the file on your computer to work, edit or customize your design. You can also find more 3D designs for printers on Automatic Platform Leveling and Z Calibration made SUPER EASY.