AWD RC Drift Car
thingiverse
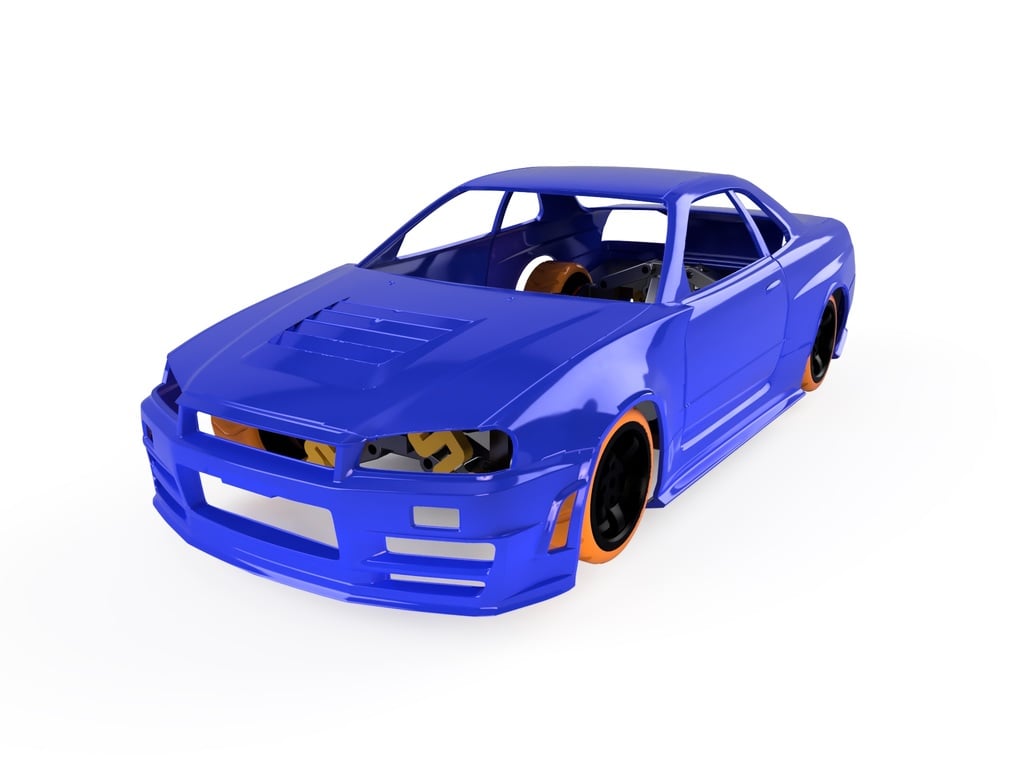
### READ THIS If you are getting corrupted file errors when downloading all the files at once, download EACH INDIVIDUAL FILE by itself. You can achieve that by pressing "Download" next to each file. That way there shouldn't be any corrupted files. Hope this helps some of you having issues. # Fully 3D Printed RC Car --------------------- Everything is was modelled from scratch to fit the electronics i had at hand. The car is modelled to fit the general dimensions (of a fairly scaled down) R34 GTR. Full car length is ~320mm. Car should be driven on flat surfaces (I drove it on concrete and asphalt). Expect broken pieces if driving on bumpy terrain at higher speeds. I AM working on improving the stability and robustness of the car in the areas where I see it needs improvement. Stay tuned for updates (mainly to steering and suspension systems) ### Electronics: Motor: 1806 2300kV ESC: up to you Battery: 2x 18650 cells in series (gives me around 1hr run time) Control: FrSky compatible receiver(this is up to you) Microcontroller: Arduino uno with servo shield Steering: Metal gear micro servo ### Print related stuff: I printed everything from PETG except the tyres and springs. Print those out of TPU or other flexible filaments(I used Fiberflex 40D). Every part is needed to print ones, EXCEPTION to the ones that have 4x, 2x in their name. Print those to the amount required in the name. Springs are to be customized(increase/decrease thickness in slicer software to alter the rigidity) Steering parts should be printed at atleast 0.15mm layer height to provide for tolerances. Use supports where needed. Main body doesn't need any supports. Print all front and back suspension pieces in 100% infill to have the best strength. Sand down and or drill out holes to have the suspension freely running. ### Hardware: Mostly M3 screws, works with practically whatever you have. Steering rotational points on motor mounts are made to fit M2 screws. If you want to use 18650 cells print single holders from here: https://www.thingiverse.com/thing:456900 (didn't want to include models here as they're not mine) When assembling the steering, the Servo adapter has a indentation for a micro servo horn. The servo horn should be on the side where the Steering rack is located. In the hole above on the adapter should go a M3 bolt, about 10-11mm long. This is used to operate the steering. Adapter has to be put on the servo rotated a bit so the bolt that operates the steering is at the highest position(apex of its movement) If you have any questions feel free to comment! Enjoy! ### Updates 14.11.2021. Added some photos of the car built with electronics. Body shell (NOT created by me!) from this model: https://www.thingiverse.com/thing:3667117 File: BODYWHOLEscaled2.3mf (3mf format to reduce size) Model was scaled down by me to fit the dimensions, windows and details cut out. 21.11.2021. Removed individual "MiddleMount" pieces (L, R, LB, RB) and replaced them with a single piece that makes the mounting more accurate and robust. File: "MiddleMount2x.stl" model is the same for the front and back suspension systems. Updated tyre and rim models (more clearance added)
With this file you will be able to print AWD RC Drift Car with your 3D printer. Click on the button and save the file on your computer to work, edit or customize your design. You can also find more 3D designs for printers on AWD RC Drift Car.