Axis Tensioner - X axis
thingiverse
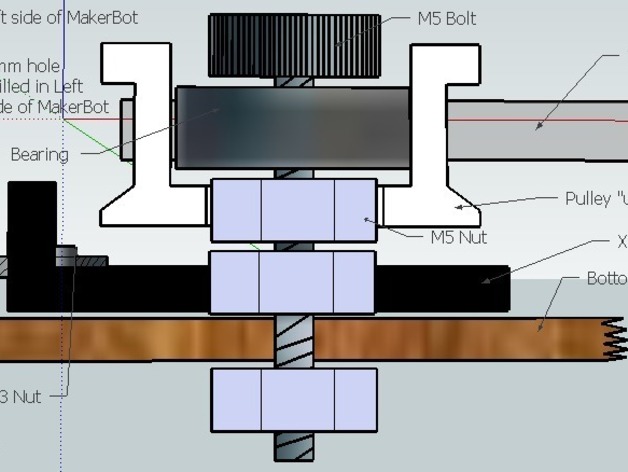
To enhance X-axis belt tension, print this upgrade. It's a single part, unlike the Y-axis tensioner. You can modify the Sketchup file if needed. Ensure your X pulley is adjusted correctly and level. The tensioner works best when assembled as shown. Thanks to SSD for testing and feedback; Version 3 has a suggested change. For first-time users, opt for Version 2. To install, loosen the X axis pulley, remove it from the slot, and take out the M5 nut beneath. Attach the tensioner around the remaining M5 nut on the bolt. Replace the pulley with the M5 nut still in place. Drop an M3 nut into the tensioner's slot. Drill a small M3 hole in the MakerBot side, aligning with the pulley. Insert an M3x? bolt and tighten. Bolt length may vary slightly.
With this file you will be able to print Axis Tensioner - X axis with your 3D printer. Click on the button and save the file on your computer to work, edit or customize your design. You can also find more 3D designs for printers on Axis Tensioner - X axis.