Aztec Relief Planter - Concrete Mold System
thingiverse
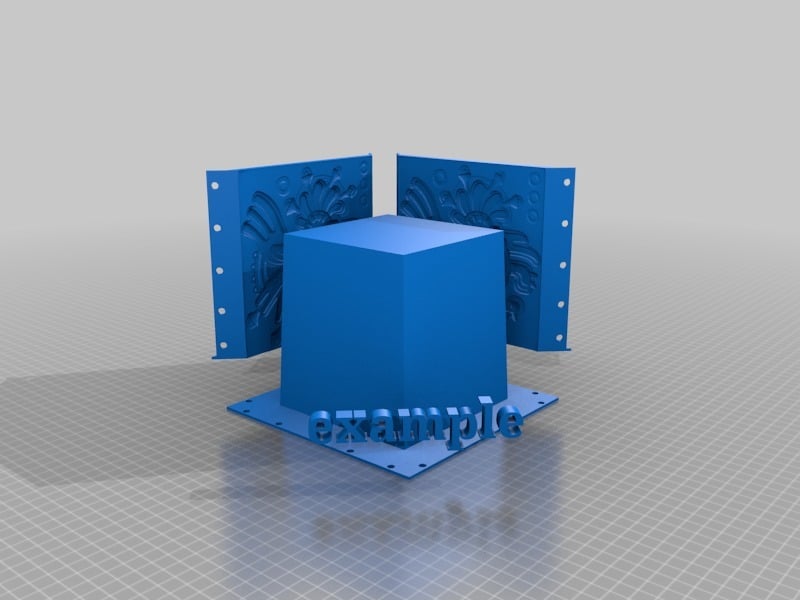
**Update 2019-06-02:** Read the summary on my Make before you start making this. https://www.thingiverse.com/make:664458 ---- I remixed my Aztec Relief Box and make this Concrete Mold System. The final Concrete Planter will be 150x150x130mm and like the linked Aztec Relief Box. The walls will be ~10mm (minimum). Upscaling should be no problem, but downscaling probably is. Scale at your own risk and check the thickness of the walls first (if downscale). There are some thin points in the wall. It is my first Mold System, but I am very satisfied with - so I think it is professional. I hope you will confirm this. (Do you?) It is really easy to print and assemble too. The four walls and the "inlay" can assemble with screws (best choice), printed braces or your own tools. If you are using printed braces print one piece only first and check whether it fit perfect. Otherwise scale it a tiny bit until it does or design your own one. The given brace can simple scale on Z if you need this. Print the walls in the current orientation (no support needed I guess but not sure) or rotate it 90% and print it flat with the pattern upside (than you need support touching build plate). Depends on your needs and the quality. It is necessary to print each wall one time and assemble in the right order. They are labeled N(orth) ,E(ast), S(outh), and W(test). <del>(The letter "S" has the wrong orientation. It was a mistake. Ignore this. Do not mirror the wall! Only the letter is wrong.</del> FIXED. There are two types of "inlays" for the inner hollow space. A less material version (you have to add support) or a "better" version, supportless and with nice handle inside for disassembling but needs more filament. The less material version is available in two versions: * without drainage --> inlay-less-material.stl * with drainage --> inlay-lessmaterial-drainage.stl The "better" version is availabe in three versions: * without drainage --> inlay.stl * with drainage --> inlay-drainage.stl * dual-usage version --> inlay-dual-usage.stl The dual-usage version needs one of the two inlays-for-the-inlay - drainage and no drainage. Print it too and place it in the inlay. Add some thin tape to cover the gaps. So you can switch fast between a version with and without drainage. Print your favorite inlay in the current orientation. If the holes from the inlay does not fit perfect during the assembly try to rotate the inlay by 90, 180 or 270 degrees. Sand the wall pattern too if necessary. For absolute perfect casting maybe add a thin layer of epoxy (or similar) carefully. If you made it, please post it. Published on Thingiverse #3654486. Update 2019-05-27: * I reupload one of the inlays which was broken (inlay-less-material.stl) Update 2019-05-28: * I fixed the wrong letter "S" (wall-south.stl) * I modified the inlays, need a bit less material & print time now (inlay.stl, inlay-drainage.stl) Update 2019-05-29: * I add the "dual usage" inlay (inlay-dual-usage.stl) * better names for all files
With this file you will be able to print Aztec Relief Planter - Concrete Mold System with your 3D printer. Click on the button and save the file on your computer to work, edit or customize your design. You can also find more 3D designs for printers on Aztec Relief Planter - Concrete Mold System.